DUAL MN8010: HiFi System From The Future
Submitted on: 22 Nov 26
Category: HiFi - other
Website Rating:
Author's Description:
Hi-Fi enthusiasts, and particularly those fond of European Hi-Fi, hold the German brand Dual in high regard. I have already written here about some of their cassette decks. Personally, I have always had a soft spot for Dual. It was a down-to-earth company aimed at ordinary consumers, occasionally venturing into more expensive components and, most importantly, generally offering honest products.
Despite the respectable portfolio of equipment they produced, Dual remained best known for its turntables, which ranged from entry-level through mid-range to upper-mid-range models.
Historically, Dual went through several periods of crisis, changes of ownership and transformations: from its acquisition by the French company Thomson, through its sale to Germany’s Schneider, and eventually ownership by the also-German Karstadt. At various points the business was split into several units covering different areas of the audio/video market, and so on. I won’t bore you with all of that.
Here’s an example of how their logo changed over the years:

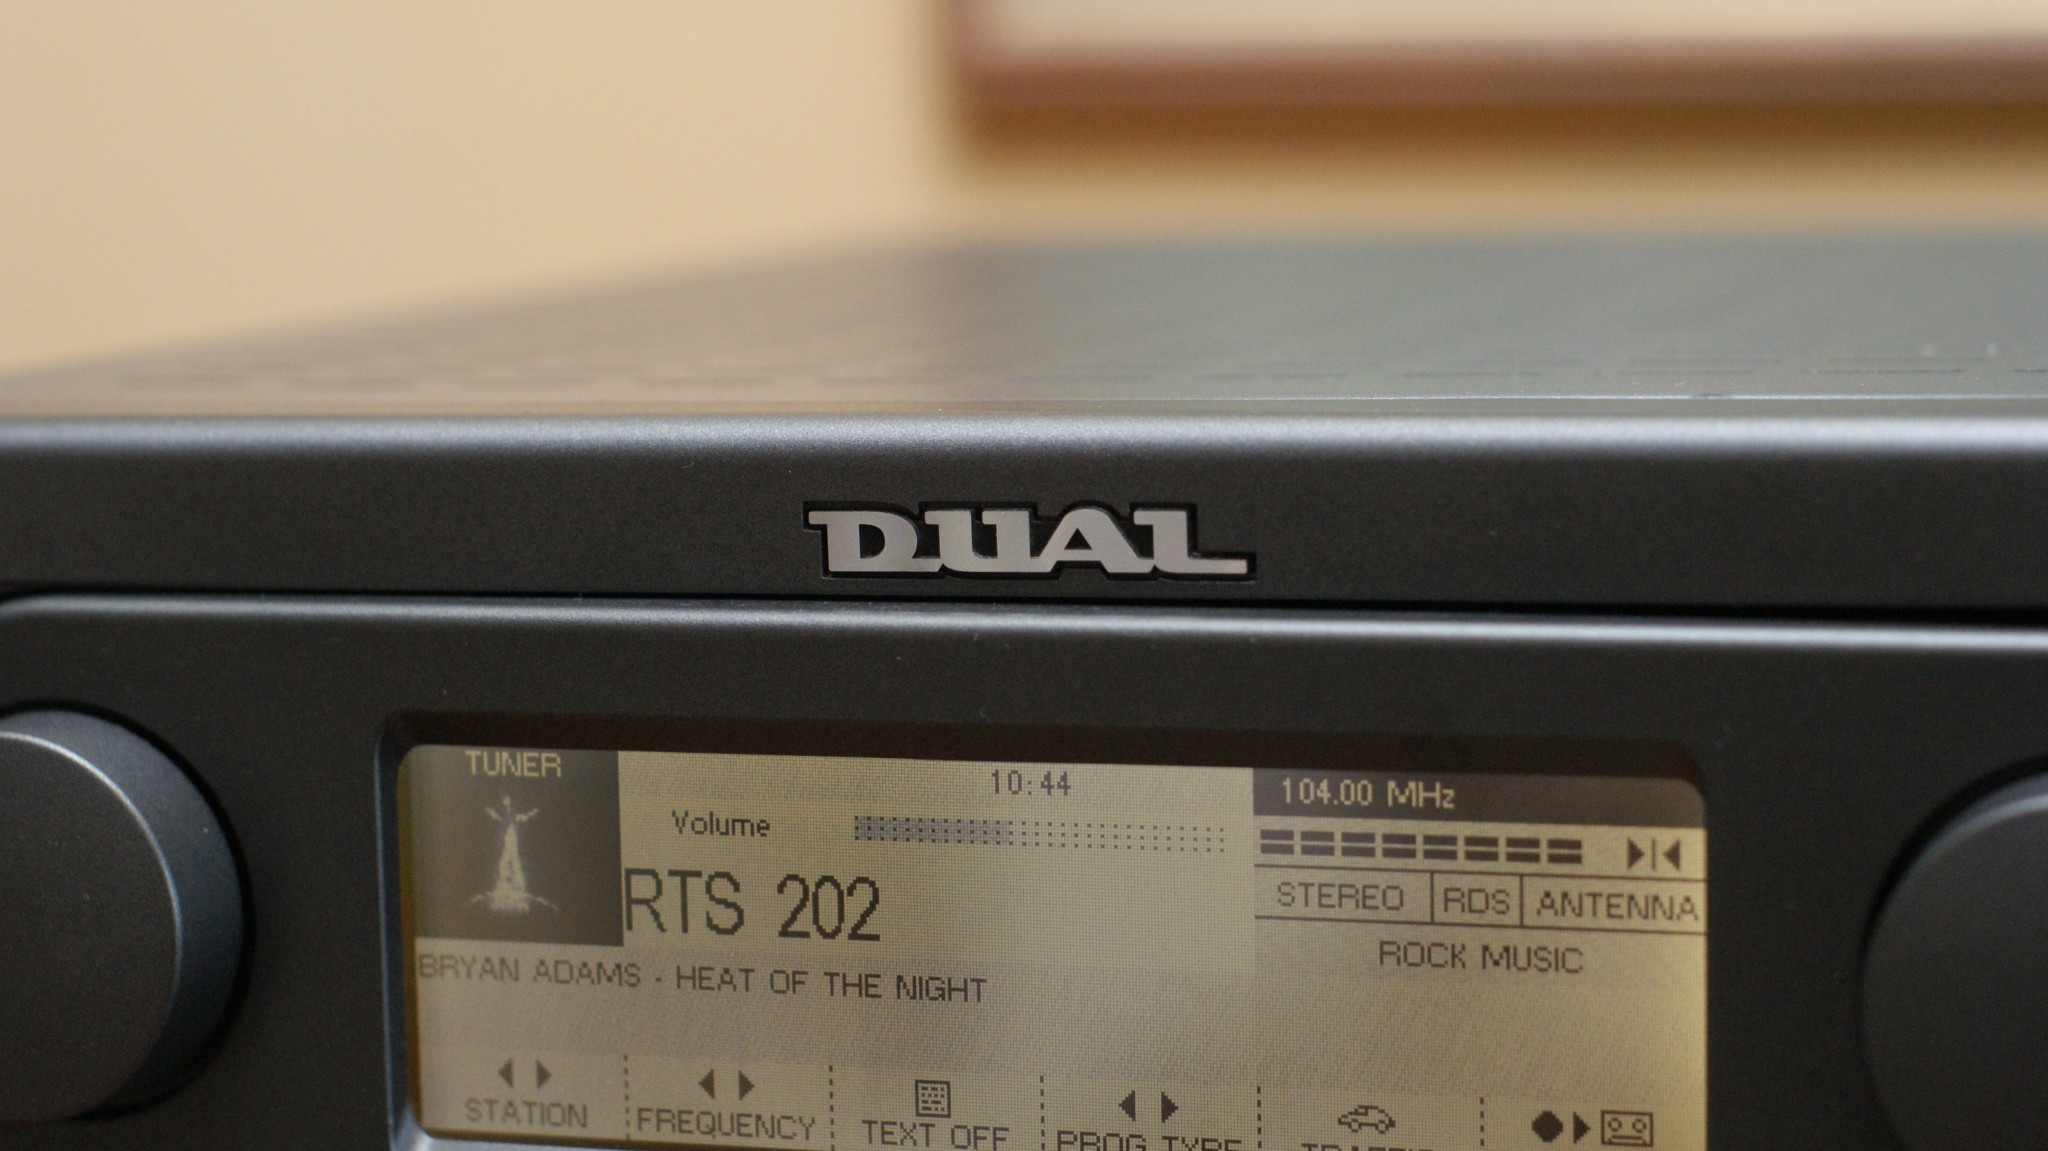
However, the logo used on the MN 8010 mini system is slightly different:

Today we see Dual resurrected in the form of turntables, with some more expensive and some cheaper models which, in my opinion, are overpriced, much like a great many “audiophile” Hi-Fi products employing technologies whose heyday passed long ago.
But let’s get back to our story.
Around 1996, somebody at Dual came up with the idea of creating what I would call a unique mini system, something unlike practically anything else on the market. The result was the futuristic MN 8010, which I would describe, in the fewest possible words, as a genuine glimpse into the future, wrapped in a clear vision and elegance.
It was a bold move. Dual had no real history in this particular market, especially in a product category that generated huge profits for manufacturers and in which virtually all mainstream companies were fighting fiercely for their place in the sun. Throwing down the gauntlet primarily to the Japanese manufacturers could have cost Dual dearly, but management obviously accepted the risk, and I honestly admire them for having the courage to do so.
It is also obvious that Dual either lacked the necessary manufacturing capabilities at the time or that developing everything in-house would have been prohibitively expensive. So, right from the start, they had an existing product in mind that they wanted to modify and improve.
And it was European!
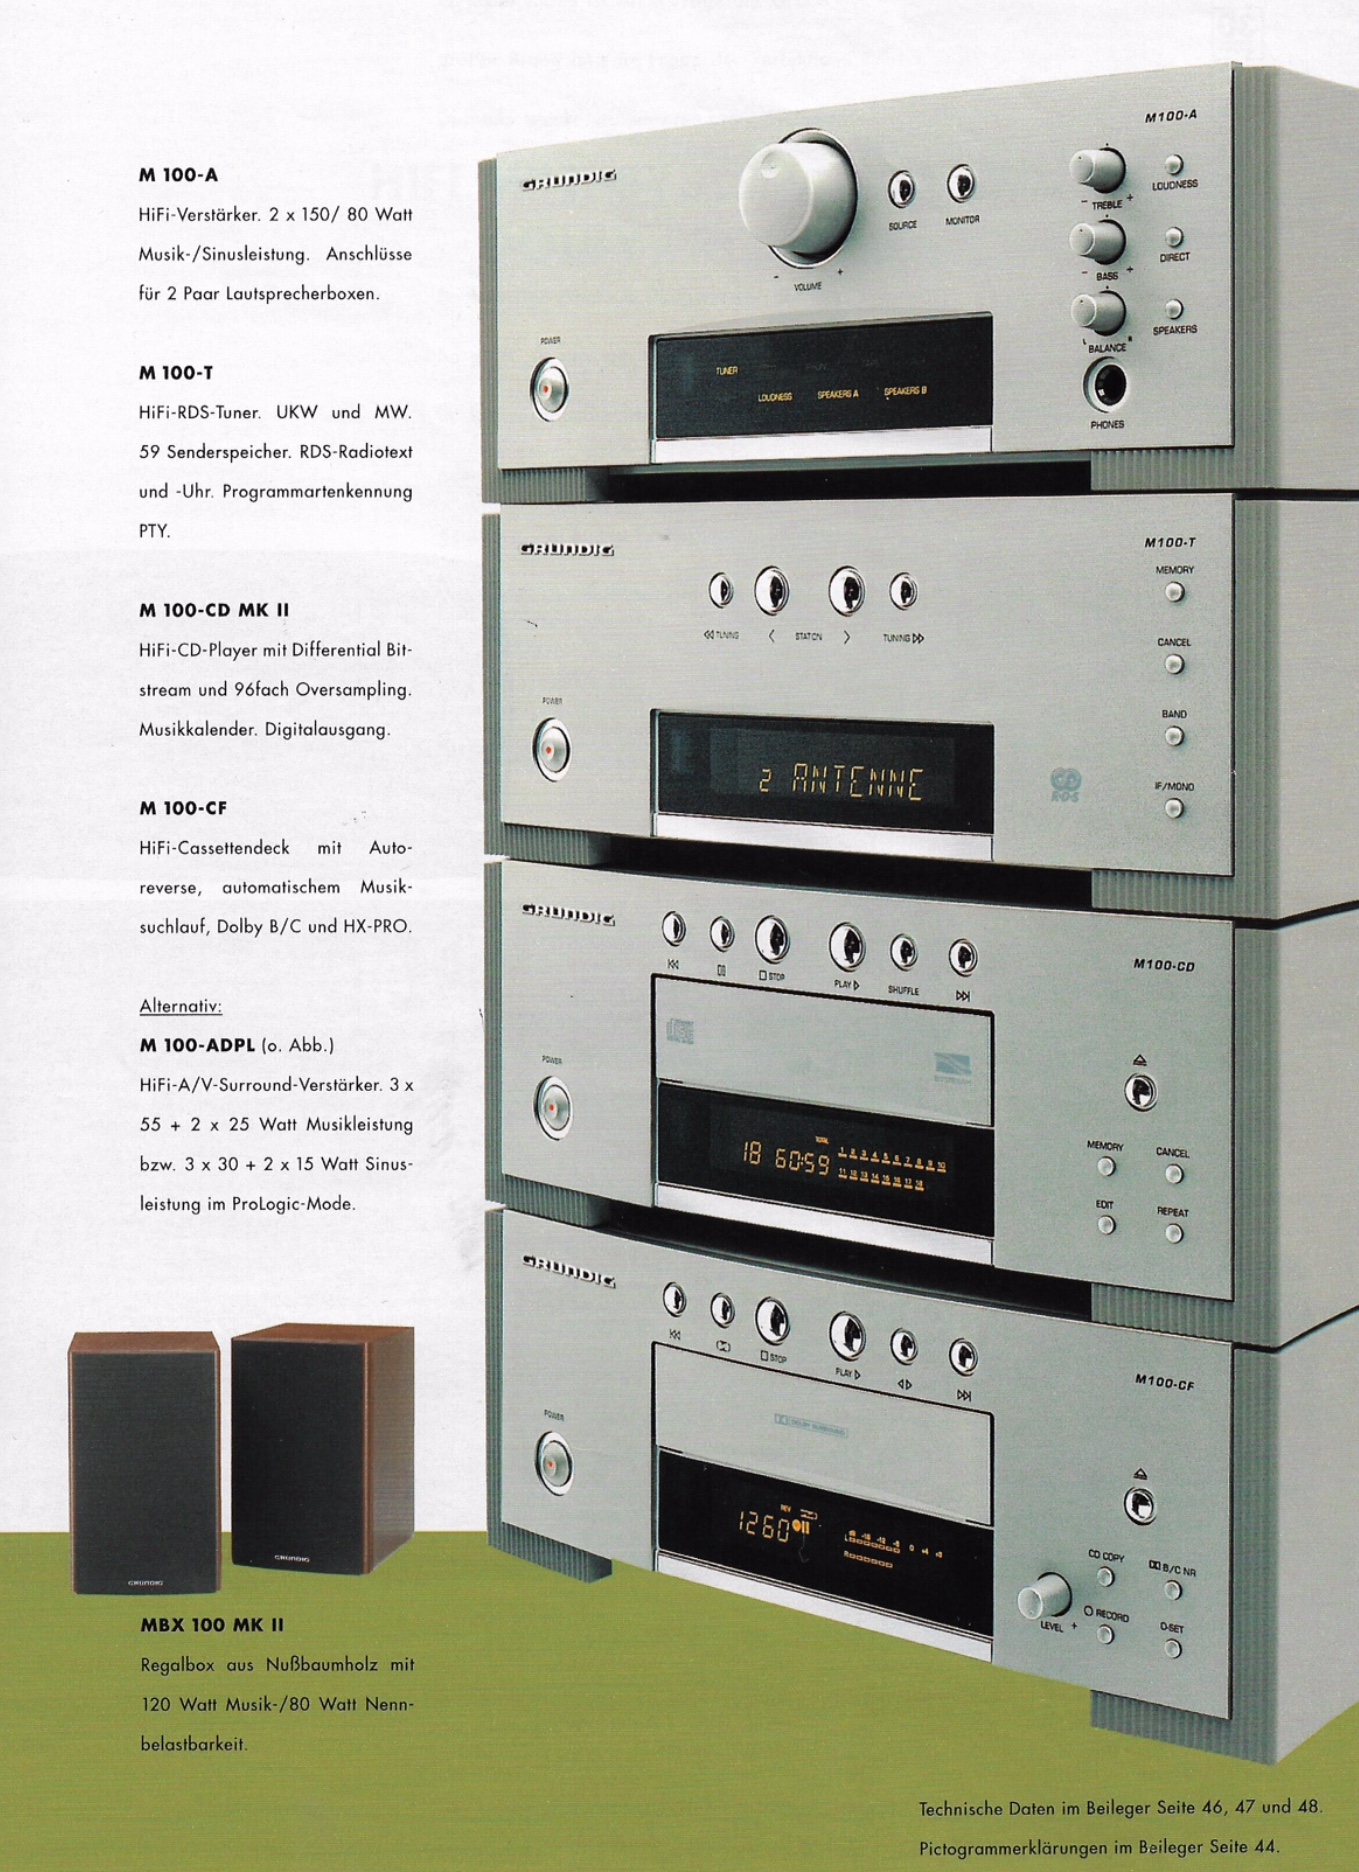
Their fellow German company Grundig made an expensive, high-quality mini system from its Fine Arts range, generically designated M100. It consisted of an amplifier, tuner, CD player and cassette deck, plus a few other possibilities.
As alternatives, you could choose a receiver instead of the separate amplifier and tuner, with exactly the same specifications, as well as a three-disc CD changer using the same transport but a different decoder and DAC from the single-disc player: a TDA1545AT instead of the SAA7350 DAC. There was also a rare optional M100 ADPL compact surround amplifier.
As far as I remember, the Dual MN 8010 was sold exclusively through Karstadt-owned department stores in Germany and the Netherlands. The system cost DEM 2,300, or approximately EUR 1,150, placing it above both the Fine Arts M100, which cost around DEM 2,000 in its four-component amplifier configuration, and the well-known and highly regarded Onkyo Liverpool series. The latter also consisted of four components, a CD player, tuner, three-head cassette deck and integrated amplifier, and cost roughly DEM 2,000.
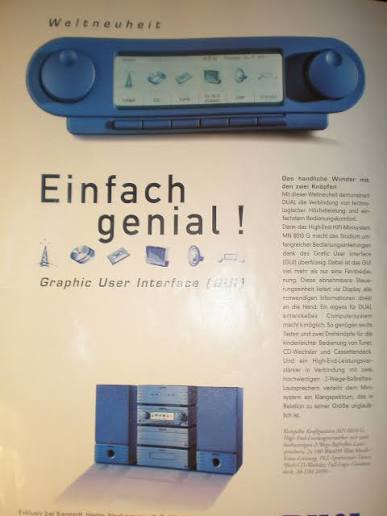
However, for DEM 2,300 Dual gave you five components, albeit in a somewhat different configuration: a three-disc CD changer, cassette deck, preamplifier/tuner, or what I shall call a pre-receiver, a power amplifier and, finally, a pair of two-way loudspeakers.
The complete designation of the system was MN 8010 G.
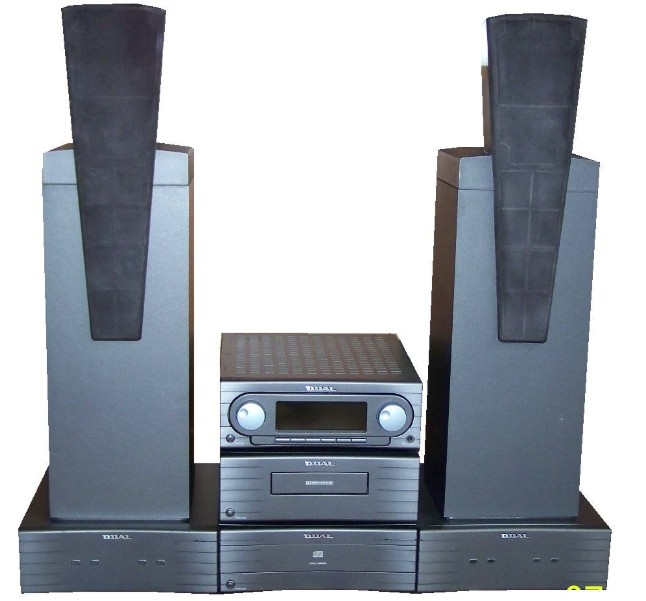
There was also a rare MN 8010 GA version with active loudspeakers and only three components.
In this version the power amplifiers, two monoblocs, were built into the bases of the loudspeakers, effectively doubling as their stands. Personally, judging from photographs, I find the result rather ugly.
What matters, however, is that Dual did not simply decide to plonk a passive loudspeaker on top of a power amplifier with one channel ripped out. Quite the opposite. The loudspeakers, designated AS160, used three drivers instead of two, adding a dedicated midrange driver, while each monoblock contained separate amplification for the woofer, midrange and tweeter.
In other words, they did it properly.
I still think the speakers are ugly, though. But I would very much like to hear them.
All of this was actually manufactured for Dual by Grundig, mainly at its factory in Portugal, with some parts made in Germany, the active speakers for example. I don’t know exactly how much Grundig’s engineers contributed to the overall project, but I’m quite certain their involvement was far from negligible.
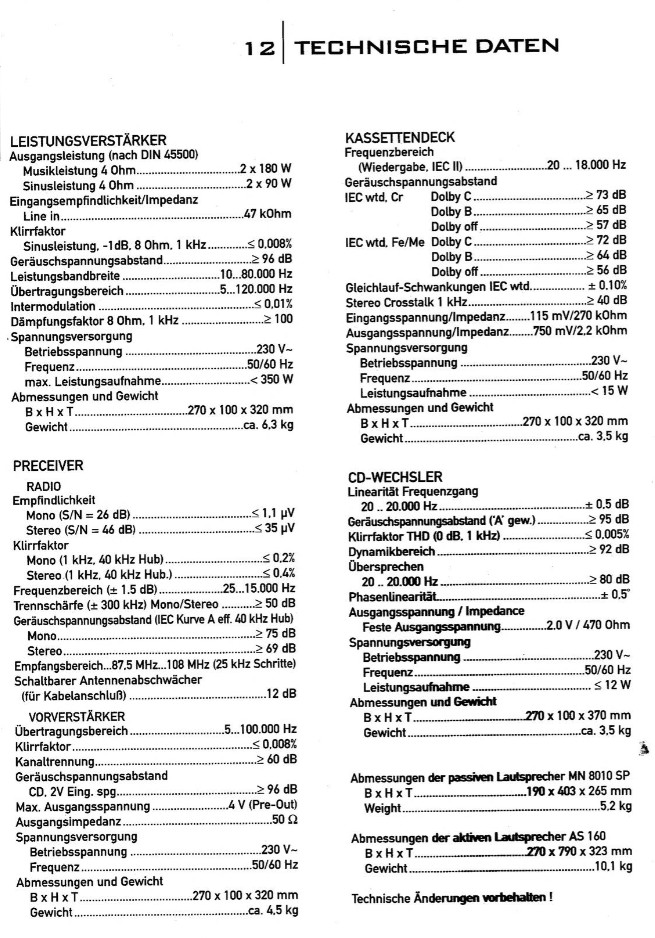
Comparing the specifications of the Dual and Grundig systems shows that their CD players are essentially identical, while the Dual cassette deck has a slightly better frequency response. The amplifiers are also marginally better, at least on paper, delivering 90 rather than 80 watts into 4 ohms. This suggests that the Dual can probably deliver around 65 watts into 8 ohms, compared with 60 watts for the Grundig.
The stated frequency response and signal-to-noise ratio are again slightly better on the Dual, while the damping factor is identical.
All in all, either these differences fall within measurement tolerances and most specifications are effectively the same, or the Dual is a mildly improved version of Grundig’s M100 system.
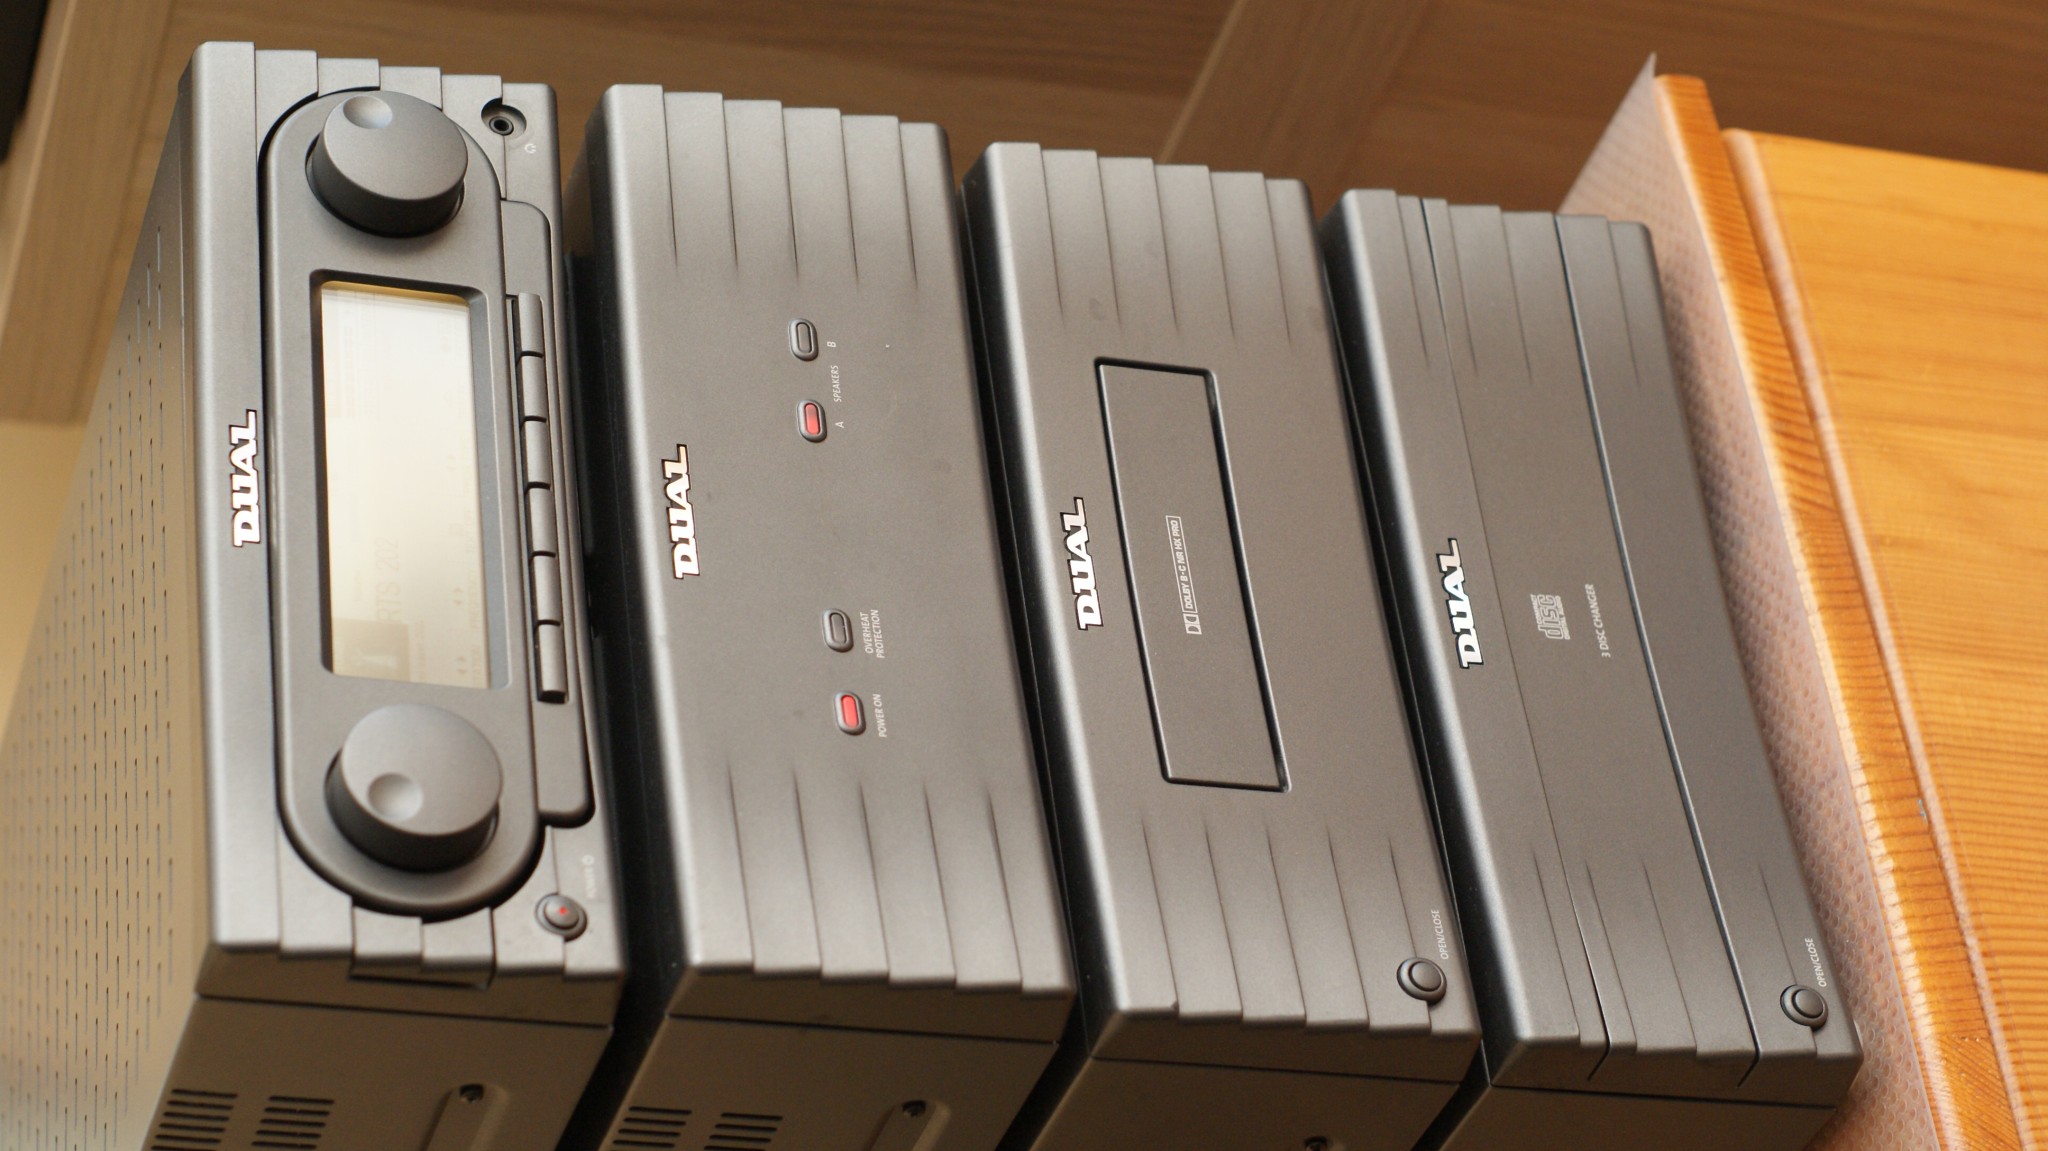
But this story isn’t about splitting hairs over specifications. It’s about sound, build quality and, in particular, the extraordinary control system that Dual decided to incorporate into the MN 8010, something virtually unimaginable at the time, especially in a mini system.
There was a remote control with a rechargeable battery, something others such as AVI and Quad had also done. There was two-way communication, meaning that the remote both transmitted and received data, as Bang & Olufsen and Quad had done, among others. But nobody was doing this with mini systems because it was simply too expensive.
And then there was a genuine dot-matrix LCD with a complete graphical user interface, or GUI. That was something nobody else had on a remote control. Today, with OLED displays everywhere we look, it appears antiquated and rather humble. But at the time, and even ten years later, this was nothing short of a marvel of audio engineering, and indeed of consumer electronics in general.
Even by 2010 and for several years afterwards, many well-known manufacturers still hadn’t developed graphical interfaces as sophisticated as the one Dual had offered back in 1997. On a mini system!
Instead, their interfaces often looked like something created by an IT guy who makes something hideous, you complain about it, and he replies:
“But it works, doesn’t it? What more do you want?”
The sad truth is that many audiophiles actually get excited by products designed this way, following the logic that:
“If it’s simple, it must sound good. They must have spent all the money on sound quality.”
Very often, that is far from the truth.
The real truth is that manufacturers frequently fleece audiophiles while simultaneously looking for every possible opportunity to cut costs. Just look at the interfaces on Naim’s first-generation streamers or the Cambridge Audio Stream Magic 6, to name only a couple of examples. They’re miserable. Most others weren’t any better before 2010, with only a handful of exceptions.
To be honest, I don’t know who helped Dual and Grundig design and manufacture this two-way control system.
Initially, I suspected Ruwido, the Austrian manufacturer perhaps not particularly familiar to Hi-Fi enthusiasts, but known for making exceptionally high-quality remote controls. They manufacture them for the aforementioned Naim, among many others. But that turned out not to be the case.
The circuit boards in this system carry the name Fusion Design. If that’s the name of a company, I couldn’t find any information about it whatsoever. Perhaps the marking refers to Autodesk Fusion software for PCB design, although I doubt it.
You’ll soon see why.
The remote uses rechargeable batteries which are automatically charged by the base station. There is no reliable information about how long it can operate away from the base, while a completely depleted battery reportedly requires around eight hours to recharge fully.
Just imagine the amount of effort, work, energy, hardware engineering, user-interface development and software writing and testing required to create something like this from scratch, because nothing comparable existed. Development must have been extremely expensive and required a huge amount of enthusiasm.
I stress this because what Dual delivered was a complete, coherent product. It wasn’t flawless, but it was unique, elaborate and excellent.
Seen from that perspective, the very high DEM 2,300 asking price of the MN 8010 could actually be regarded as below market value. After all, Dual didn’t take some miserable, bargain-basement components and bolt a science-fiction remote onto them. They took what was already a genuinely high-quality mini system and moved it into a category of its own.
Bravo!
For that alone, the MN 8010 deserves not to be forgotten, either in the history of Hi-Fi or on my pages.
So, let’s take a closer look at the system itself without, dear readers, boring you completely to death.
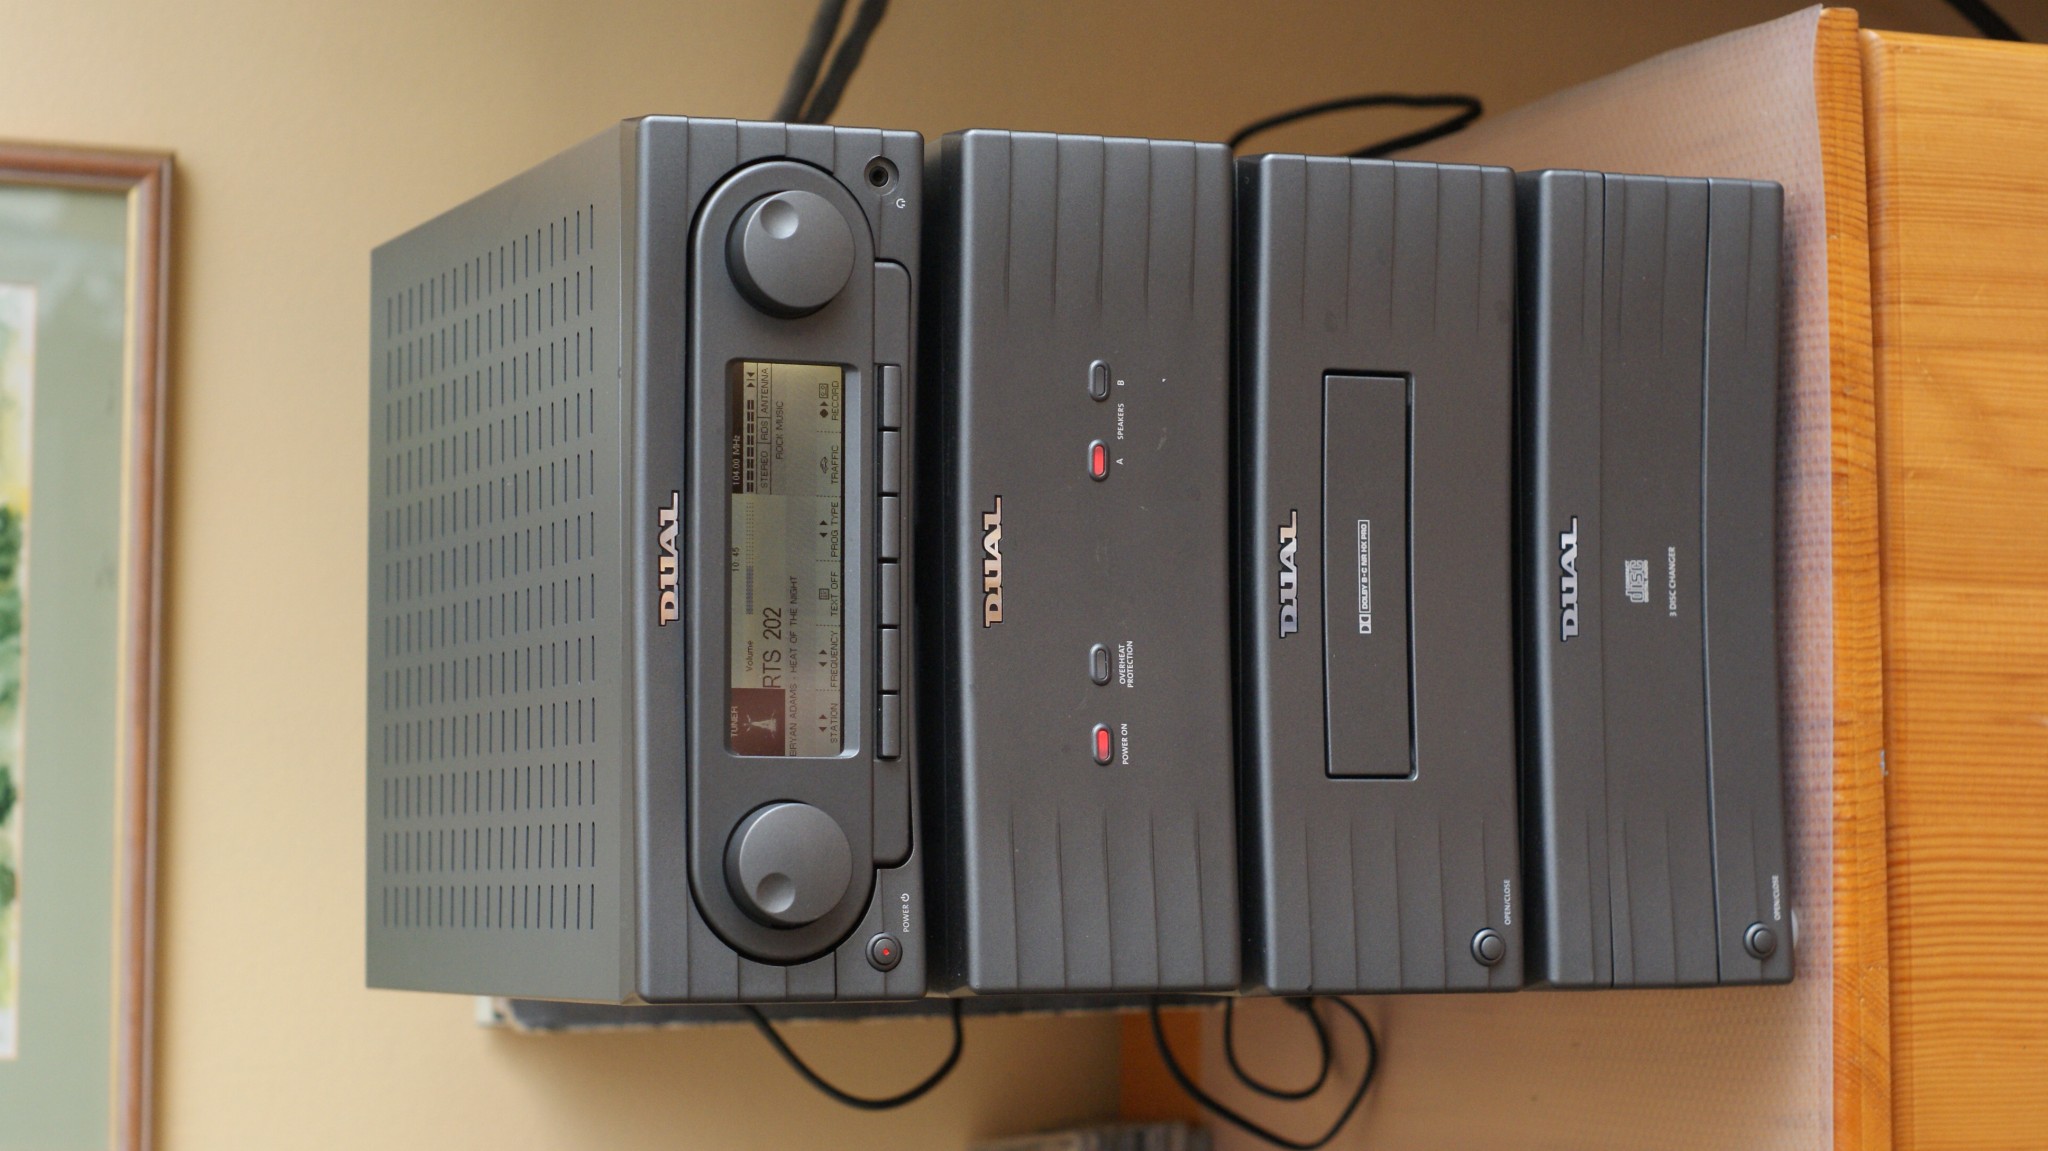
Dual MN 8010 – Description
Straight away, I should say there isn’t actually much to describe from the outside. Of the four electronic components, three have a grand total of two buttons and four LEDs between them.
And that’s it.
Interestingly, each component carries a Dual logo made of actual metal, not cheap plastic pretending to be metal.
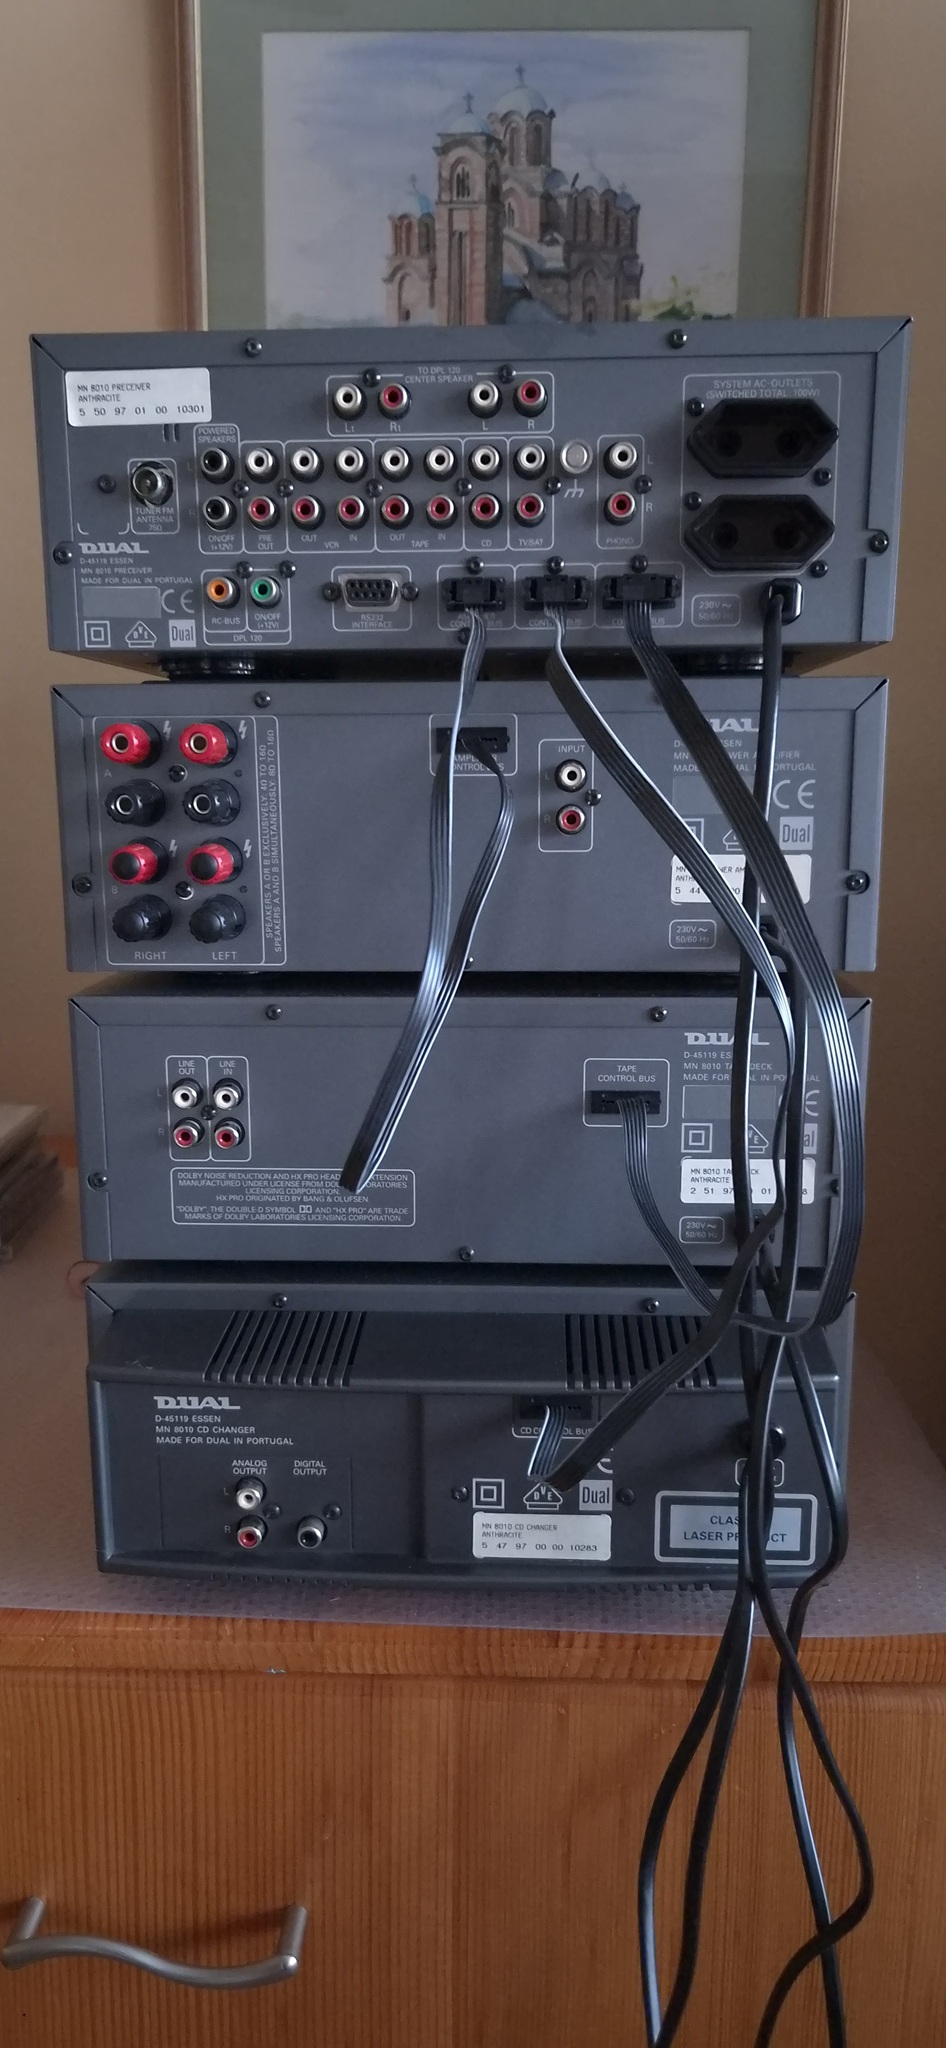
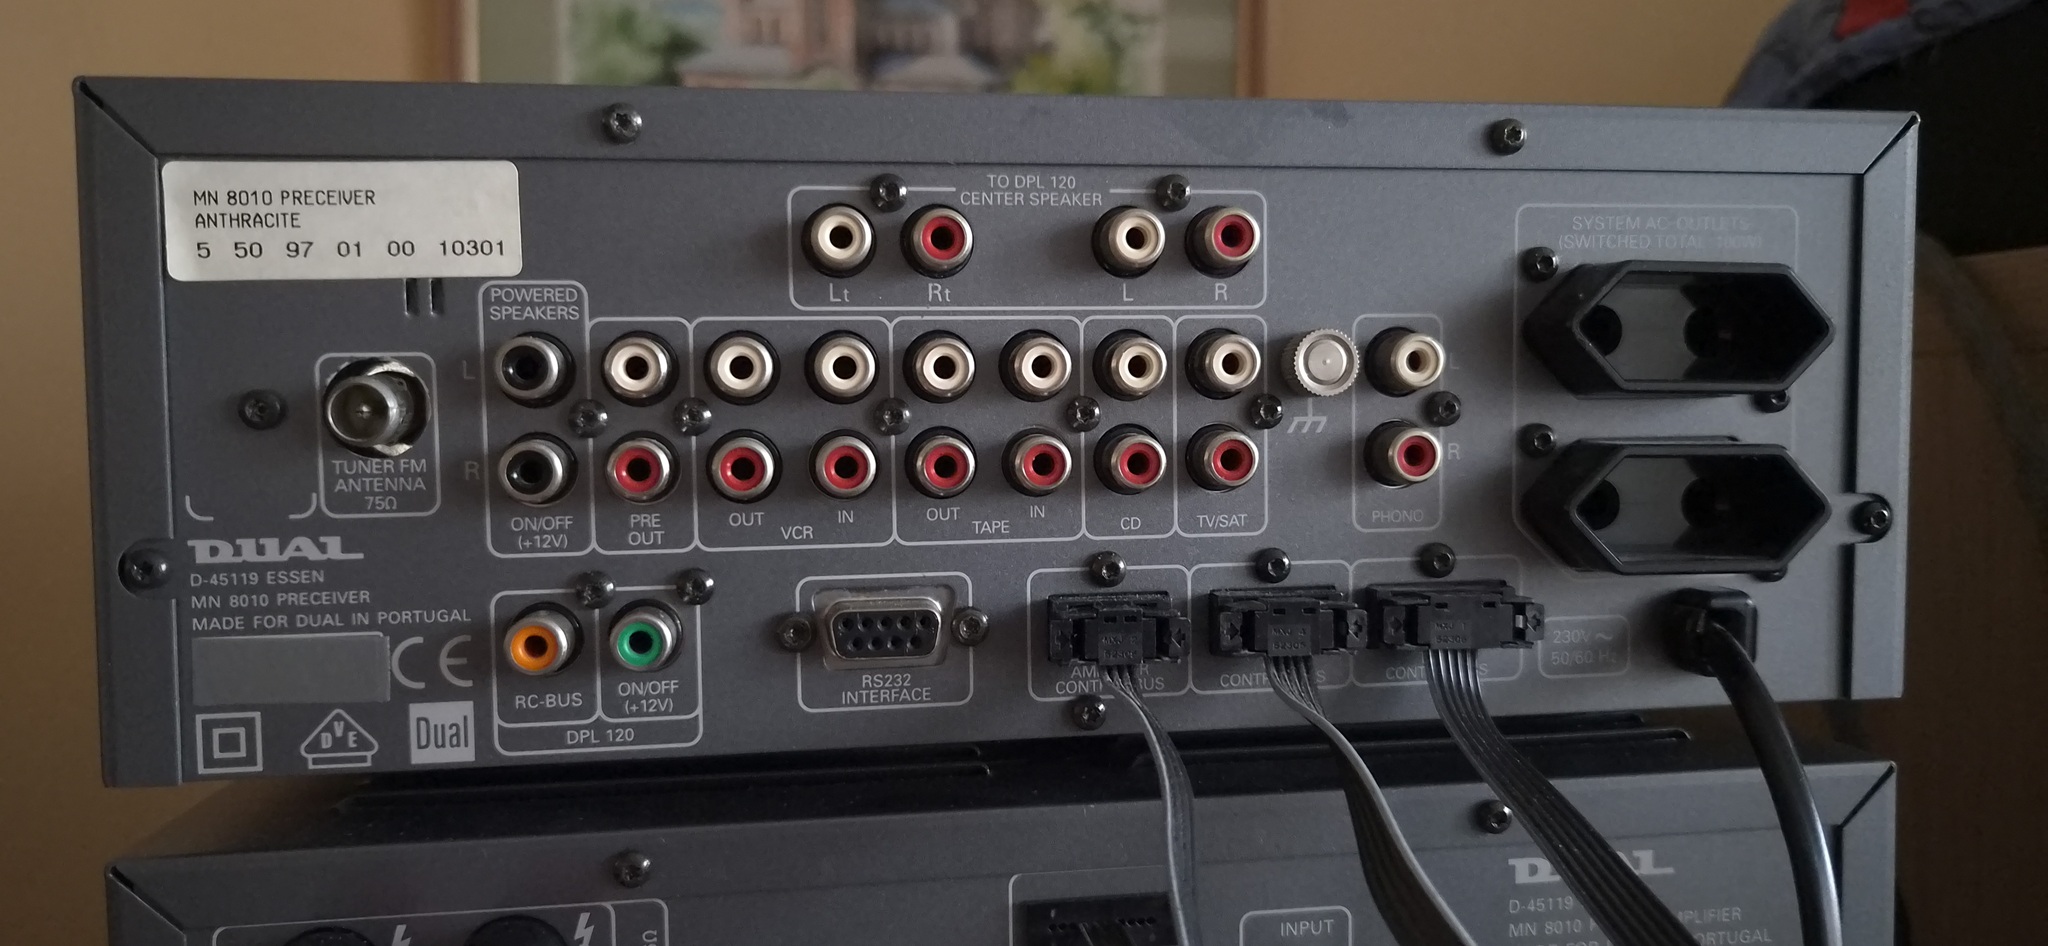
Control signals are carried via multipin connectors, which transmit commands and status information but not audio. Audio signals travel through conventional RCA connectors.
The power supplies for the individual components are completely separate. The pre-receiver also provides two switched mains outlets, intended for the CD player and cassette deck. The power amplifier, however, isn’t supposed to be connected to these outlets and plugs directly into the mains because of its higher power consumption.
The pre-receiver contains the detachable remote control, which looks rather like a large, old-fashioned handheld games console but feels surprisingly good in the hands. The interface is based around two rotary controls, or encoders, which can also be pressed, together with several buttons below the screen whose functions change depending on context and are displayed directly on the screen.
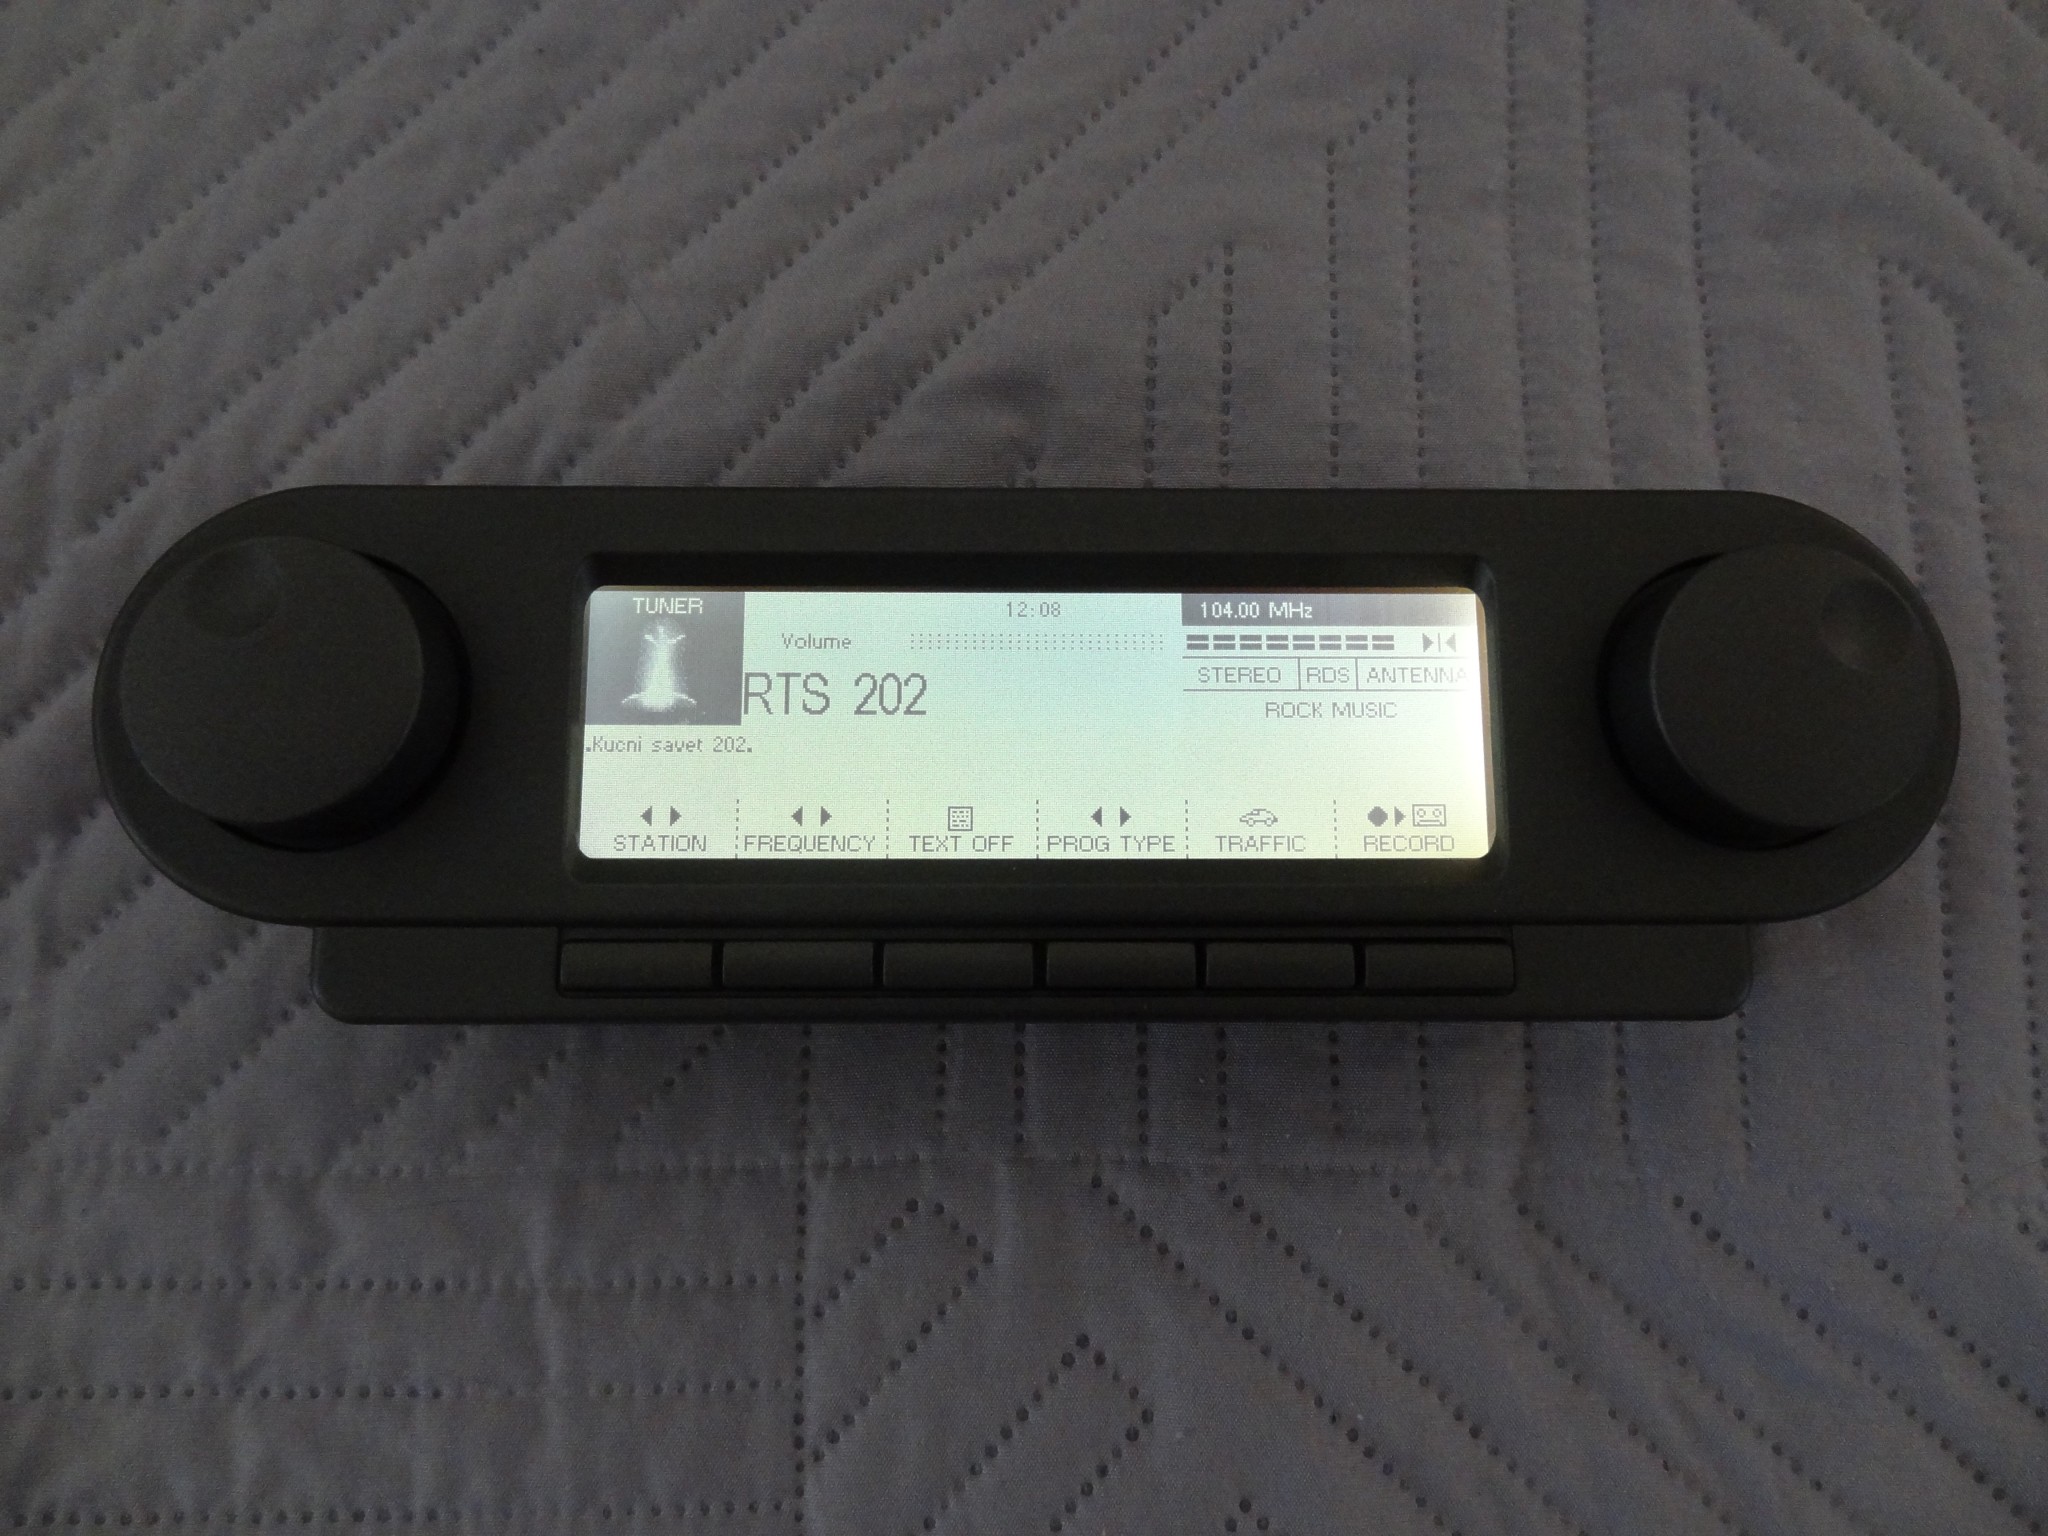
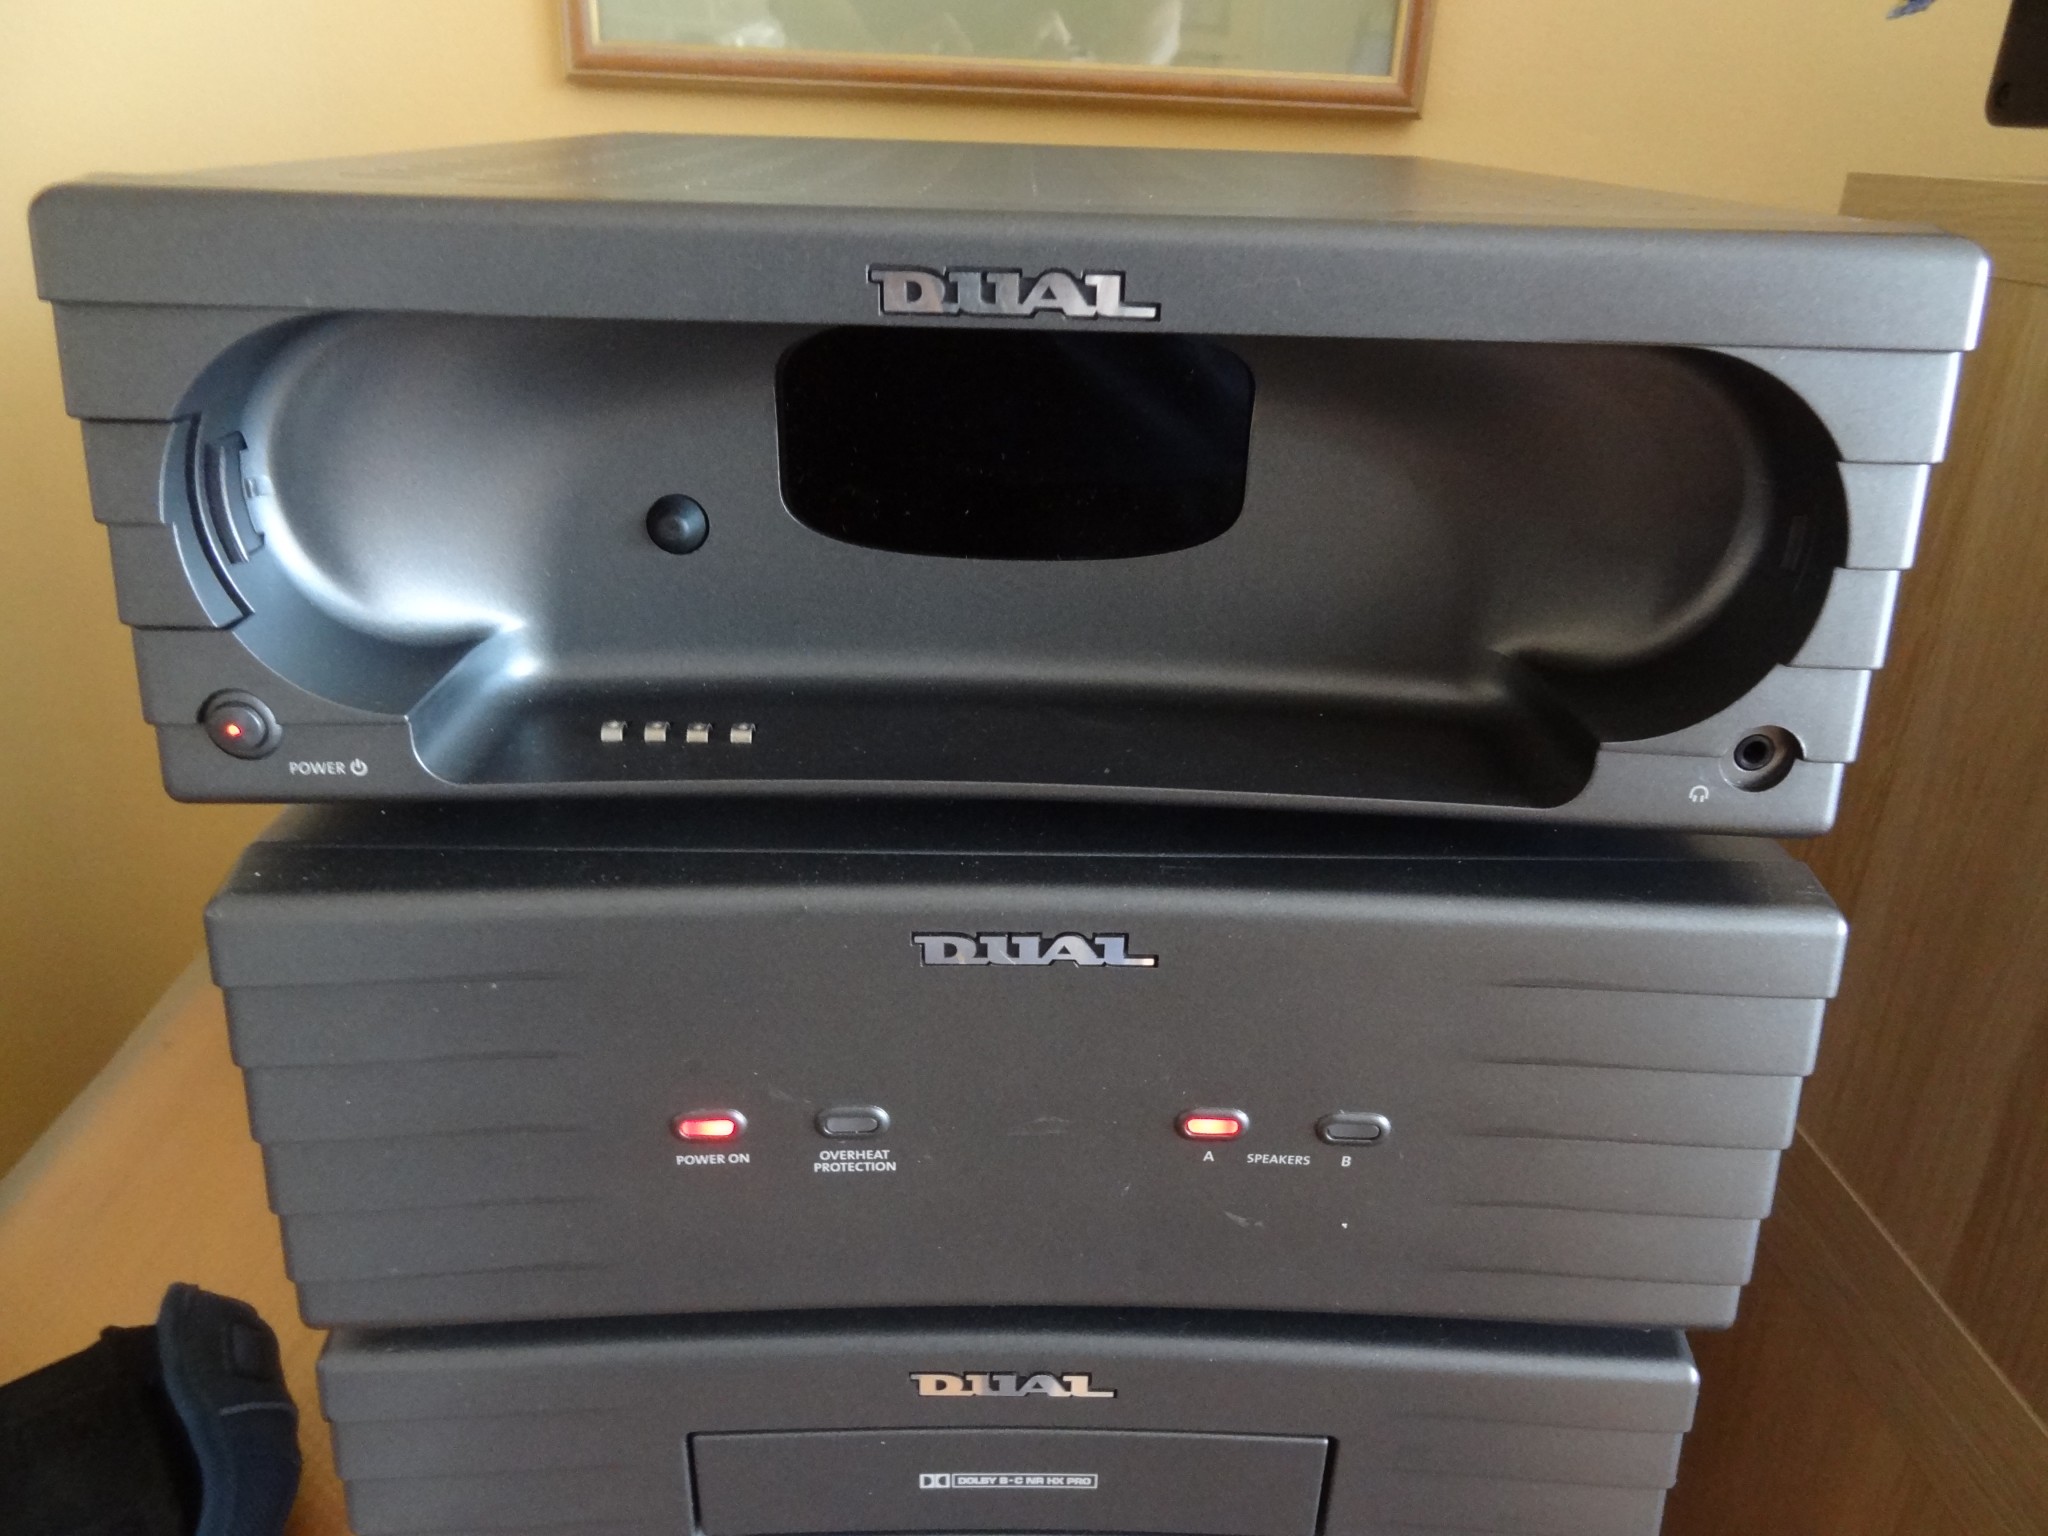
The design is attractive. Once you become accustomed to it, it actually looks better in person than in most photographs, where it somehow appears rather dull. Remove the remote, however, and you’re left with a great gaping hole in the pre-receiver, making the whole thing look rather grotesque.
The rear panel is tidy and sensibly laid out, and I have no particular complaints. The loudspeaker terminals are of decent quality for the period and accept bare wire, spade connectors and banana plugs.
Dual MN8010 – In use
Whether you like the futuristic styling is very much a matter of personal taste among lovers of good sound.
The same goes for the ergonomics of the MN 8010 and my impressions of using it.
Remember, this is a product from 1997, and what fascinates me is just how far ahead of its time it was.
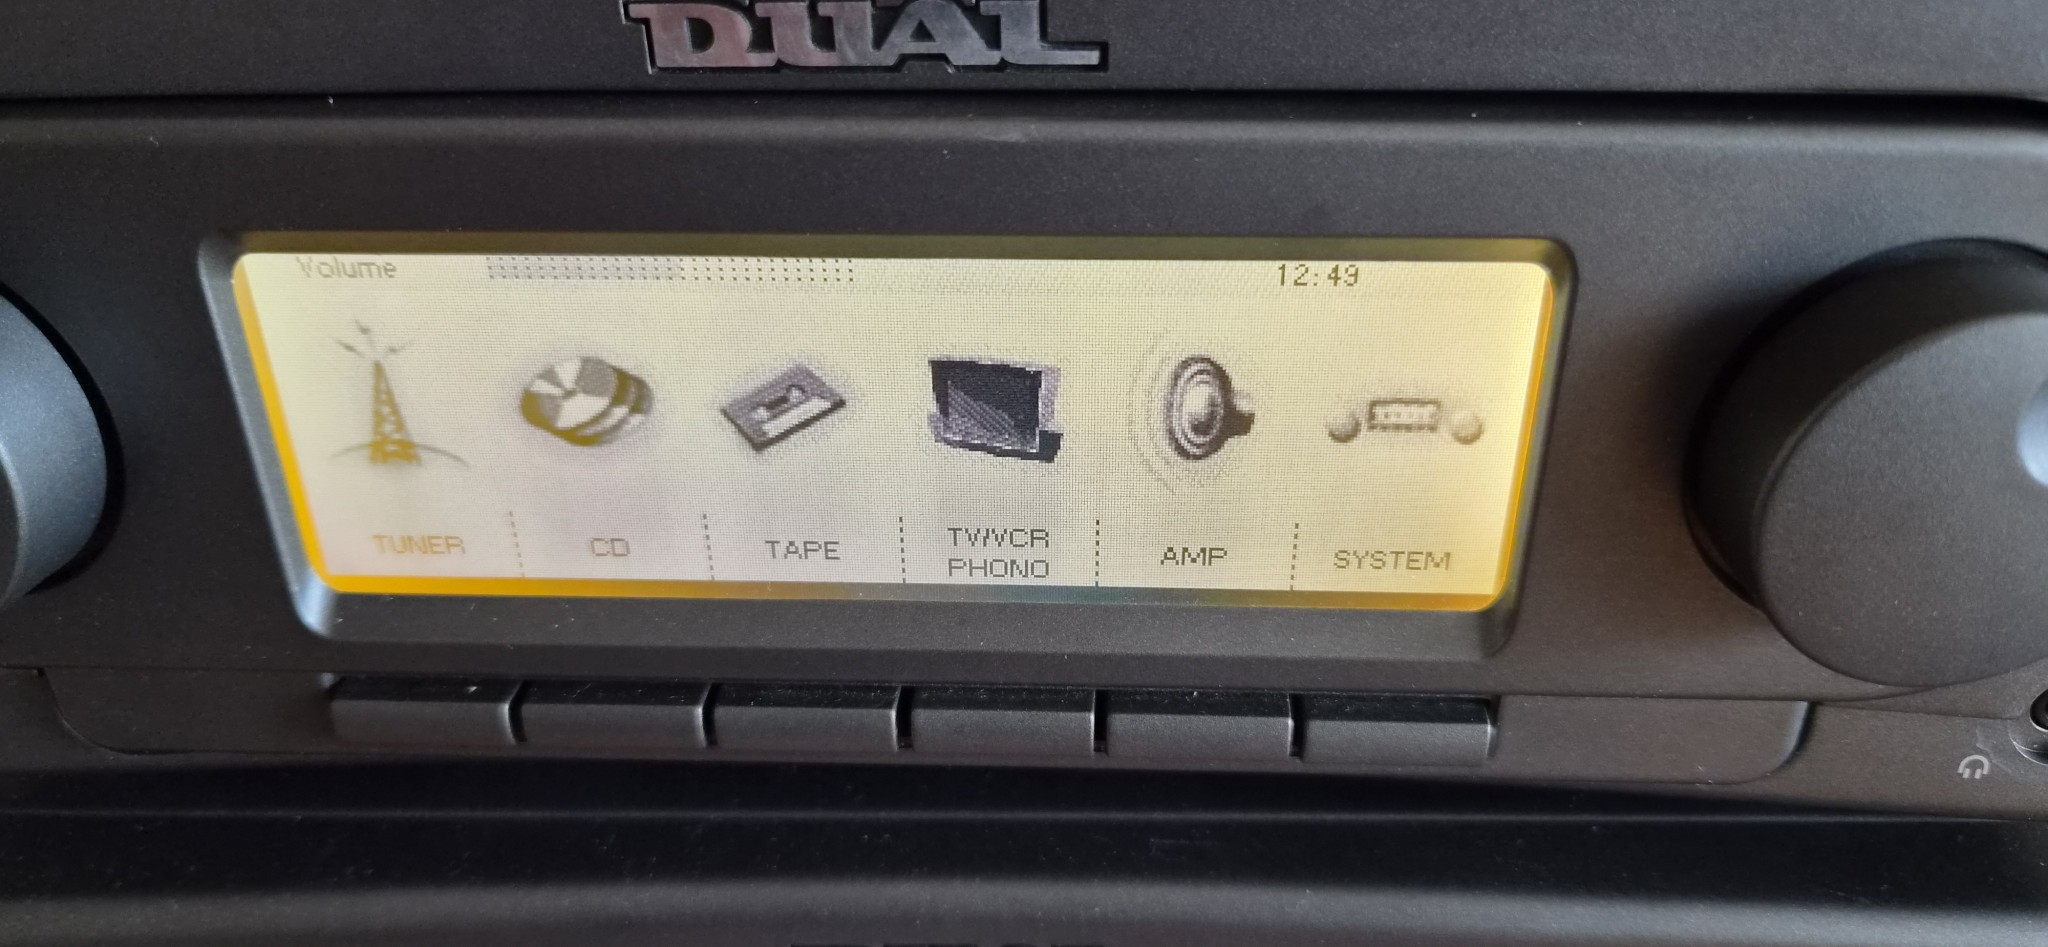
The control software is remarkably sophisticated. Here are just a few examples.
Tuner:
There are several display modes, both with and without RDS. RDS information isn’t limited to the station name; it can also show a scrolling text line, most commonly describing the track currently being played.
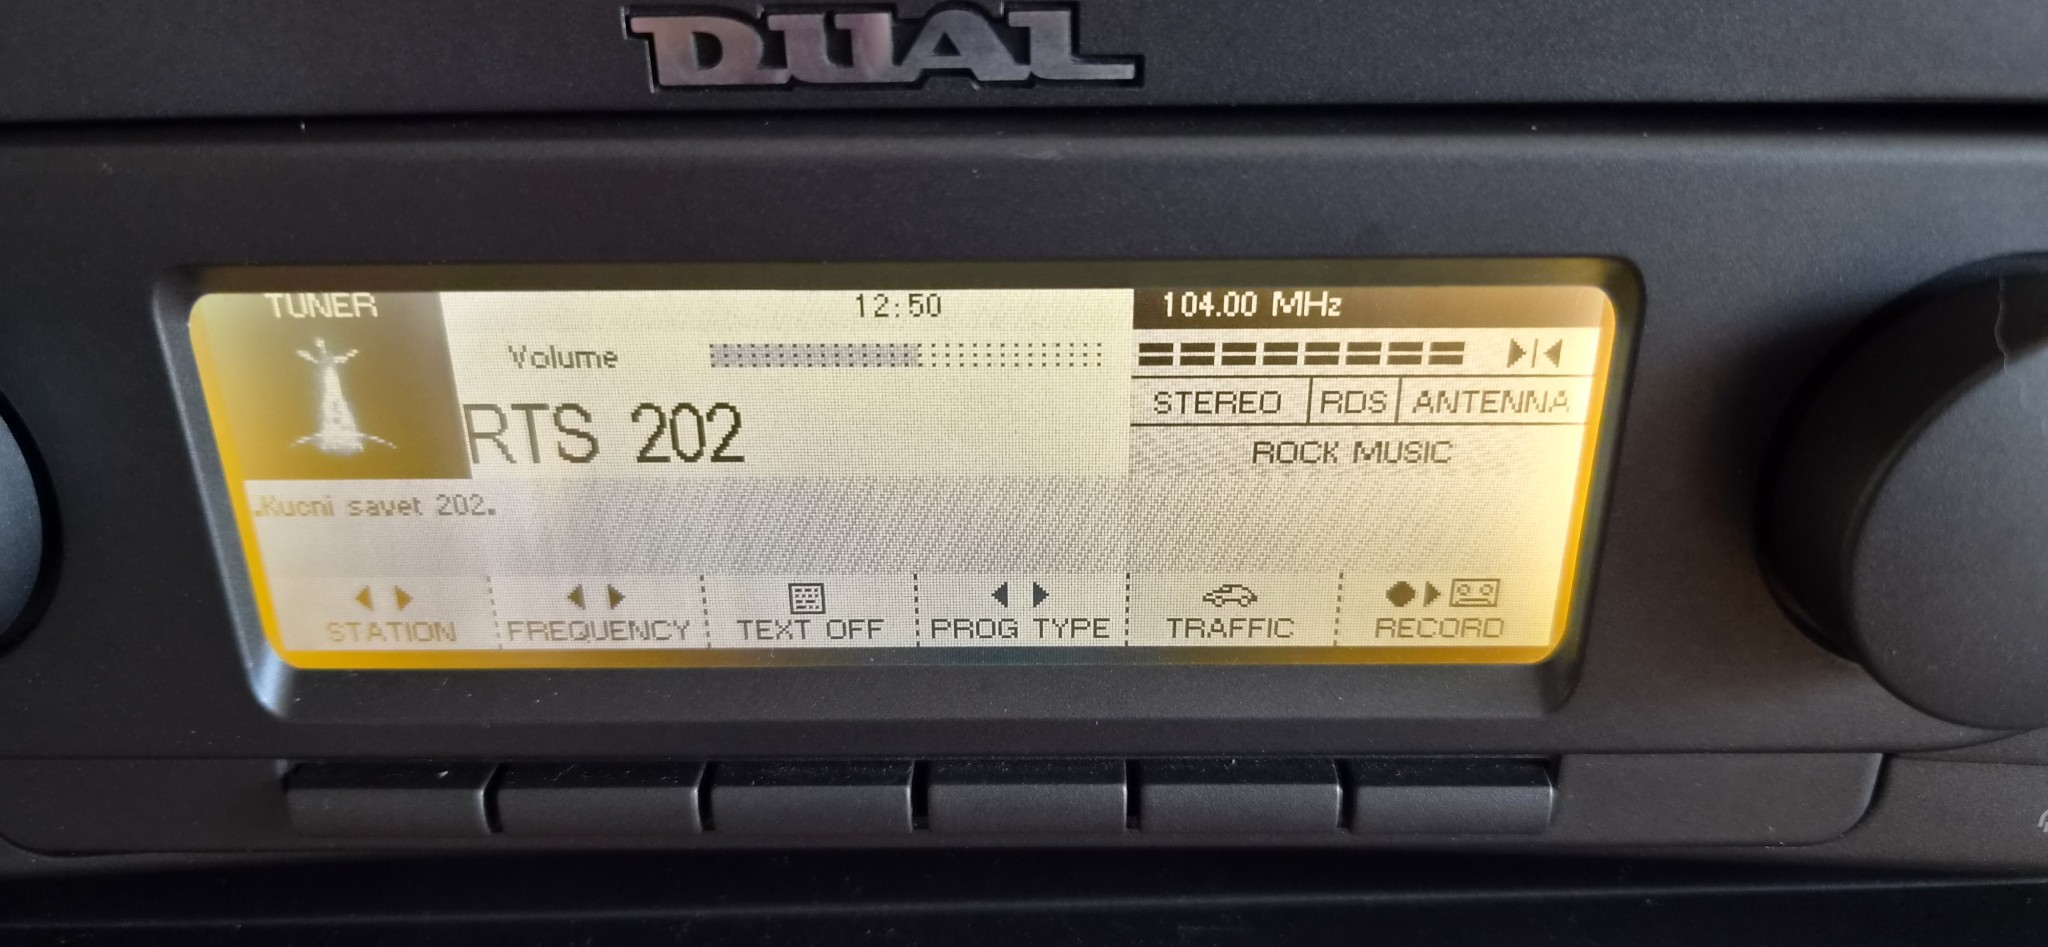
The tuner can be displayed either as a station list or as a scale faithfully imitating the tuning scales of old radio receivers, complete with frequency markings and the names of memorized stations. Stored stations can be deleted and renamed.
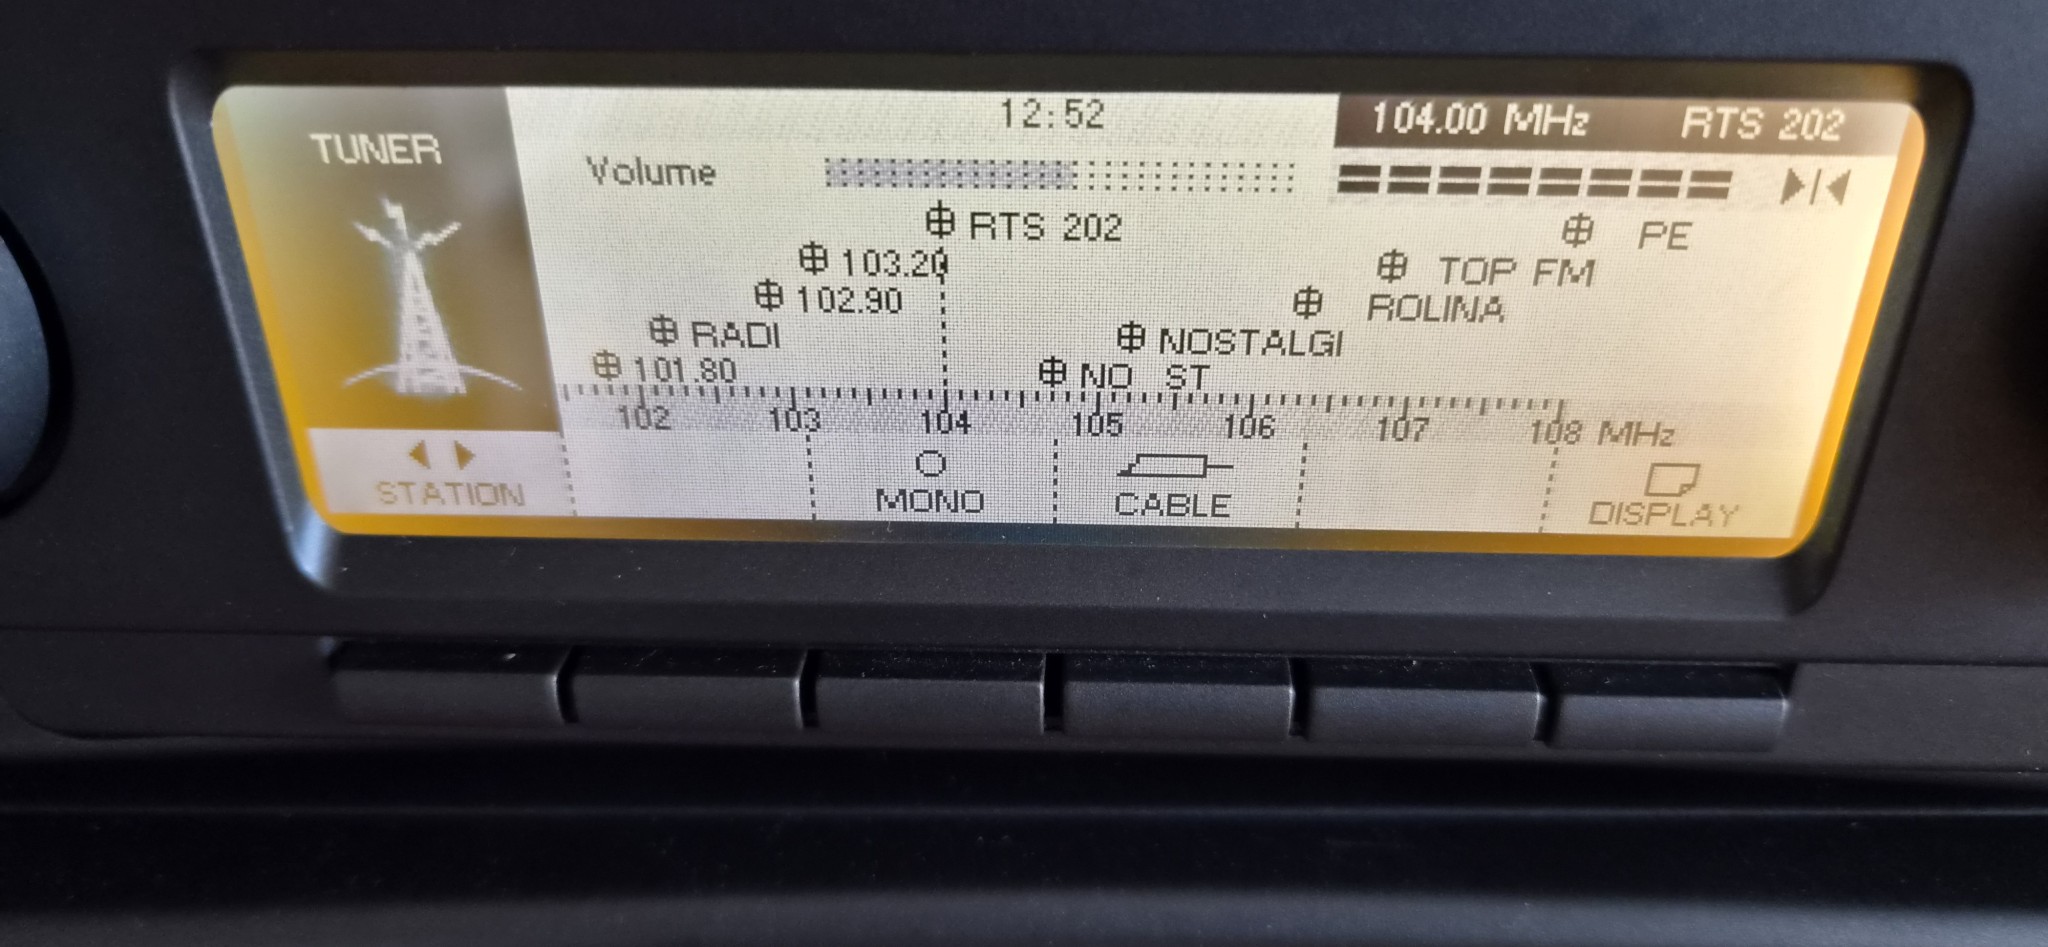
The antenna input can also be configured for either a conventional aerial or cable radio.
Amplifier
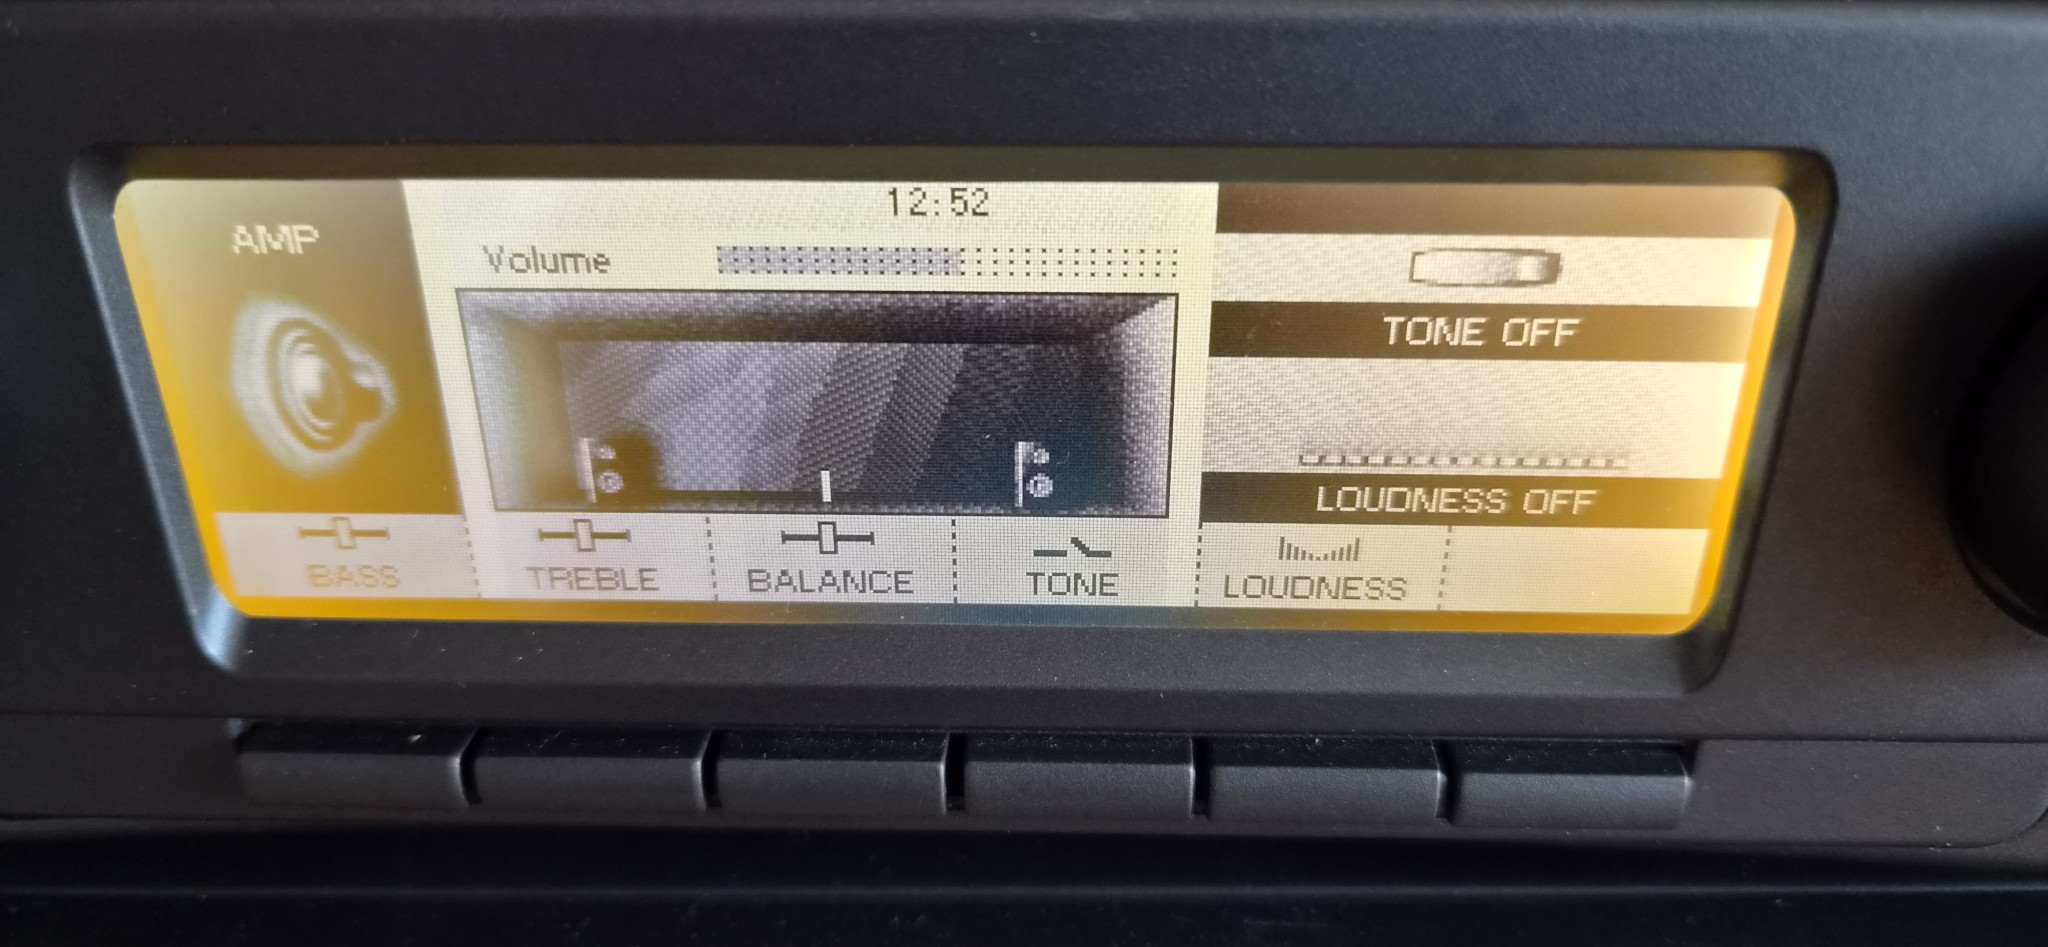
It provides tone controls and loudness compensation, all represented graphically on the display. The tone controls are illustrated with a graphic of a two-way loudspeaker in which the woofer and/or tweeter is visually emphasised depending on the adjustment.
Cassette deck
The display provides peak-level meters as well as a real-time tape counter calculated from the rotational speed of the supply and take-up reels. It therefore shows the actual position from the beginning of the cassette.
This is comparatively rare on cassette decks.
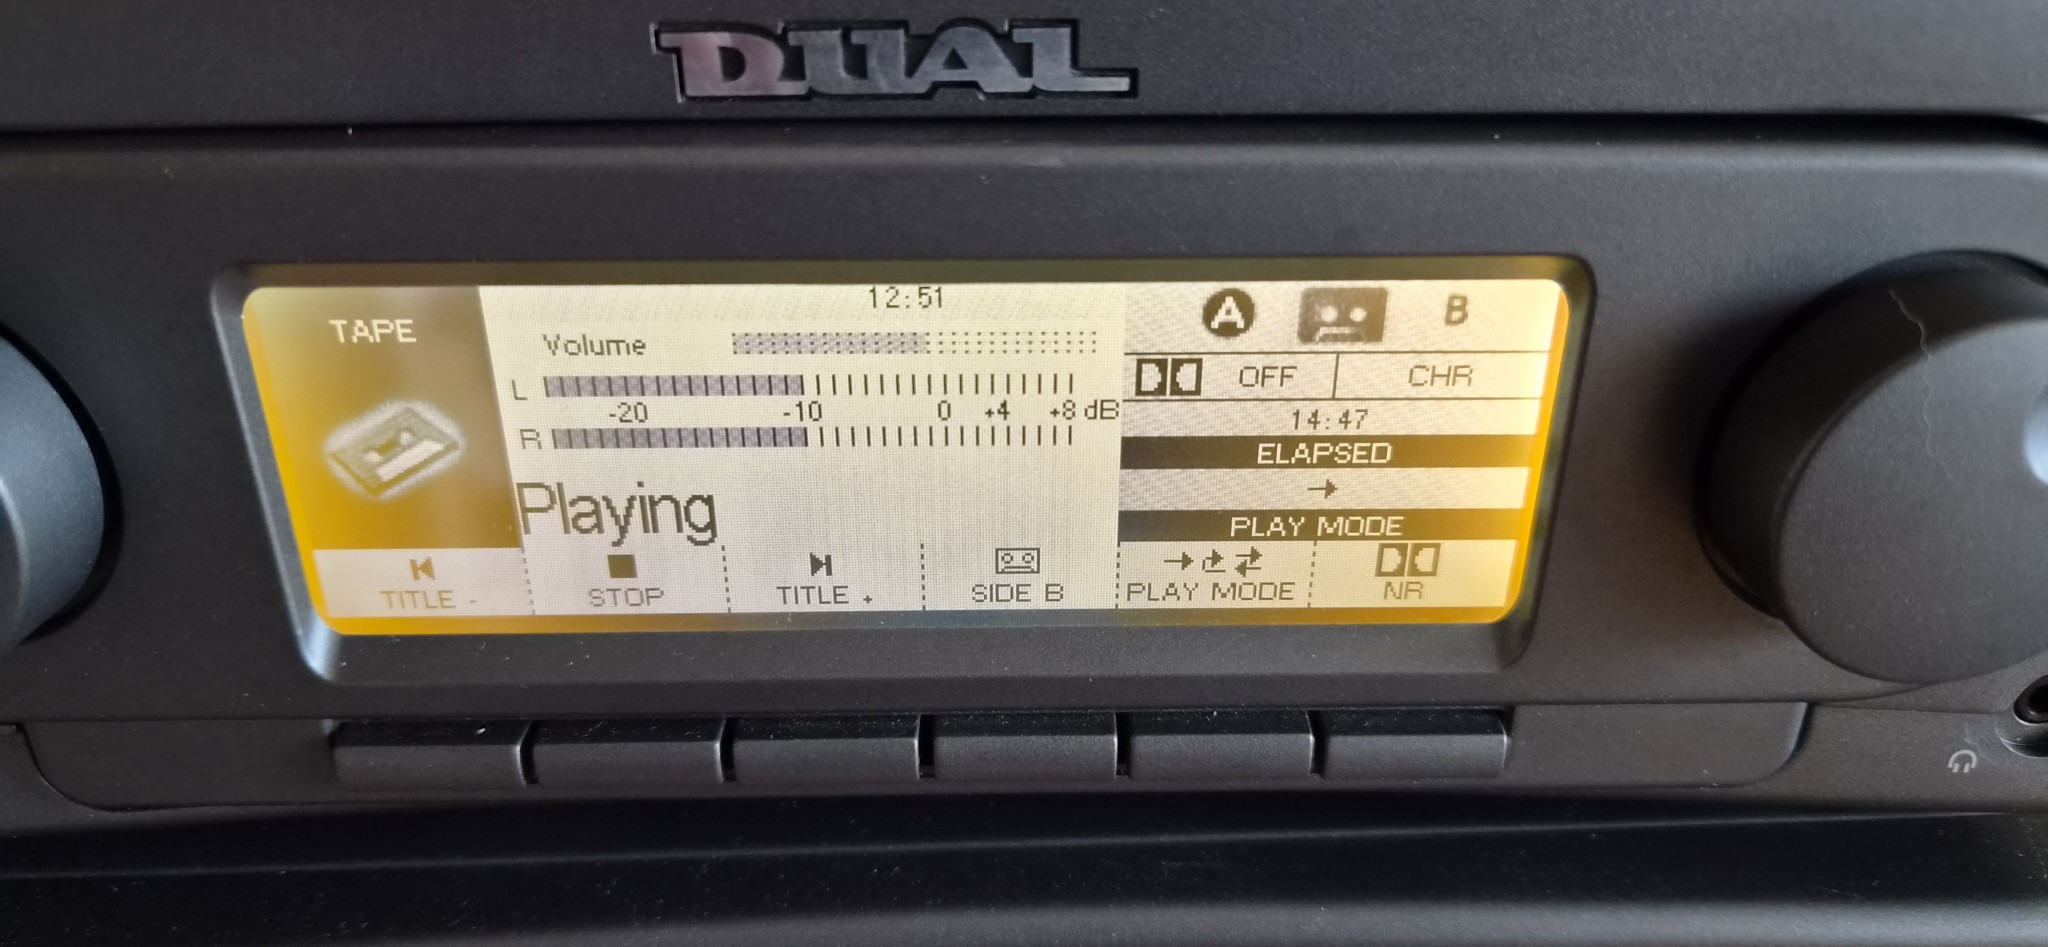
There is also a tape-preparation mode for recording. It isn’t calibration, but it’s useful nevertheless. Recording level is adjustable too, unfortunately with both channels tied together.
Dolby B and C with HX Pro are included, along with autoreverse mode selection and so on.
The only physical control on the cassette deck itself is the command used to load and eject a cassette.
Interestingly, once you’re inside the deck’s own menu, you can’t start recording from there. Recording is initiated from the menu of the source you’re listening to. For example, if you’re listening to a CD and want to record it, you start recording from the CD source menu.
It’s slightly awkward, but you get used to it.
Virtually all relevant information is available on the display at all times. My only wish is that the tape-counter digits were a little larger.
CD player
In terms of features, this is one of the real jewels of the system.
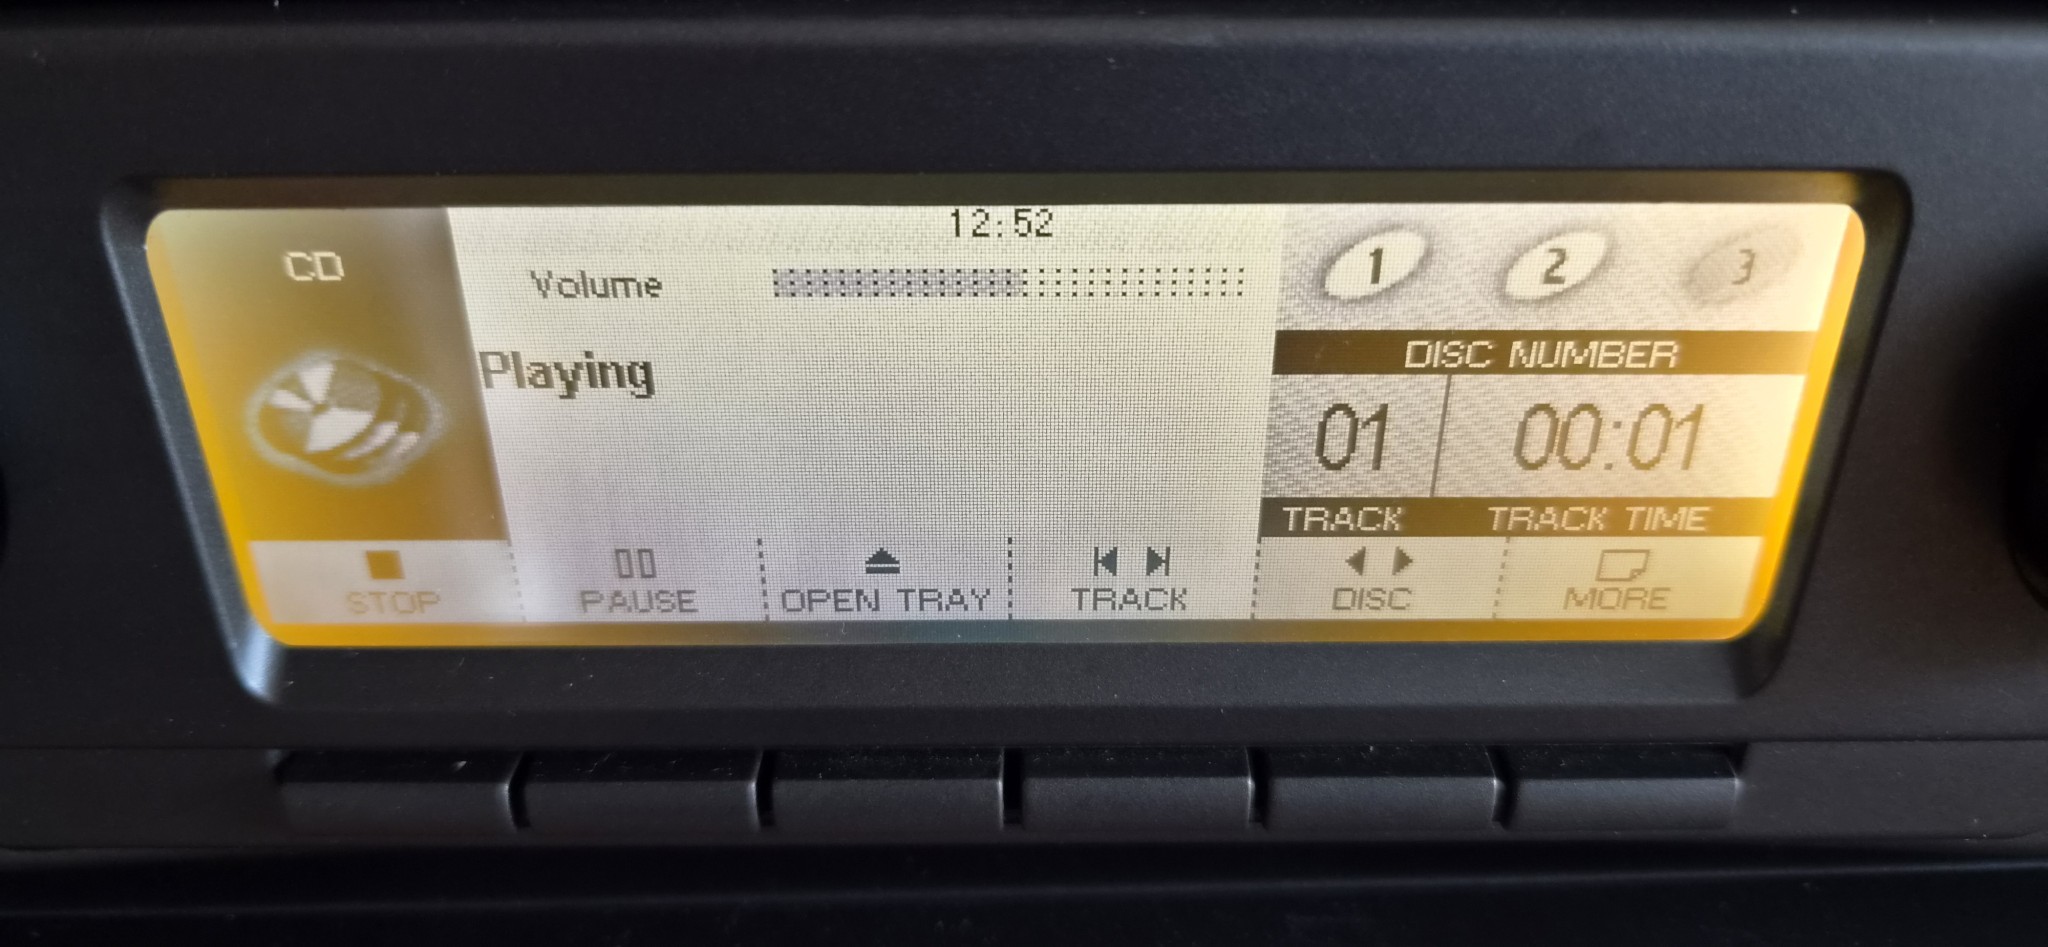
It holds three discs, changes between them quickly and reads them reasonably fast.
Apart from standard features such as track programming, it supports Philips’ FTS, or Favourite Track Selection, system. FTS remembers your preferred track selections for individual discs. So, for example, if you insert a CD on which you know you can’t stand tracks five and twelve, the machine recognises the disc and automatically applies the track settings you previously programmed for it.
You can also assign names to discs. The MN 8010 doesn’t support CD Text, but this gets surprisingly close.
Other inputs
Television, VCR and satellite receiver inputs are supported, presumably intended for products from Dual’s contemporary range, with support for their basic control commands, which is a very nice touch.
These days, of course, it can simply be used as ordinary line-level inputs.
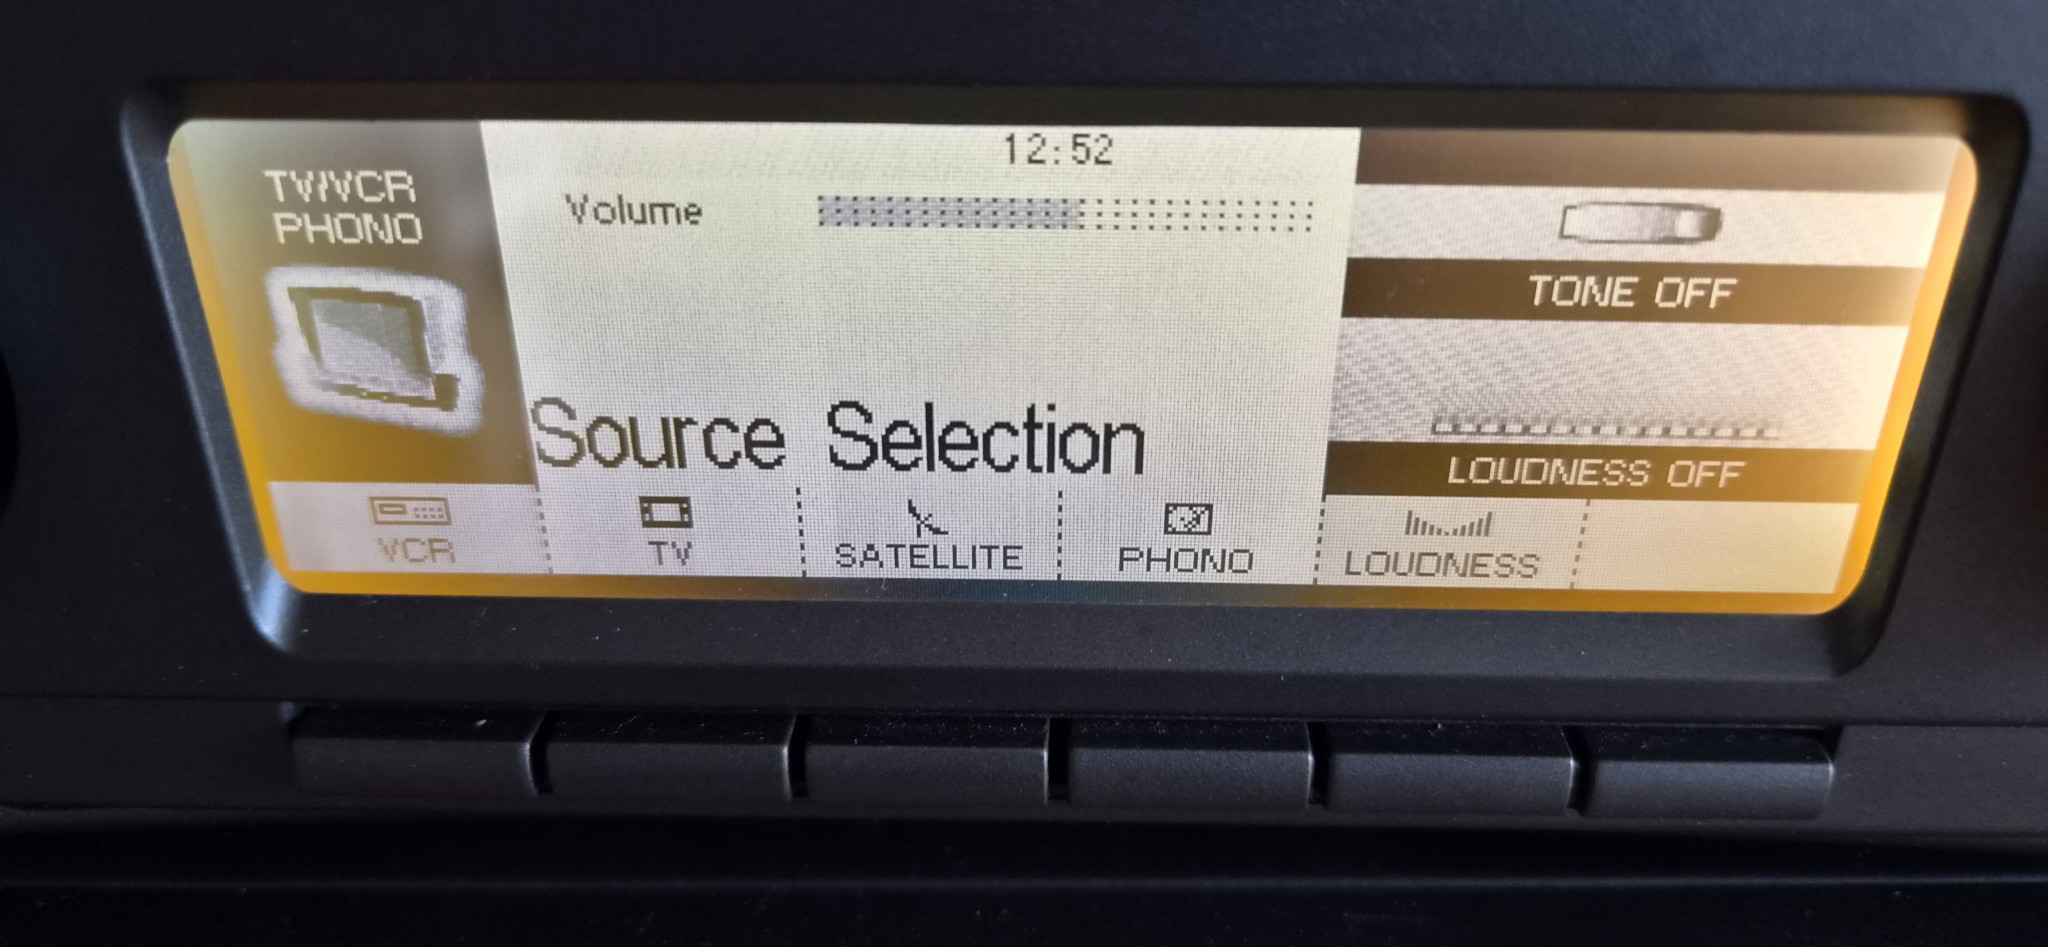
A turntable is also supported through an MM phono input.
The system even supports Dolby Pro Logic if you connect the rare DPL 120 centre speaker. Several associated settings are available, although I couldn’t access them because I didn’t own the required speaker.
System settings
System settings cover display brightness and contrast, language, date and time.
There’s even an alarm, although I wasn’t particularly interested in that.
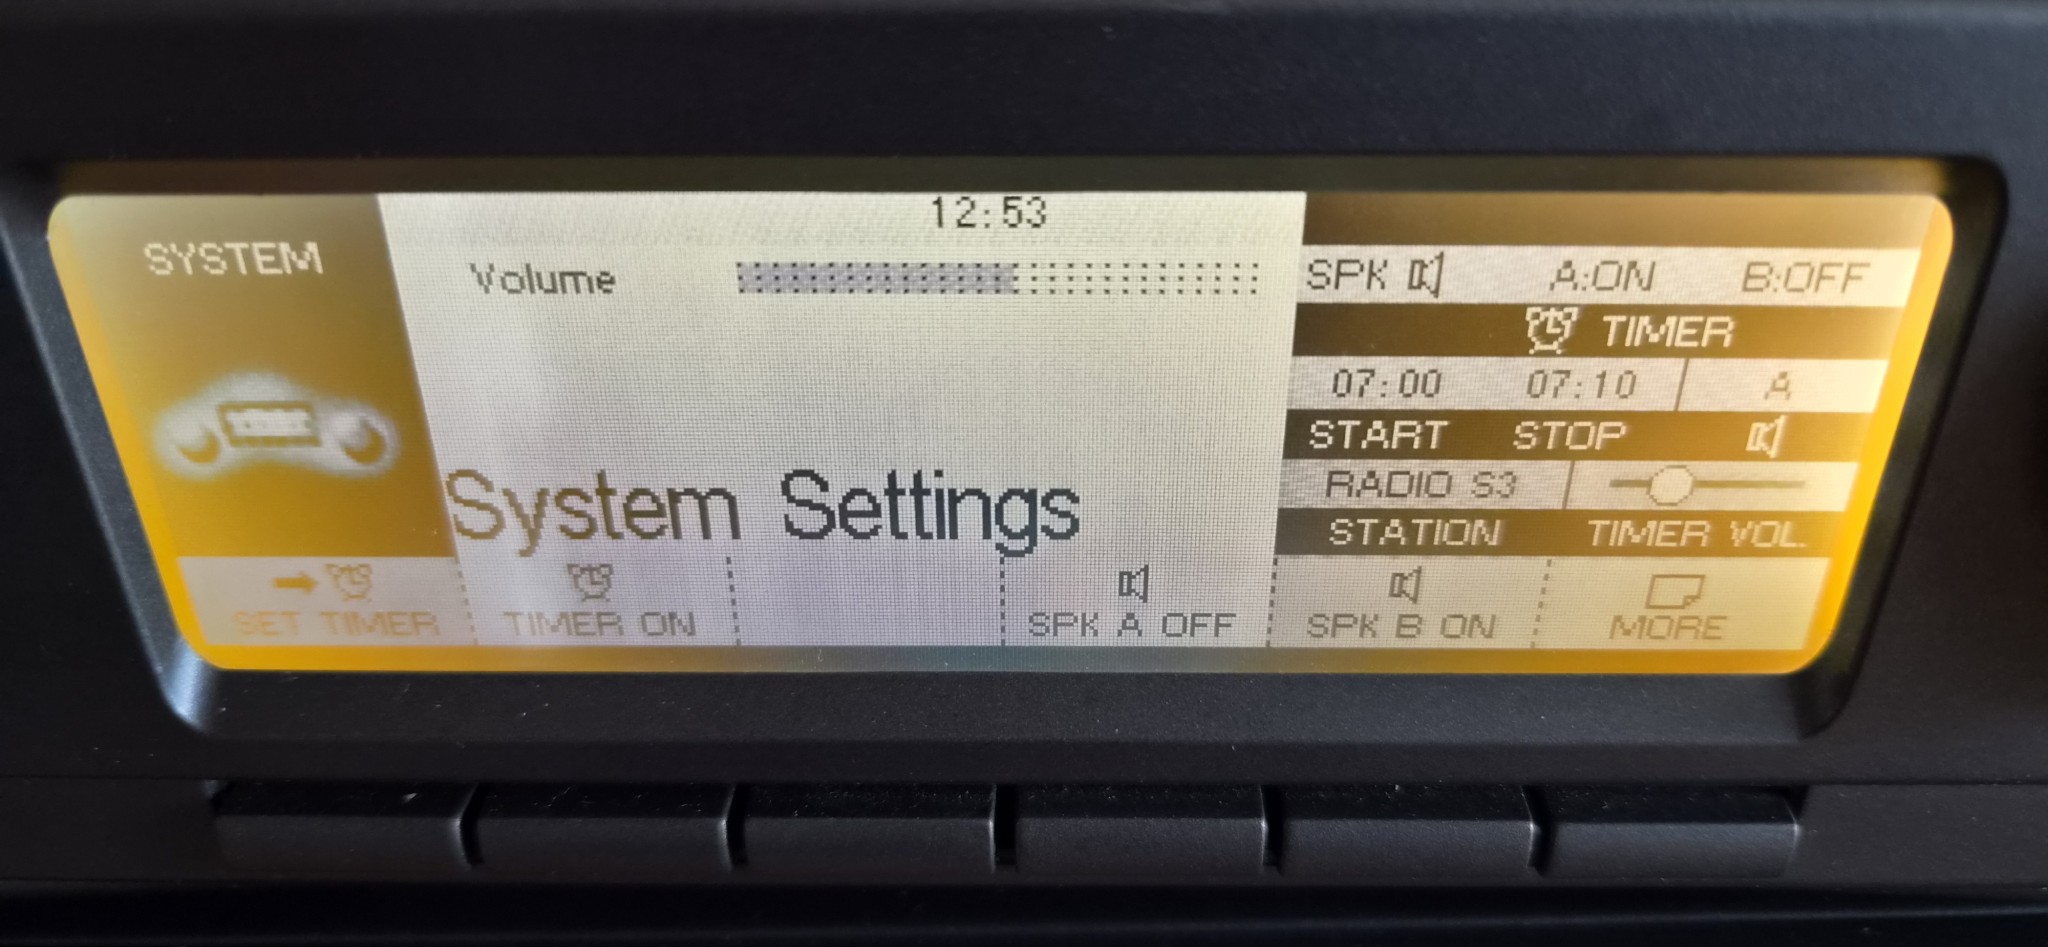
I’ve deliberately omitted some menus because I didn’t want to drown you in every single option this interface provides.
Does this advanced user interface and remote control have drawbacks?
Of course. So does almost everything ever made.
- The LCD is rather difficult to read at certain angles, particularly when its vertical viewing angle changes. That’s simply one of the limitations of old LCD technology.
- Remote-control battery life is short, only about 50 minutes with 3 x NiMH AAA batteries away from the cradle. The remote simply consumes a lot of power and there isn’t enough room for physically larger, higher-capacity batteries.
- Returning the remote to its cradle can be slightly awkward, and should be done carefully.
- The infrared system doesn’t work reliably from every angle. You need to be more or less in front of the unit, perhaps within 20–30 degrees either side, for commands to be received correctly.
- Because communication is bidirectional, this occasionally produces some interesting situations. You increase the volume, and the amplifier duly gets louder. 🙂 But the remote doesn’t receive the return message confirming that the volume has changed, so the display continues showing the old value. Move closer to the pre-receiver and the information suddenly updates, with the volume display on the remote console changing accordingly. This suggests to me that the two-way communication system continuously exchanges the status of basic system parameters. Very interesting.
- Commands are delayed by a fraction of a second. This applies to volume changes, the cassette deck’s peak meters and commands issued to both the CD player and cassette deck. That’s simply how it is. I assume the communication channel has relatively limited bandwidth and is already carrying quite a lot of information.
- Because neither the CD player nor the cassette deck has its own controls, moving from menu to menu isn’t as convenient as using a system in which every component has dedicated physical controls. As a result, the MN 8010 can initially make you feel somewhat constrained. You get used to it after a while.
- Releasing the remote-control module from the cradle is easy, but removing it completely requires you to grip it carefully, not by the left-hand knob because that can come off, and then pull it all the way out. There is no recess or finger grip on the remote itself to give your fingers a secure purchase while removing it.
Despite all of these shortcomings, using the Dual MN 8010 mini system is an experience in itself.
Of course, everything would be more advanced and different today. But there is still something fascinating about using a remote control that looks more like one of those big old portable video-game machines, yet feels so unexpectedly comfortable in your hands.
Inside
Knowing that the MN 8010 was based on the Grundig Fine Arts M100 system, I roughly knew what to expect from the CD player and cassette deck.
The power amplifier and preamplifier, however, don’t exist as such within the M100 system, although I expected the power-amplifier design to be fairly similar.
The real mystery was the preamplifier, or more accurately the pre-receiver, since it also contains the tuner. I couldn’t find anything online indicating what is inside it.
When I opened both it and the remote control, I found an interesting mixture of circuit boards. Some were manufactured by Grundig, while others were completely unfamiliar to me and carried the name of the aforementioned Fusion Design, a company about which I knew absolutely nothing. And I still don’t.
The pre-receiver power supply is based around two transformers of identical size.
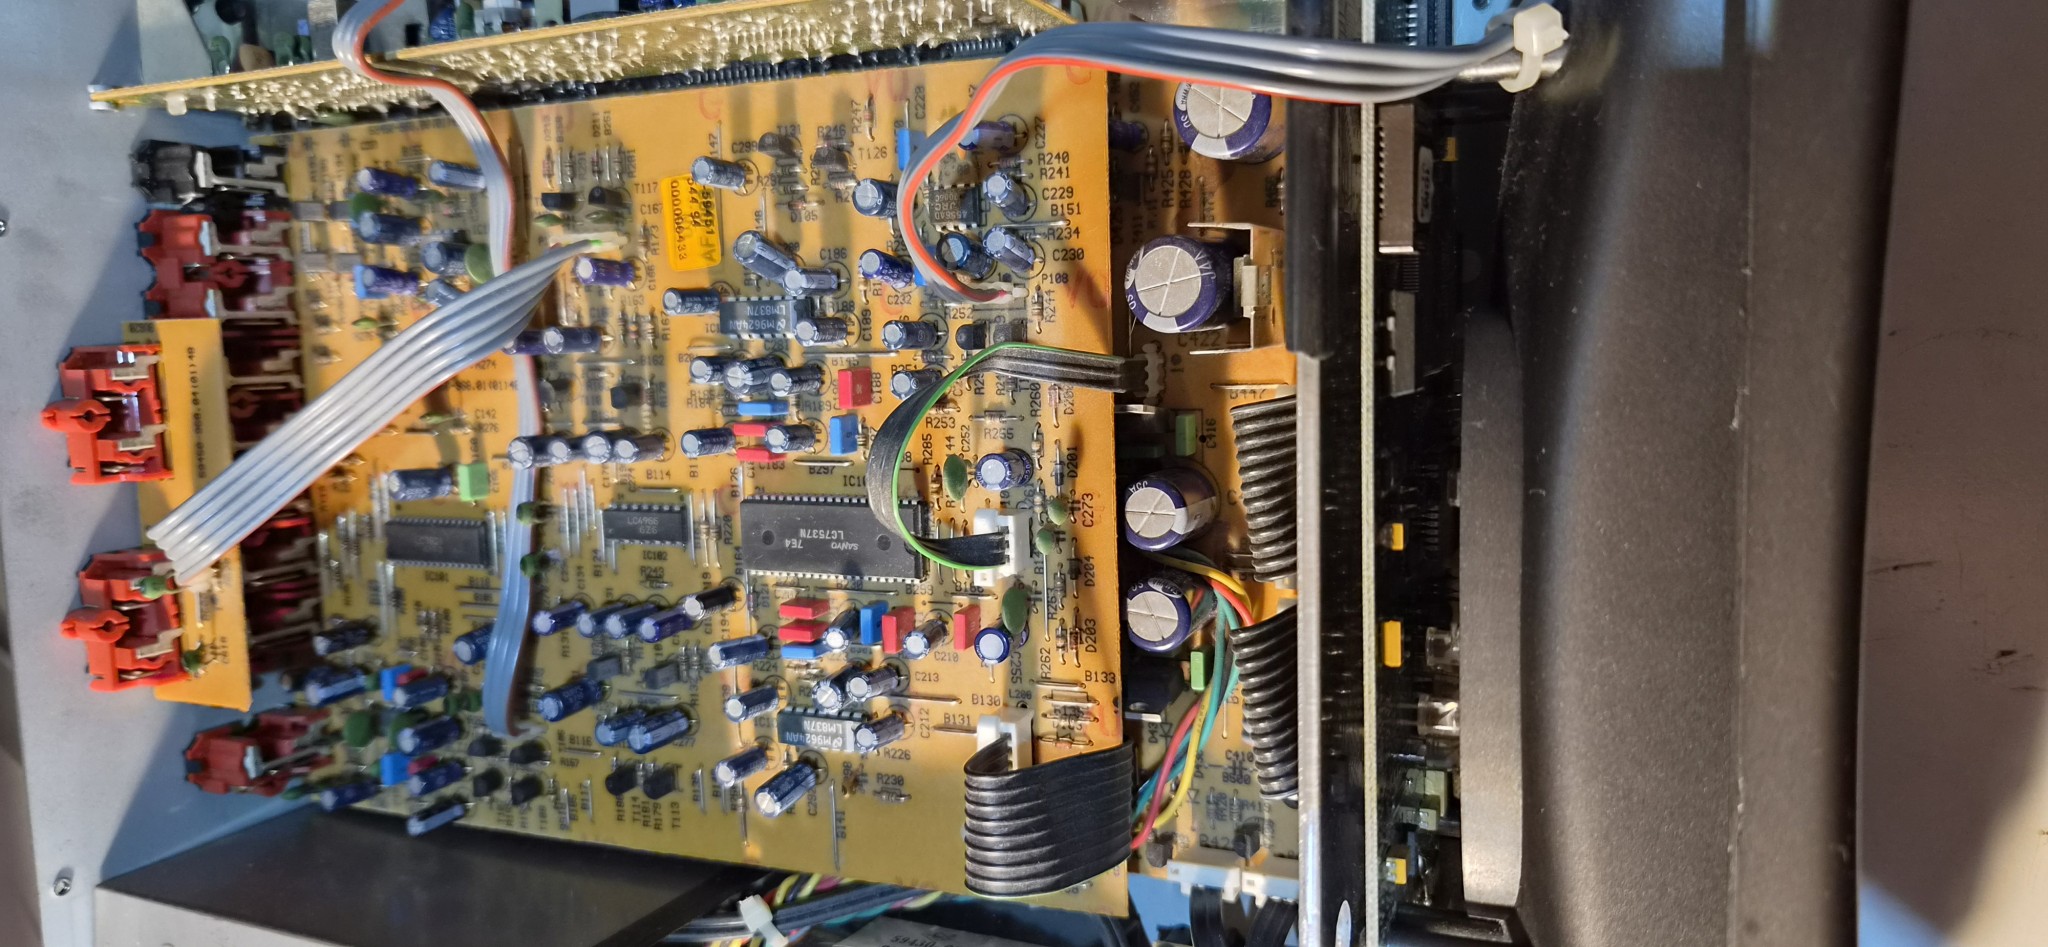
There are also two large horizontal circuit boards. The lower board contains the voltage regulators, five of them if I counted correctly, together with several fuses that look rather like electrolytic capacitors.
Unfortunately, they’re practically inaccessible for replacement because the chassis has no removable bottom panel.
What this means in practice is that, to replace virtually anything, you have to remove the top cover, undo around twenty screws, disconnect the front-panel assemblies through multipin cables and lift up the lower PCB.
It would have been a hundred times easier if they’d simply added a removable service panel to the bottom of the chassis.
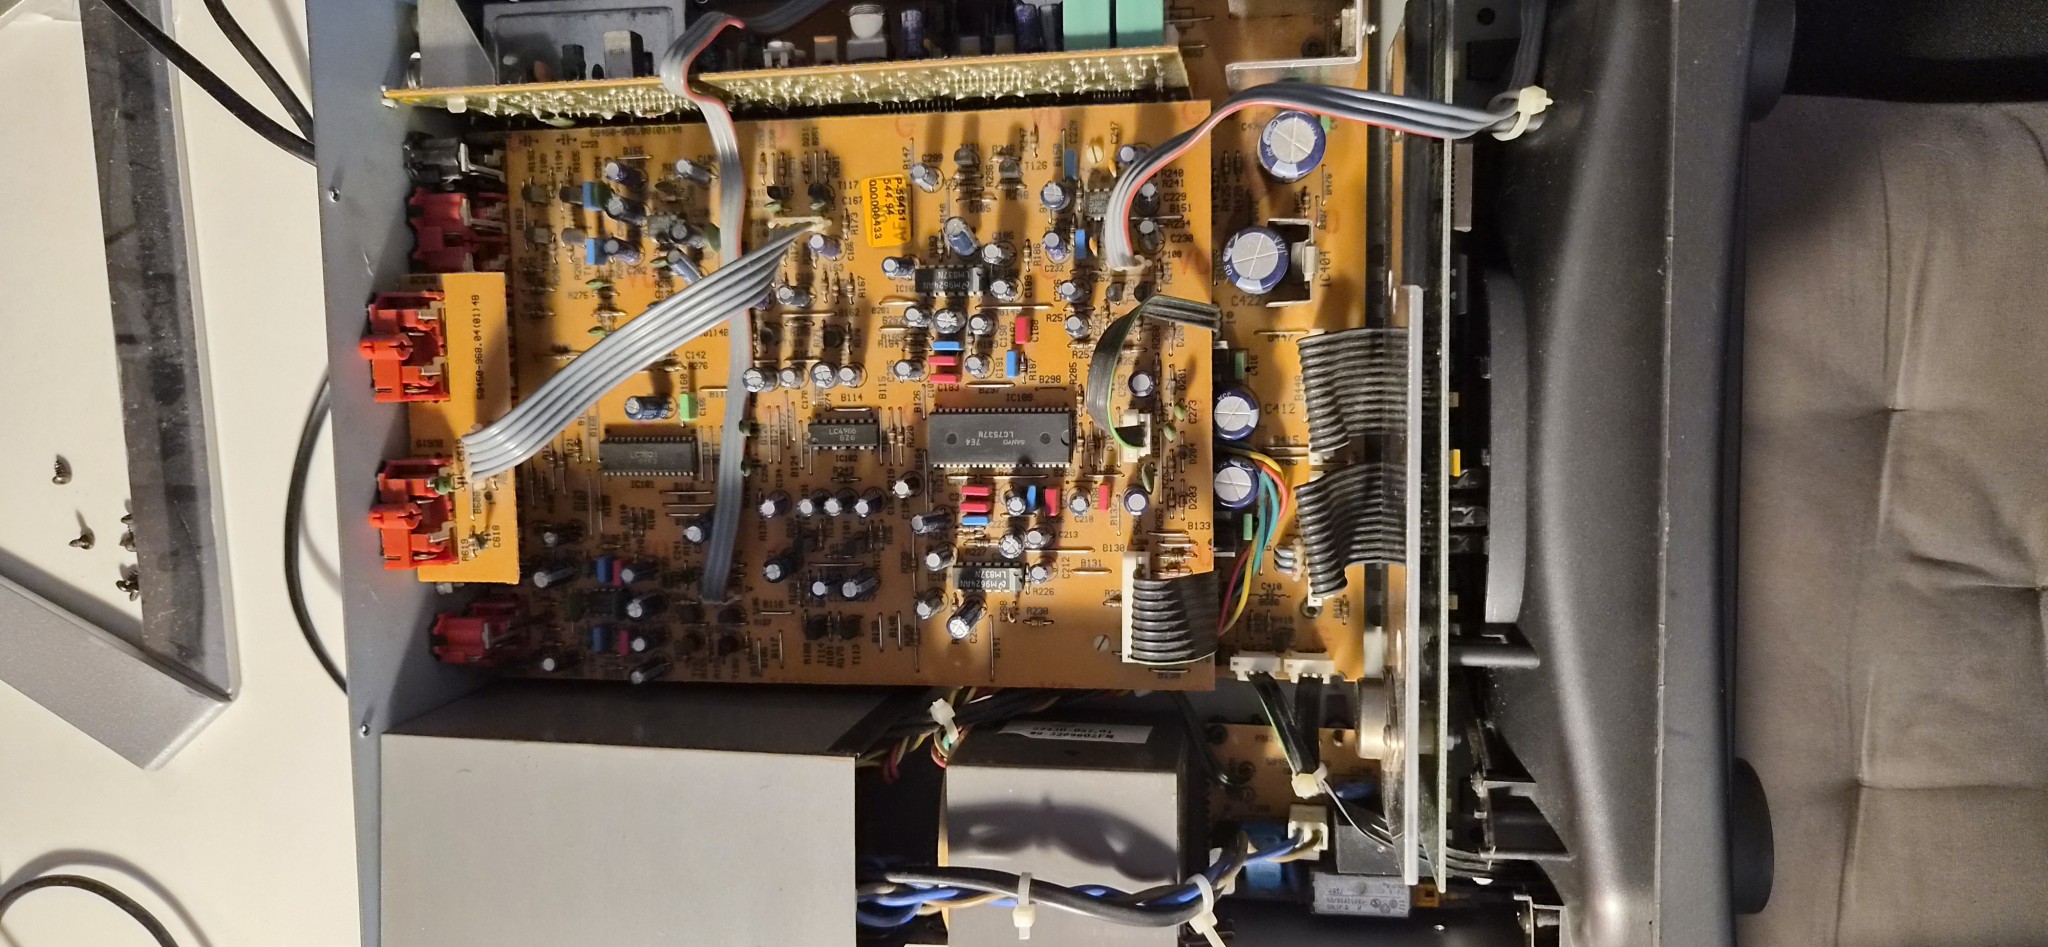
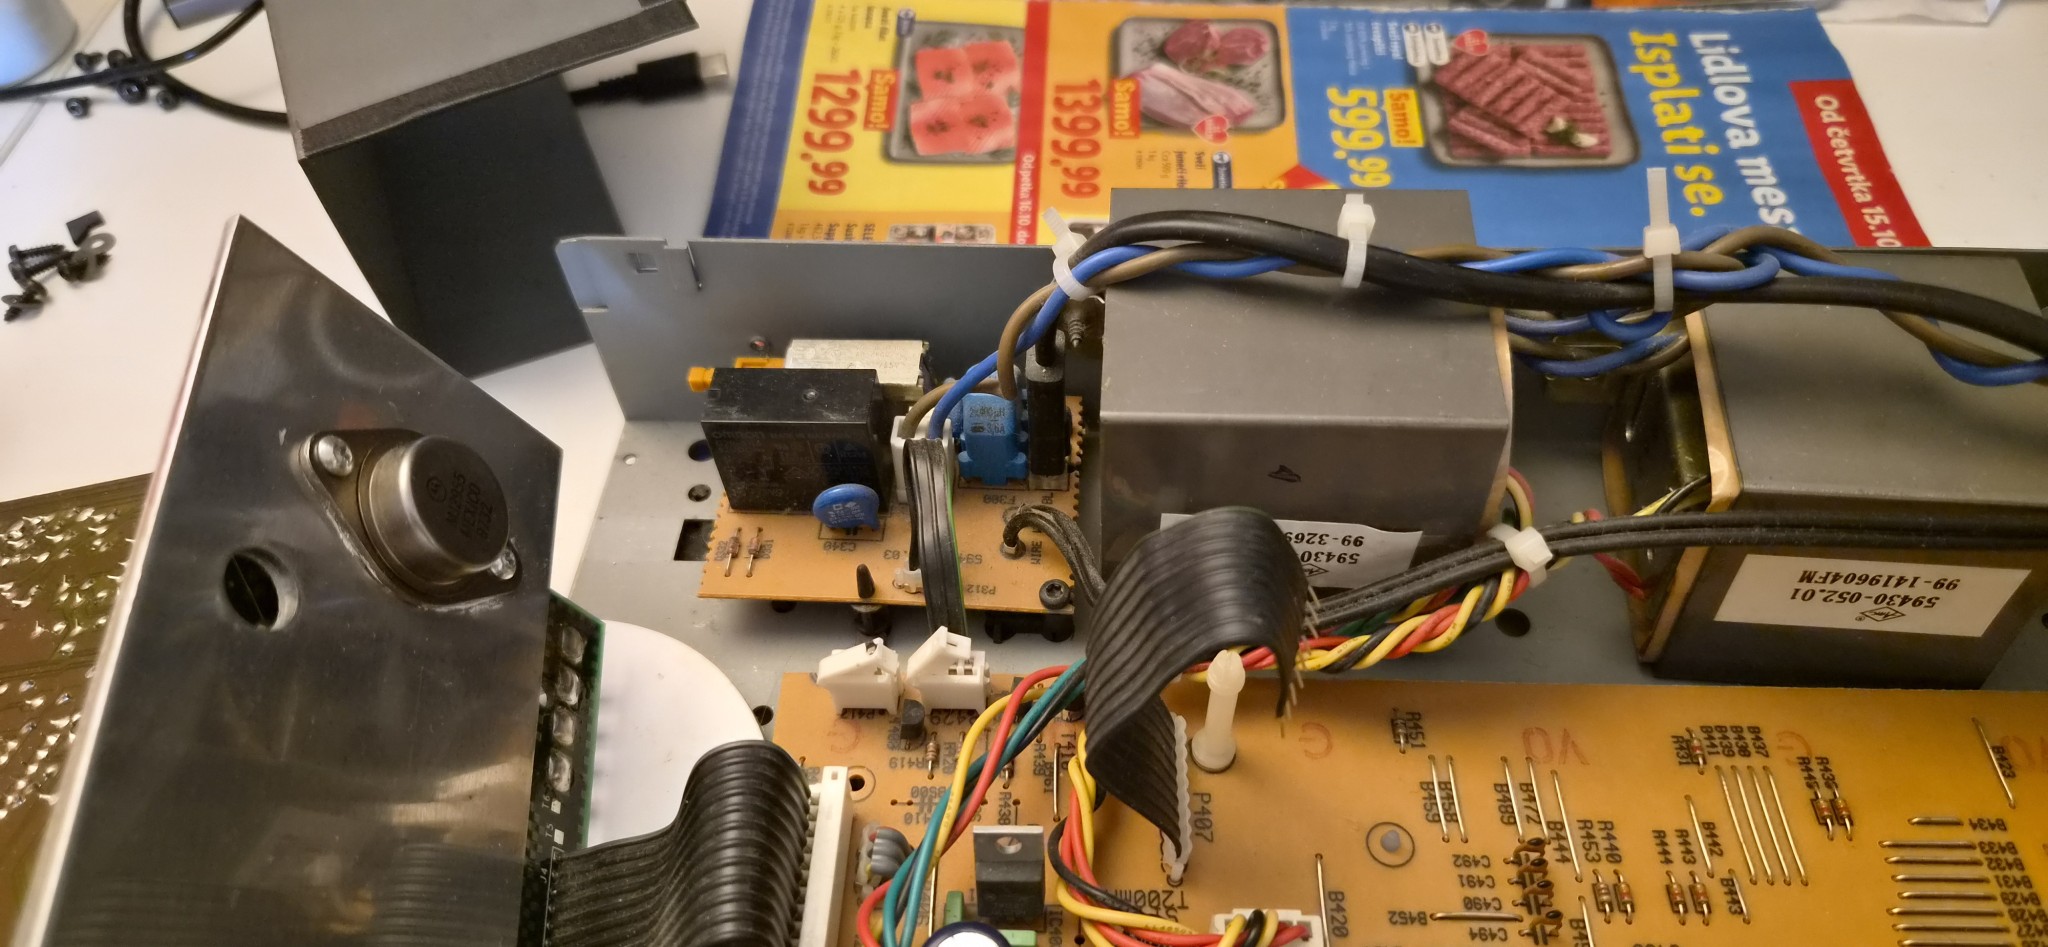
The lower board also contains the central control processor responsible for managing the system’s functions, including input selection, volume control, tone controls and so forth.
The upper PCB handles the audio section.
Input selection is performed by the familiar Sanyo LC7821 IC, a popular solution in better-quality mini systems, less expensive preamplifiers and even some fairly costly amplifiers of the period.
There’s another Sanyo chip too, the LC7537N, responsible for electronic volume control.
The phono stage is a conventional design based on an LM833 operational amplifier, while the headphone amplifier uses a 4556AP op-amp.
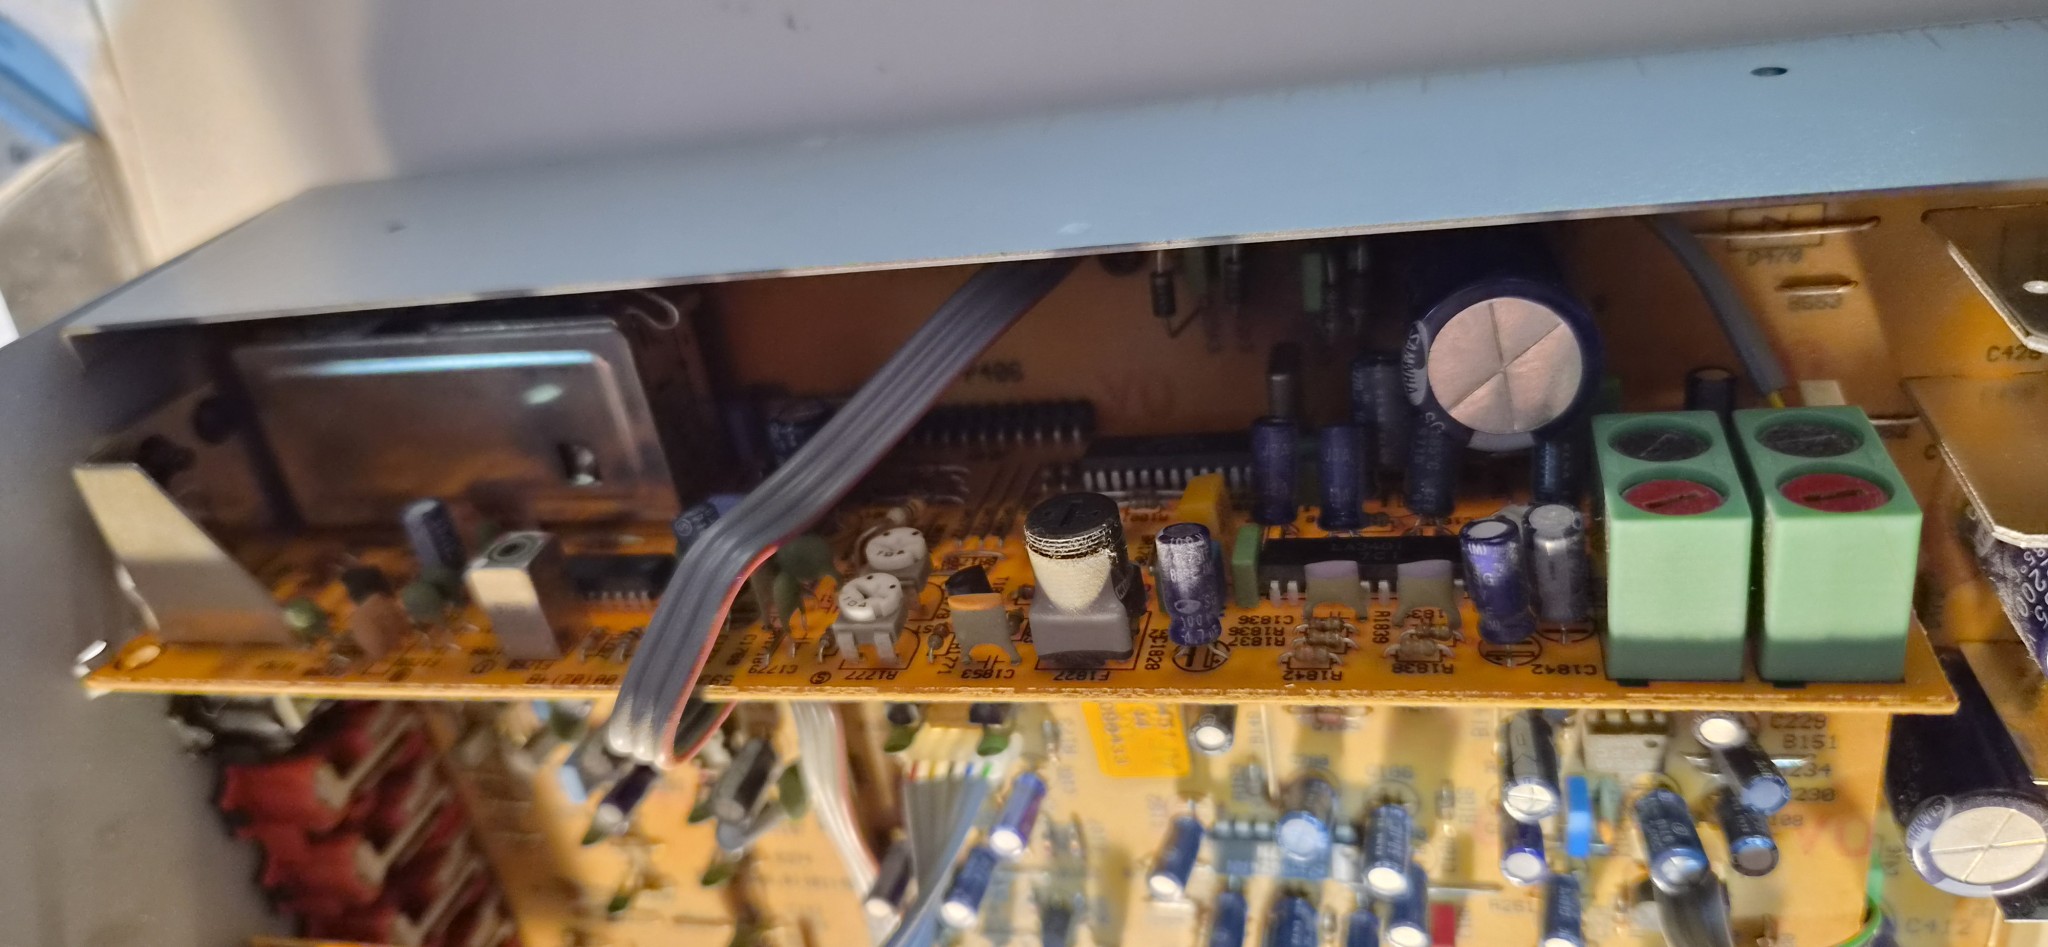
The tuner section takes the form of a long vertically mounted board. I didn’t pay a huge amount of attention to it.
The front end is based on an LA1266, the stereo decoder is an LA3401, and the RDS demodulator is an SAA6579T. I believe this is the same configuration used in the Fine Arts M100-R receiver and tuner from the same series.
Incidentally, the radio receiver in the MN 8010 has excellent specifications. Or, as Dragan from Sremčica, my Hi-Fi mentor long time ago once told me: “You can’t go wrong with a German tuner.”
Sensitivity is only 1.1 microvolts, while the signal-to-noise ratio is a very respectable 75 dB in mono and 69 dB in stereo.
That’s exceptional for mini systems and all-in-one products, which usually incorporated distinctly inferior tuners.
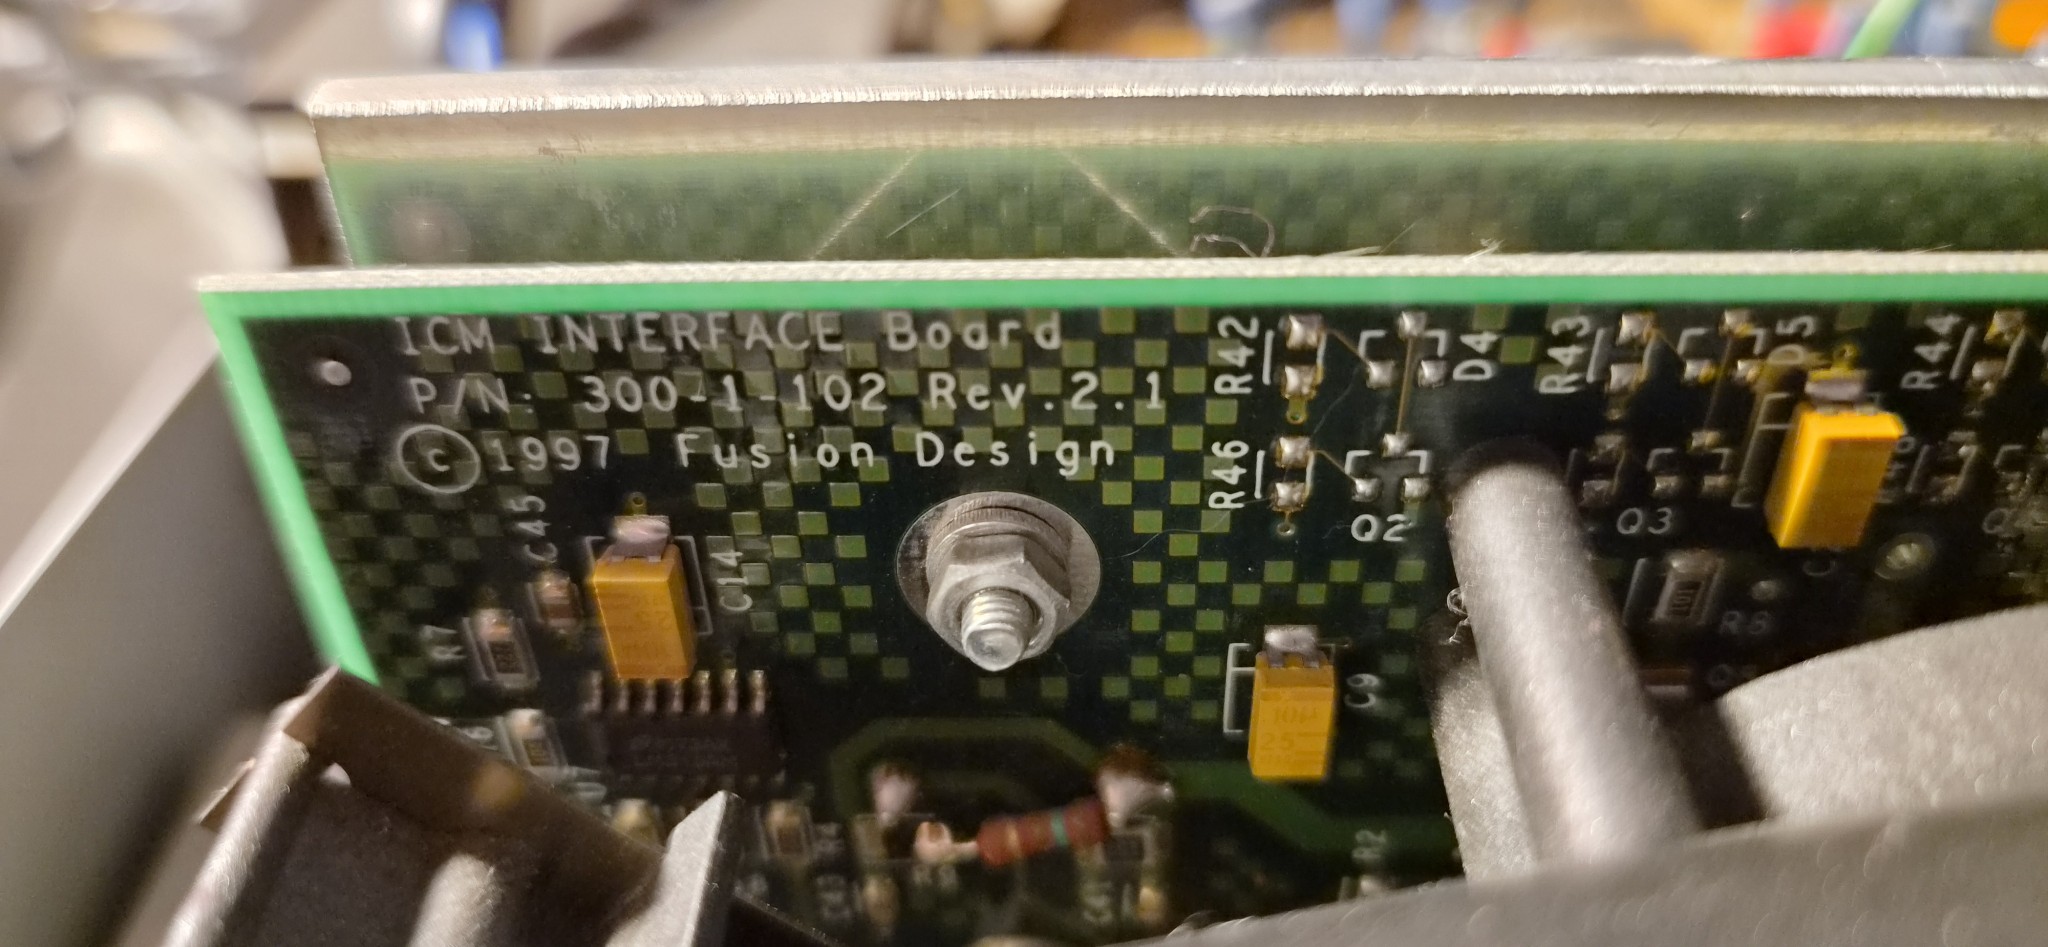
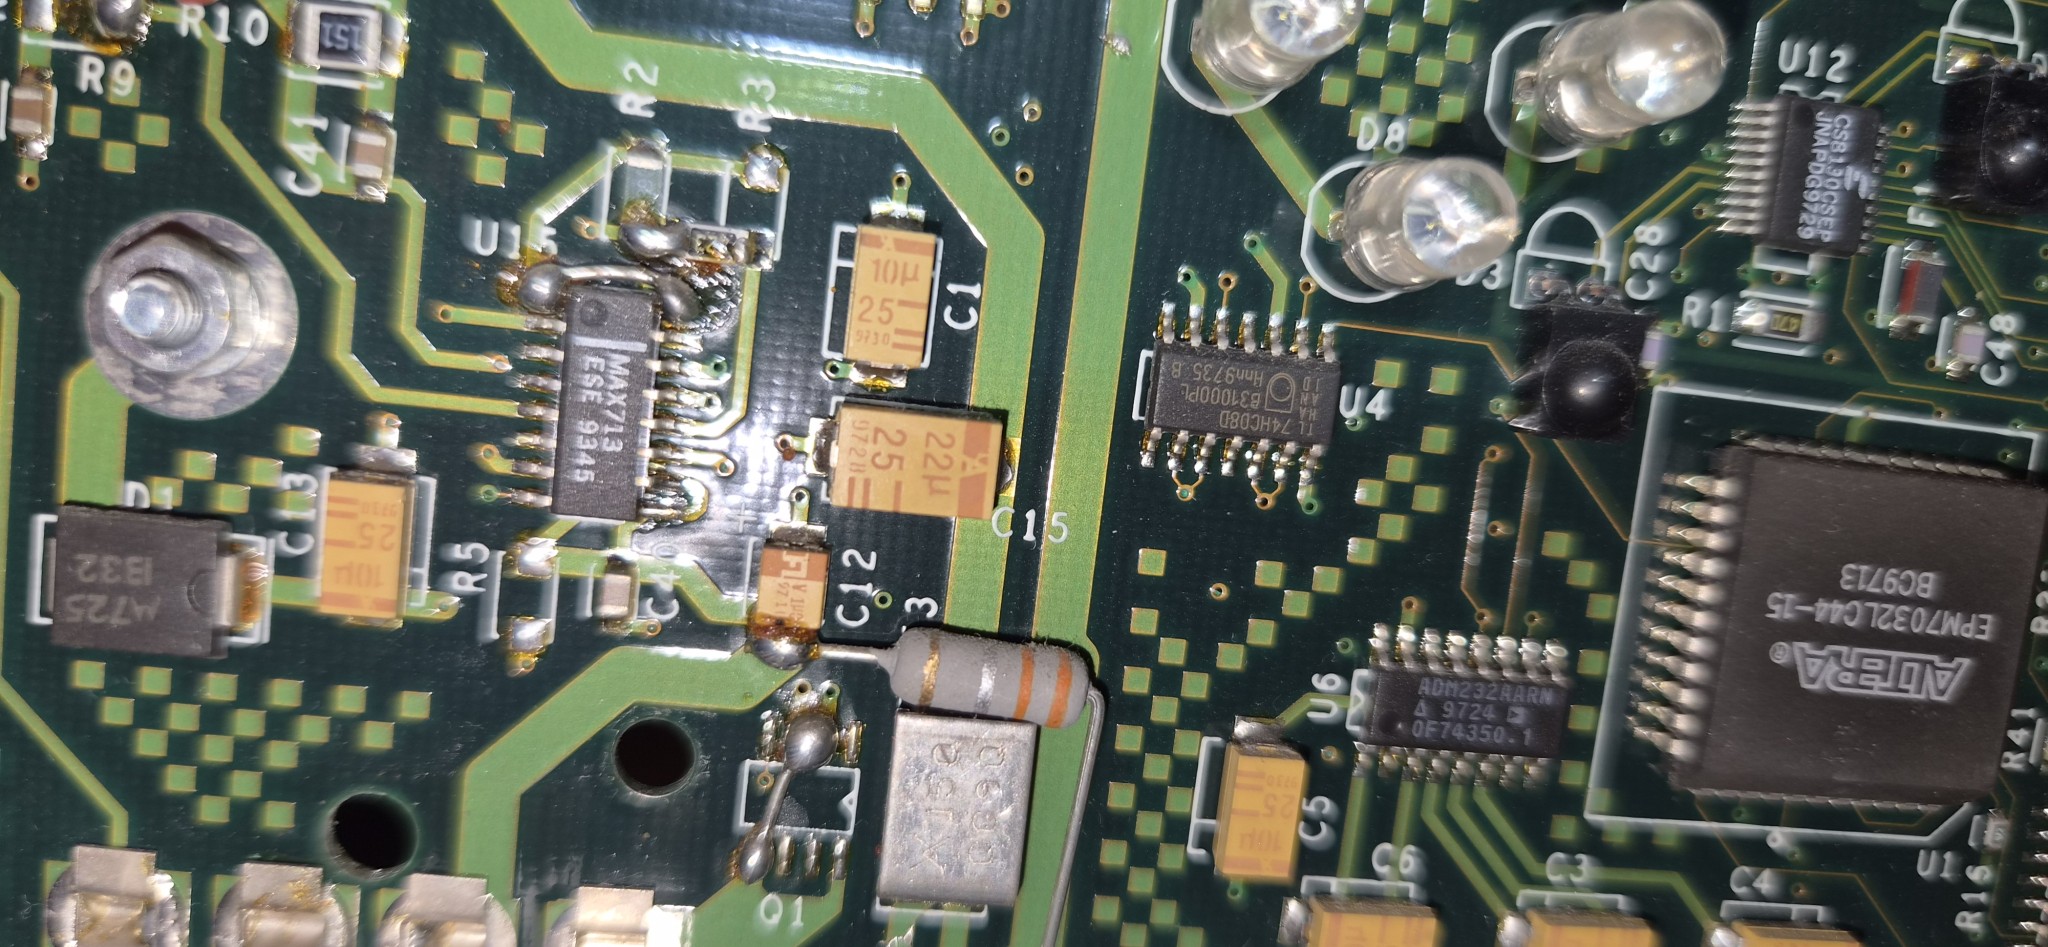
Behind the front panel lies an exceptionally sophisticated, particularly for its time, Fusion Design communications board serving as the infrared transceiver module for the remote control.
The electronics on this board go far beyond the attractive but otherwise more or less conventional electronics found throughout the rest of the system.
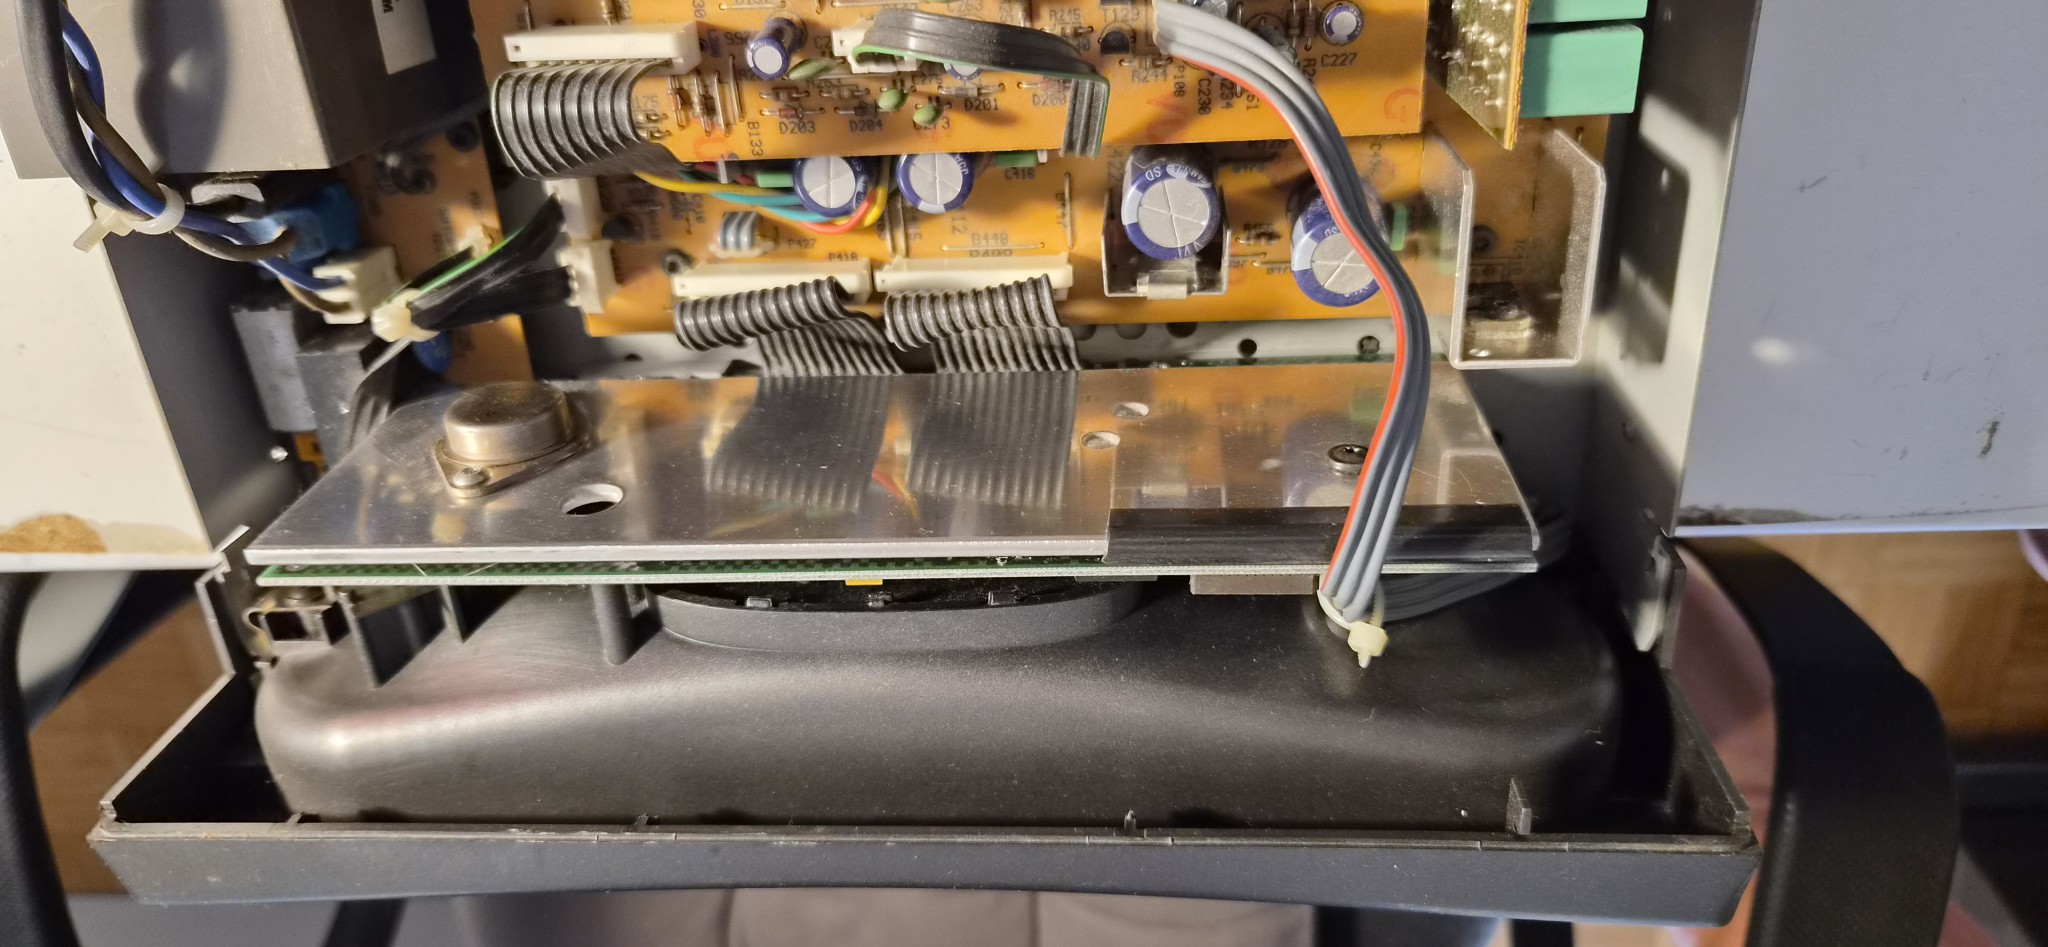
On the underside of the board is a large “top-hat” MJ2955 power transistor, attached to a substantial aluminum heatsink. It is obviously being used as a voltage regulator, and it turned out to provide +4 V.
The board contains logic devices such as the EPM7032LC33-15, a CPLD, or Complex Programmable Logic Device, presumably directly responsible for the communication protocol, the details of which are unknown to me.
The rest of the circuit gives us a few more clues, however.
Communication uses the RS-232 standard. As an aside, it’s interesting that the rear panel of the unit also contains an RS-232 port with absolutely no explanation of its purpose. I assume it was intended for software upgrades.
RS-232 communication is handled by an ADM232AARN, a dual transmitter/receiver with two transmitters and two receivers. I suspect this arrangement was chosen to increase available bandwidth and reduce latency when transferring information to and from the remote-control module. Alongside four infrared LEDs, there are two IR receivers.
I also noticed a MAX713, intended for intelligent, and definitely not AI, charging of NiMH or NiCd batteries. Unfortunately, I wasn’t clever enough to dismantle the front-panel section at the beginning and determine how this IC had been configured. Had I done so, I would have discovered how many cells the charger was designed for.
That omission nearly ended disastrously for me later.
The remote control is even more fascinating.
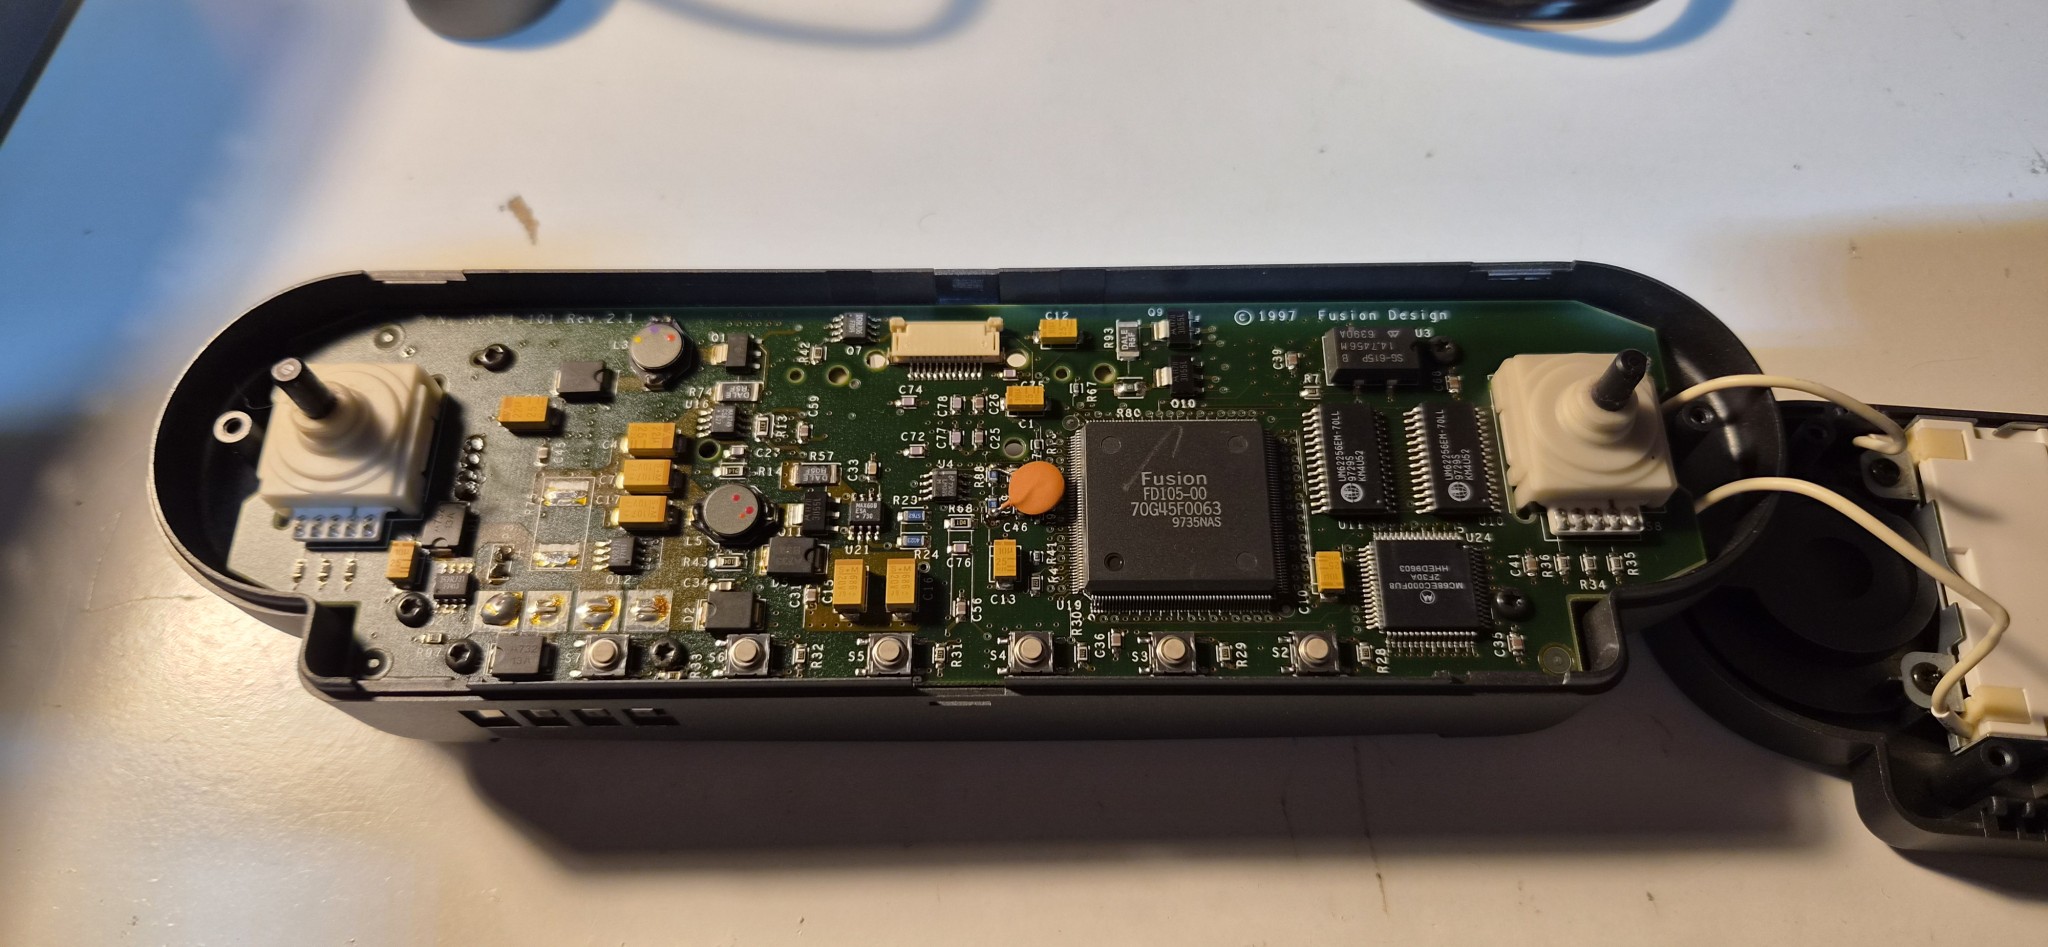
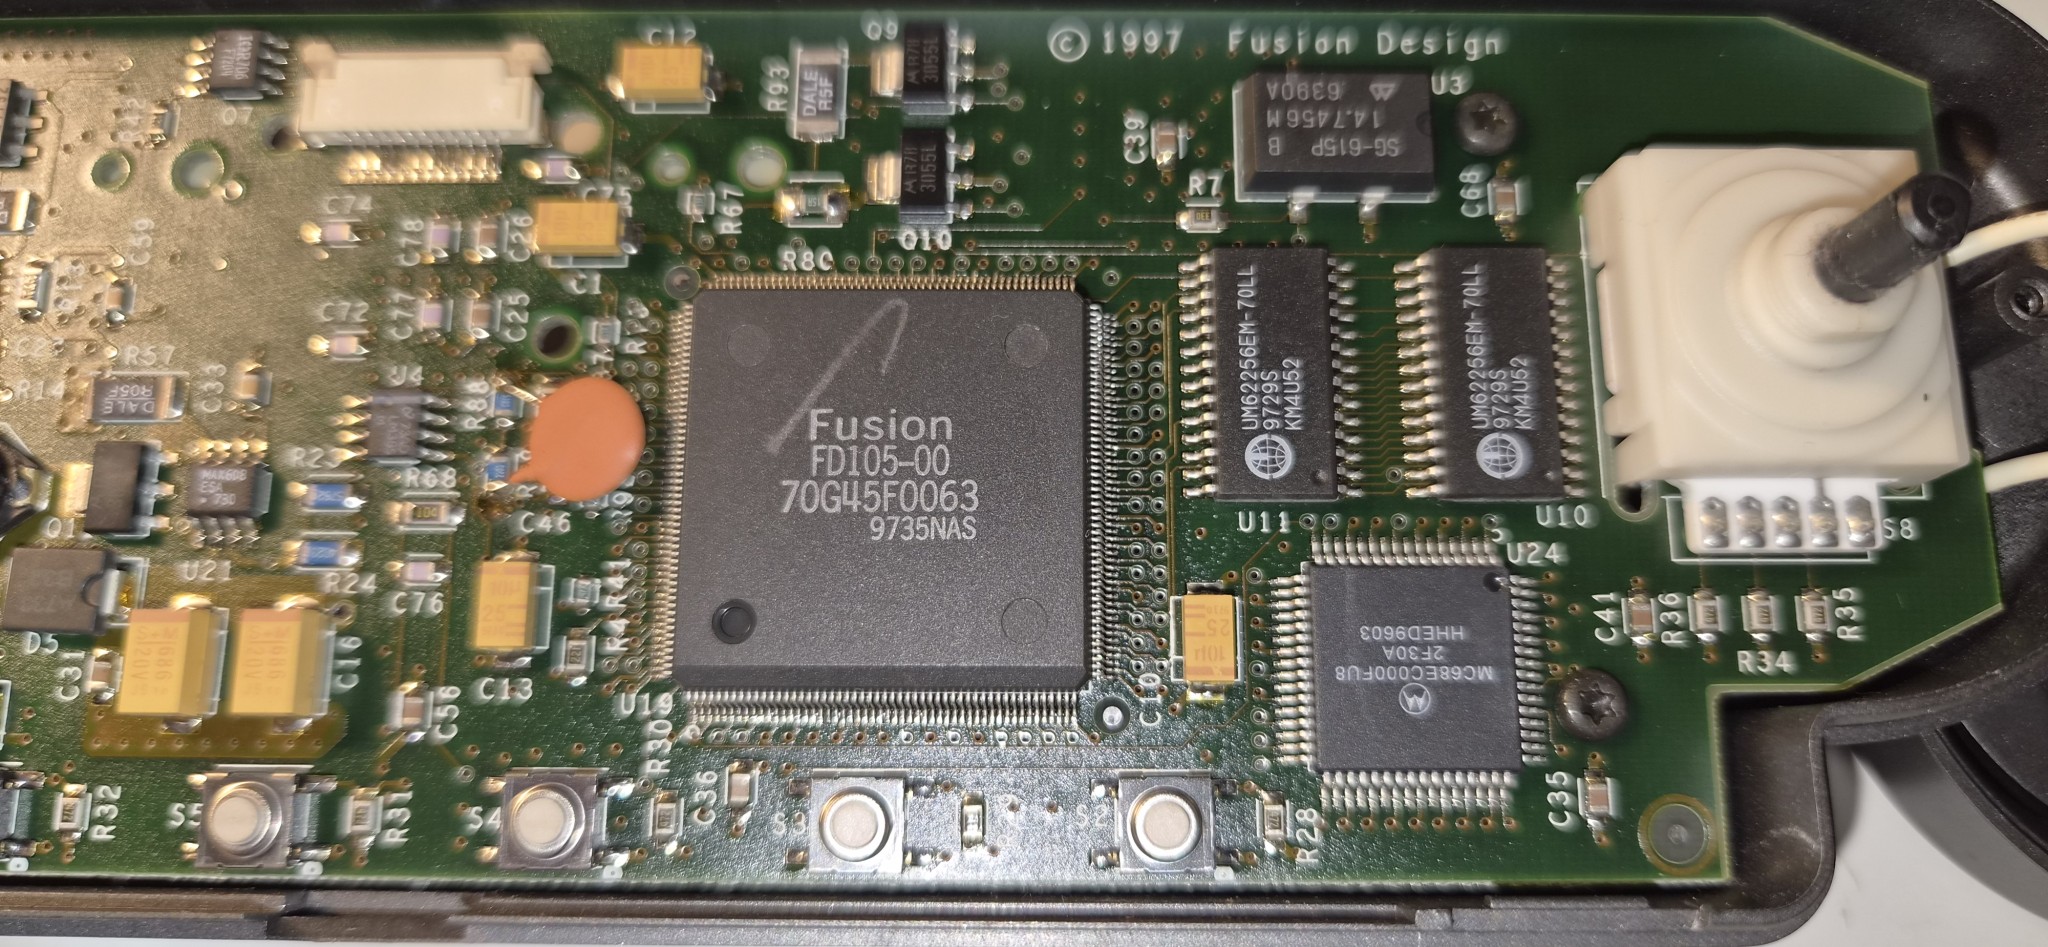
It has an interesting power-supply section, including a voltage converter for the display illumination, which I didn’t analyse, together with custom-made Fusion Design chips about which there is absolutely no information online.
There are also two SRAM modules with a combined capacity of 256 kilobits, or 32 KB, a 14.7 MHz clock, and then the real jewel:
A Motorola 16-bit processor from the 68xxx family, specifically an MC68EC000FU8. Internally this is a 32-bit processor with a 16-bit bus.
What I’m trying to say is that the MN 8010 remote-control module is actually a computer in its own right, and quite a powerful one for the period, especially considering the size of the package.
The drawback, as you’ve probably guessed, is power consumption: when I measured it, I saw values approaching one amp.
On the other side of the remote-control PCB is another IC marked GDU, presumably a programmable graphical user-interface/display driver, perhaps standing for “Graphical Display Unit.”
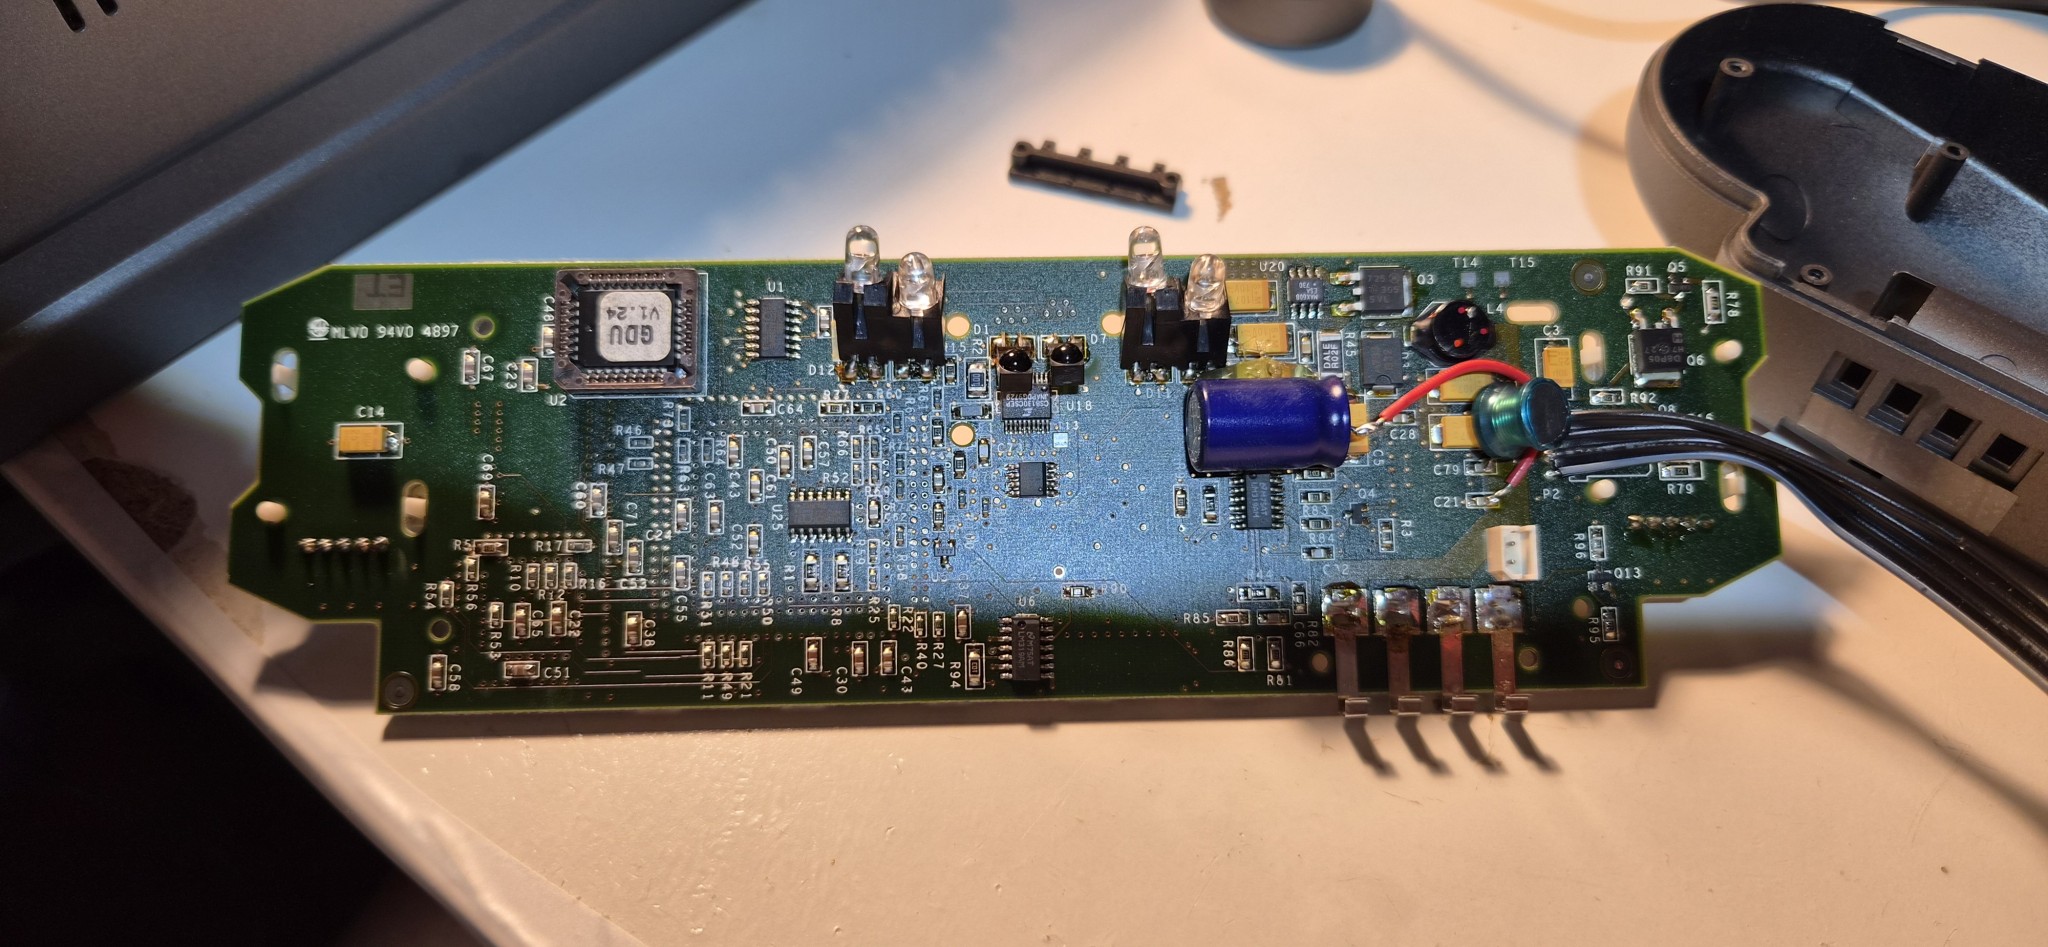
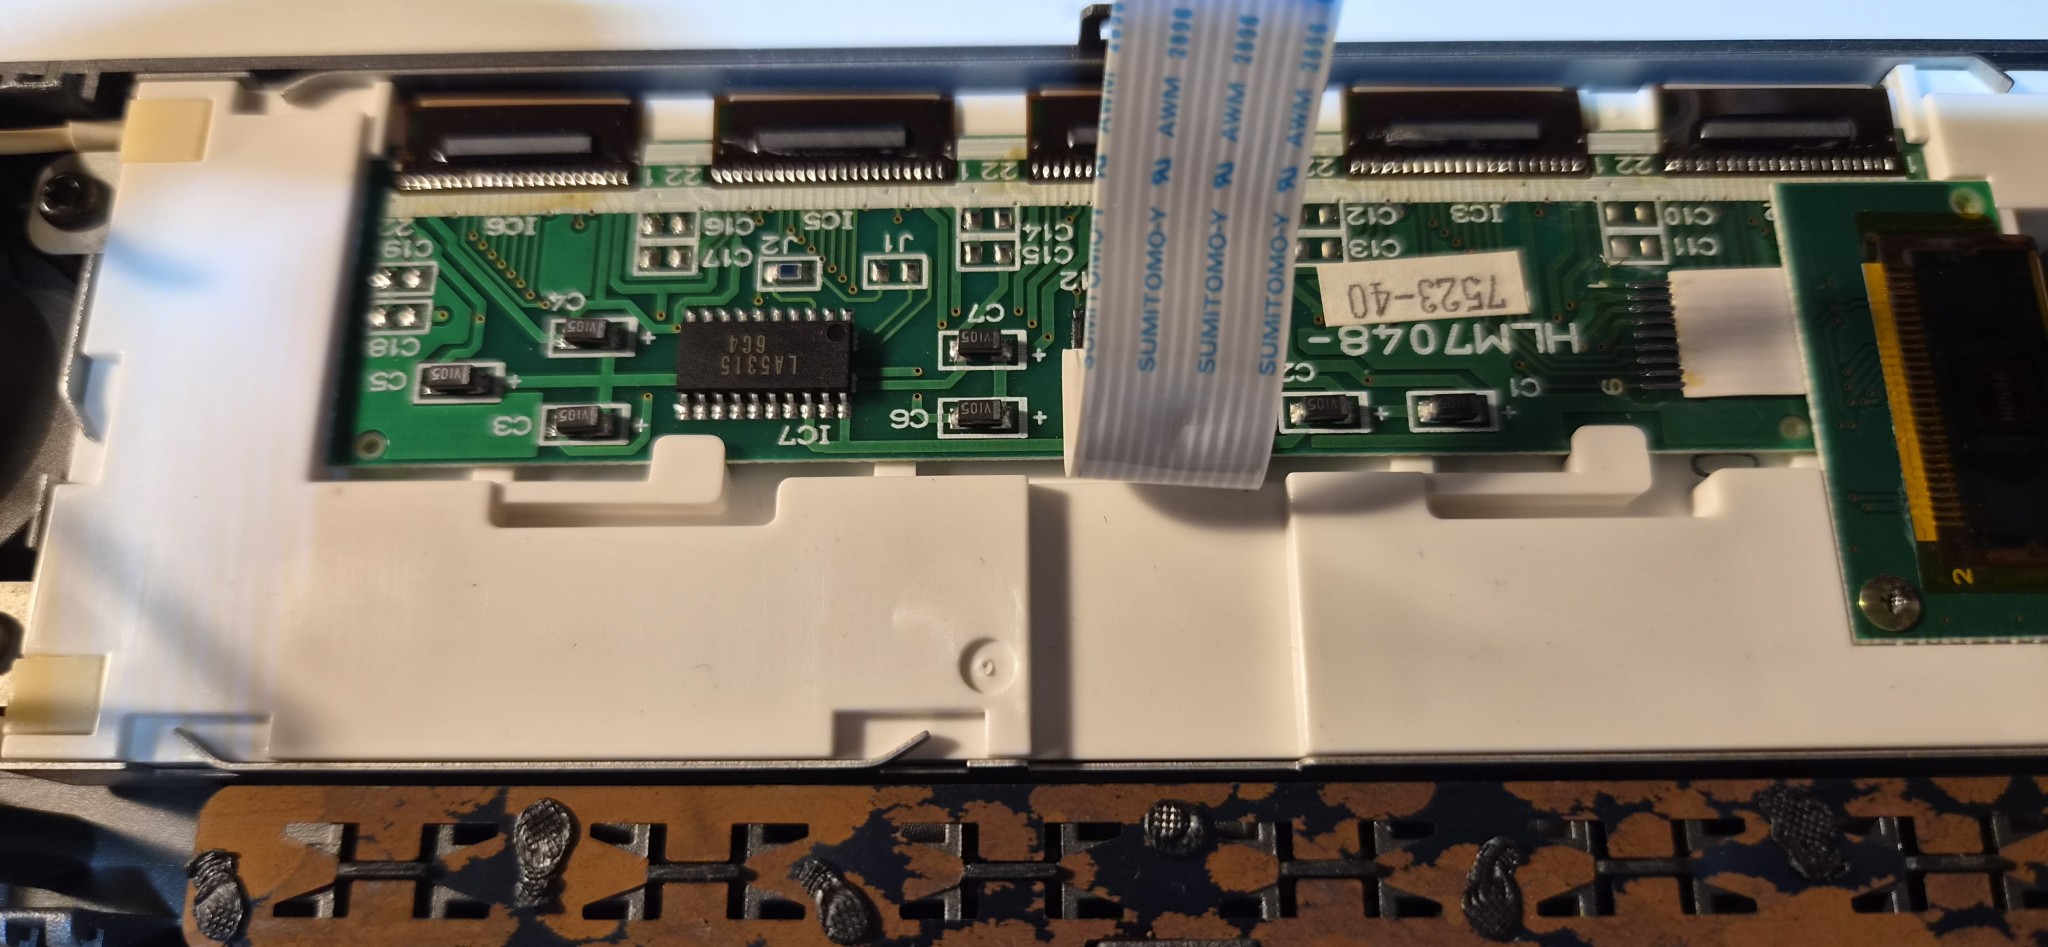
One thing I particularly admire is how neatly Fusion Design engineered all this microelectronics, with very few wire jumpers, something that couldn’t always be said for equipment of this era.
My hat is off to them.
The MN 8010 power amplifier is very similar to the output stage of Grundig’s M100-A amplifier and M100-R receiver, although with a slightly higher rated output than the Grundig, by 10 watts per channel into 4 ohms.
The damping factor is a respectable greater than 100. An R-core transformer is used, while the main filter capacitors are a pair of 6,800 µF Elna capacitors. The output stage follows a dual-mono layout with two substantial heatsinks, one along each side of the chassis.
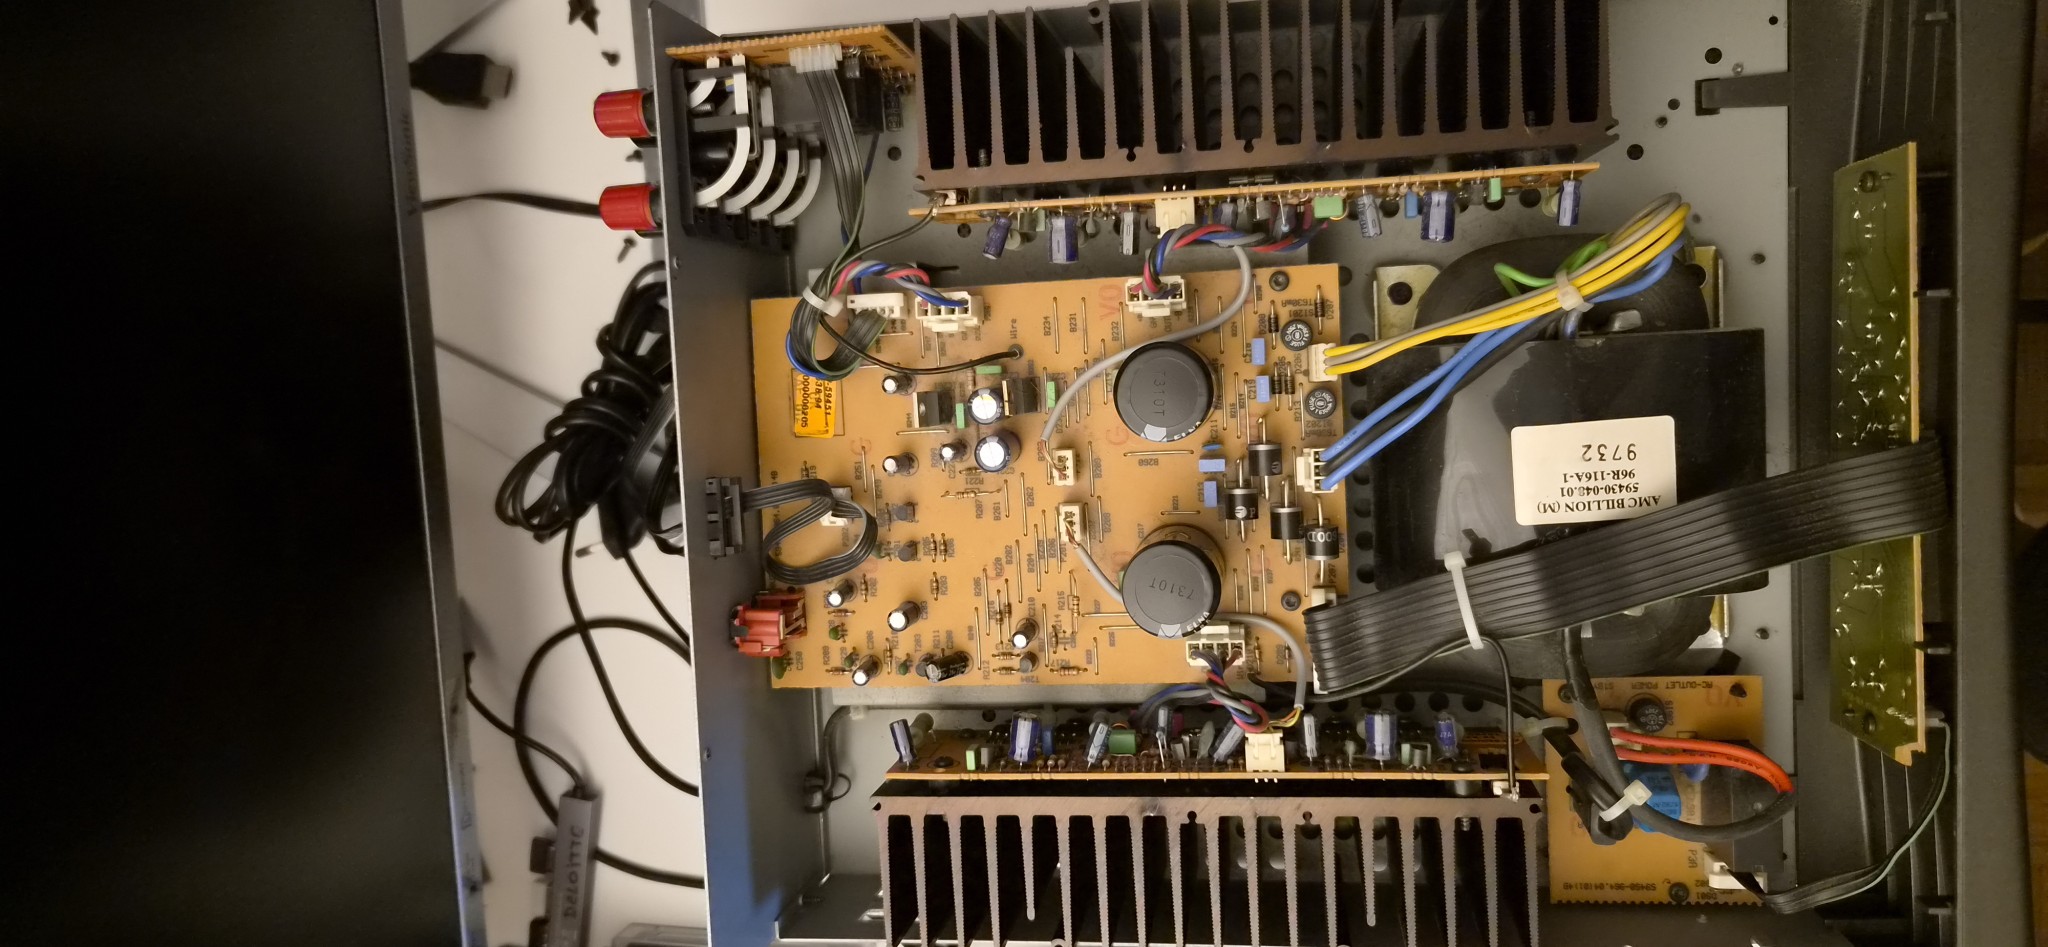
There are no fewer than four output transistors per channel, BDT64C and BDT65C Darlington.
Overall, the power amplifier is honestly and properly constructed.
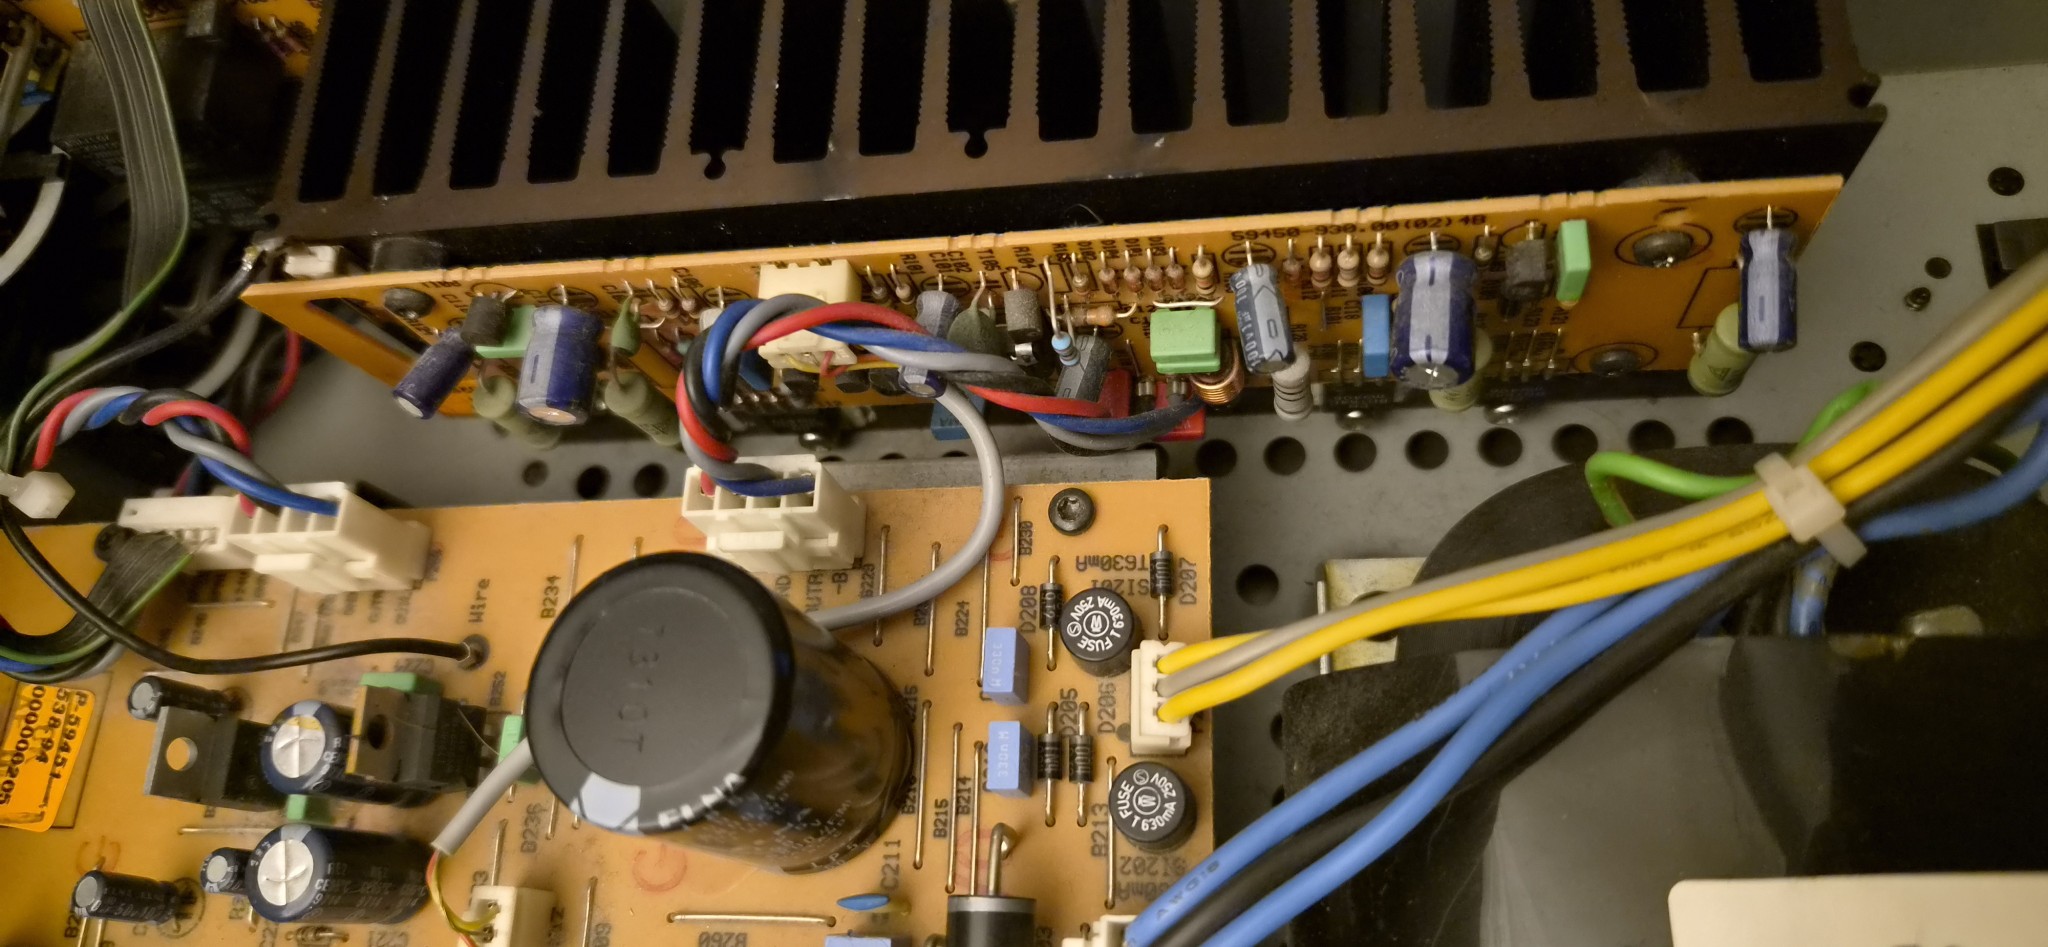
It is worth pointing out that both the pre-receiver and power amplifier run warm.
The power amplifier generally stays merely lukewarm, which isn’t a concern, but the pre-receiver can become quite hot, particularly when switched on while simultaneously charging the remote-control battery.
Both units have ventilation openings, although for some reason those on the power amplifier are louvred.
The pre-receiver heats up primarily around its rectification and voltage-regulation section. Some of its regulator circuits appear to me to deserve larger heatsinks, and I think this area could have been engineered somewhat better.
At one point I measured as much as 80°C on the rectifier diodes in one of the power-supply rails, and up to 50°C on the voltage regulators.
The ideal arrangement is therefore to keep both the power amplifier and pre-receiver at the top of their respective stacks, as shown in some promotional photographs, effectively creating two towers of two components each.
The cassette deck uses a standard ALPS mechanism, but in the version employing only one motor and a pair of electromagnetic actuators. This arrangement requires one belt and one idler.
This type of mechanism was quite common and is reliable, although it is certainly nothing exceptional in terms of quality.
But it does the job here.
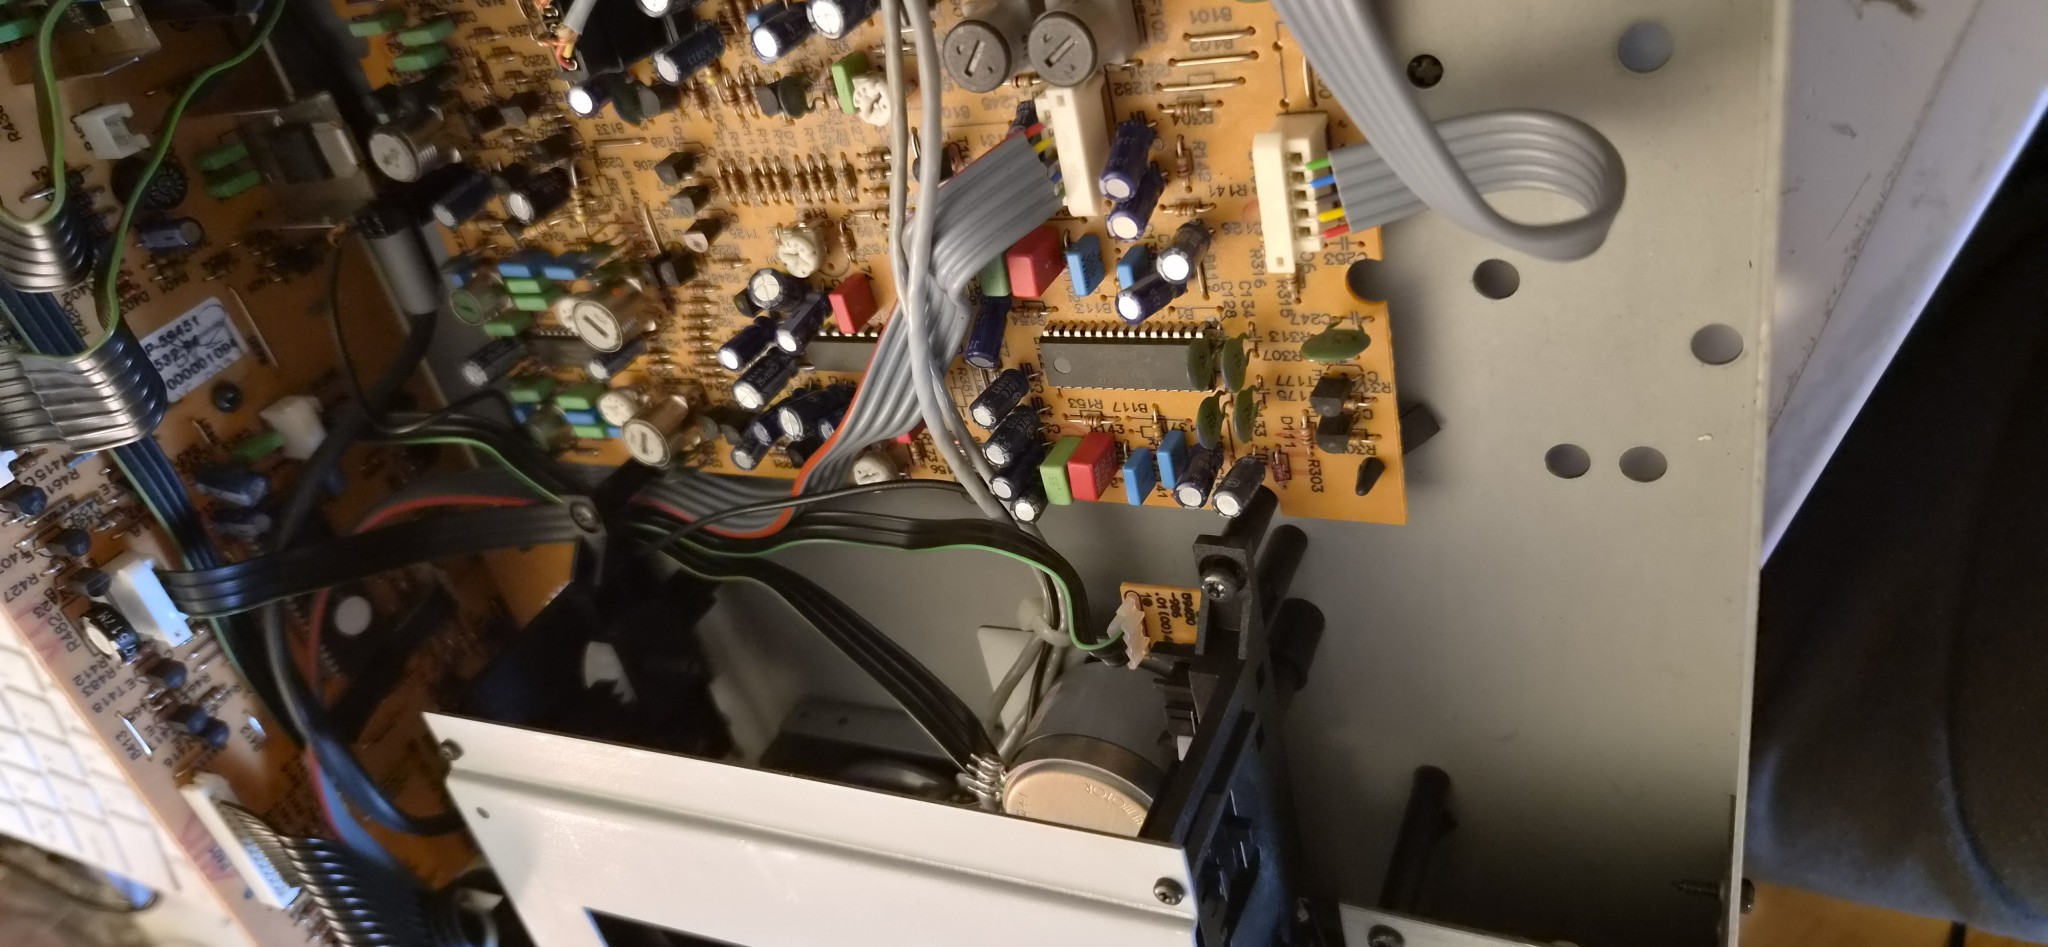
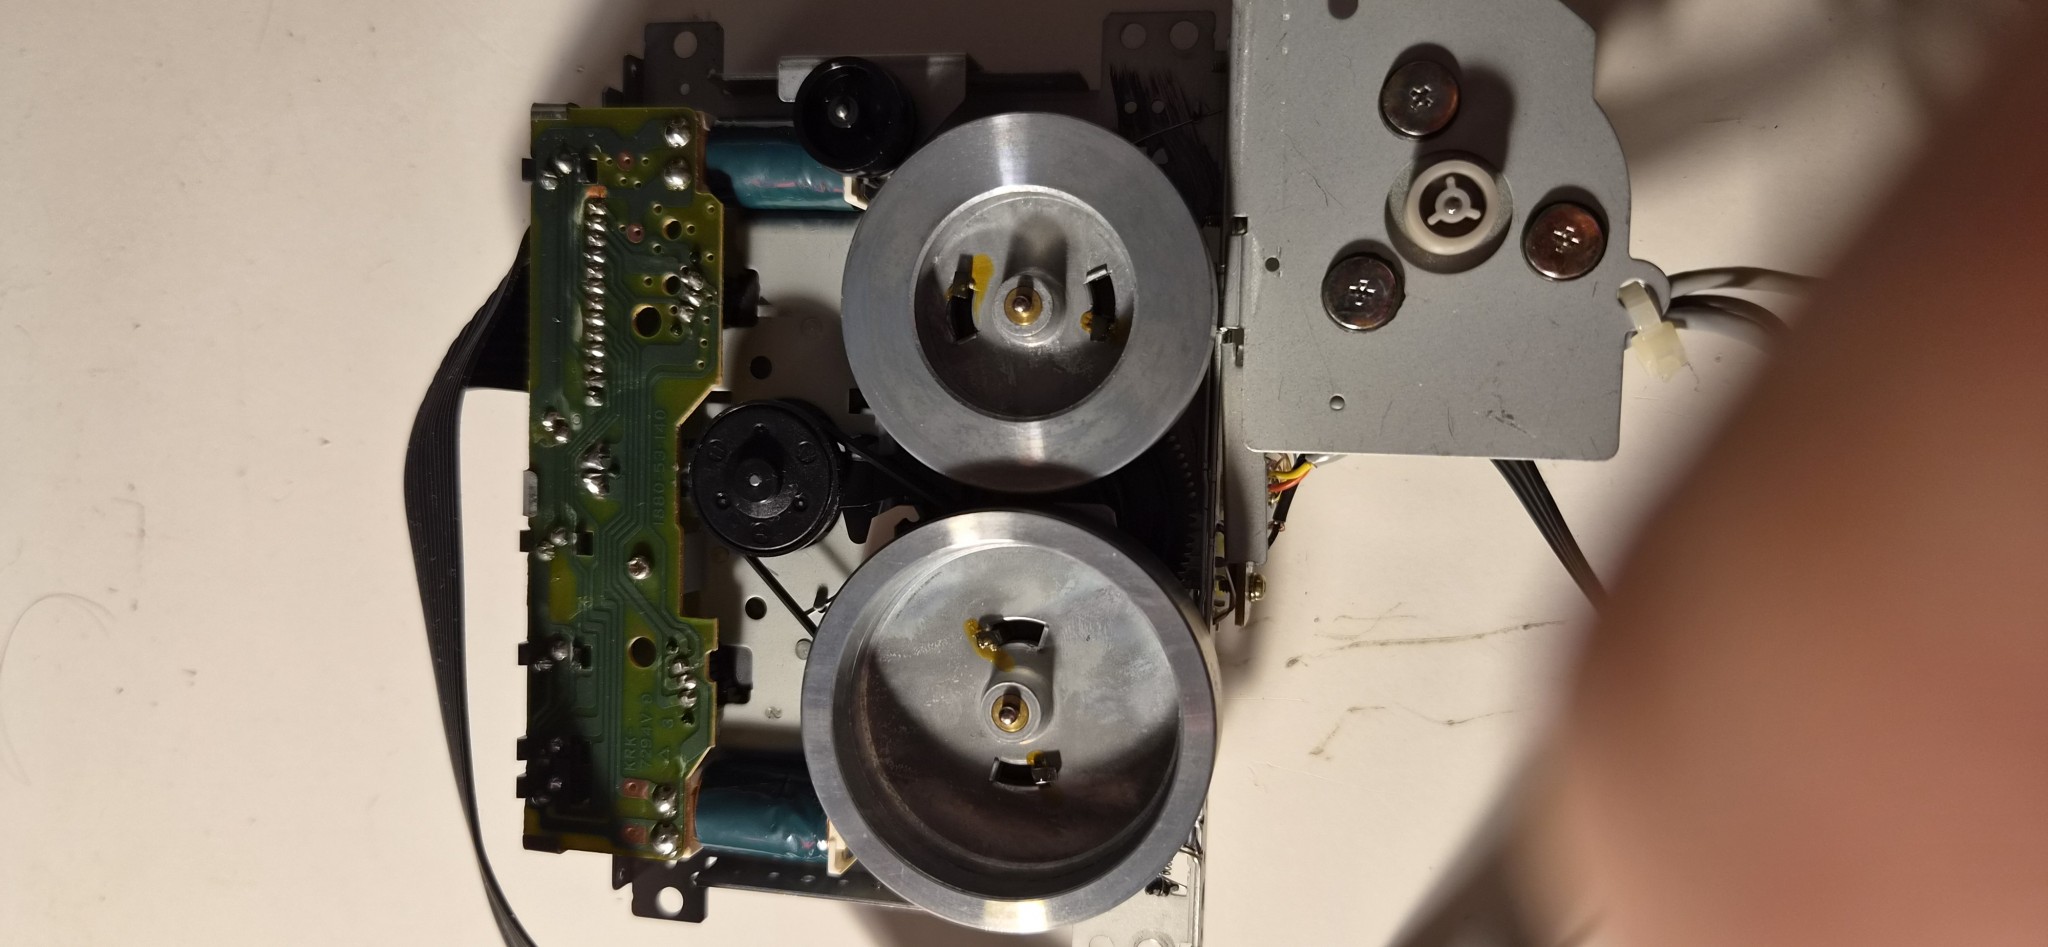
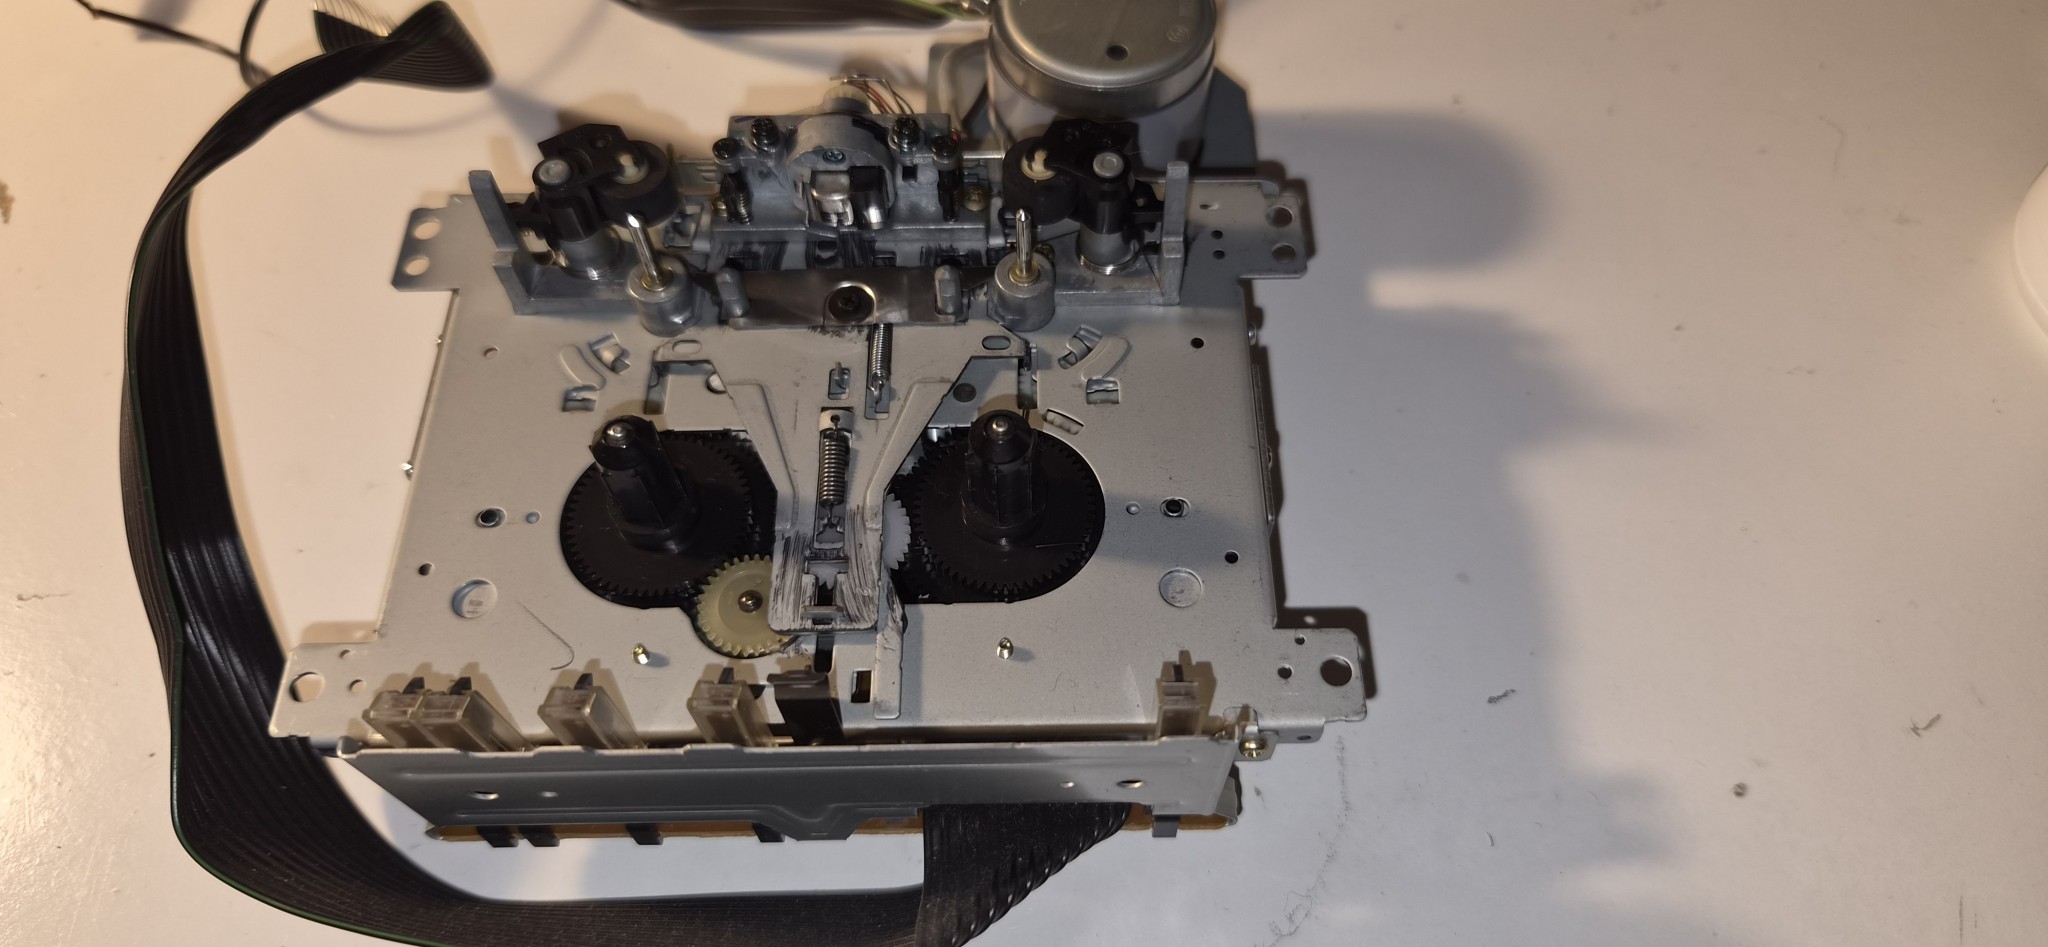
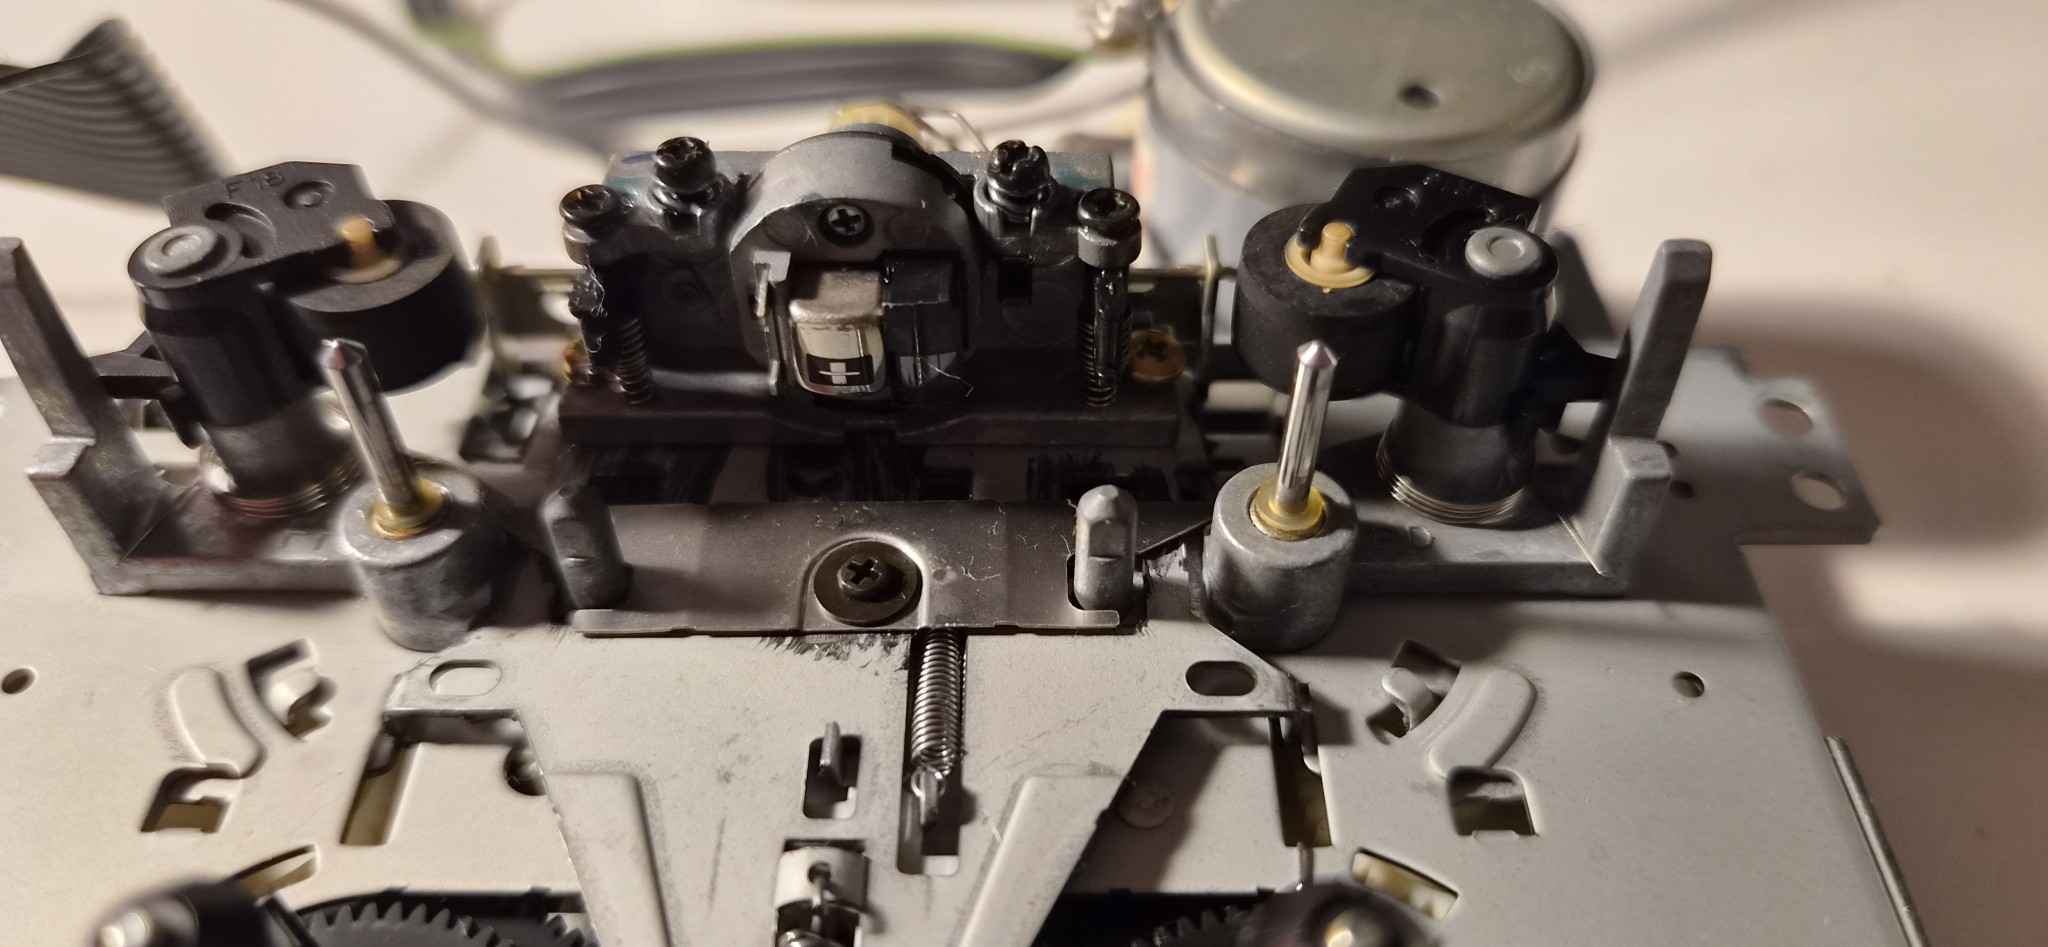
The CD player is based around a CDM12.1 pickup, coupled to the interesting TDA1545A DAC.
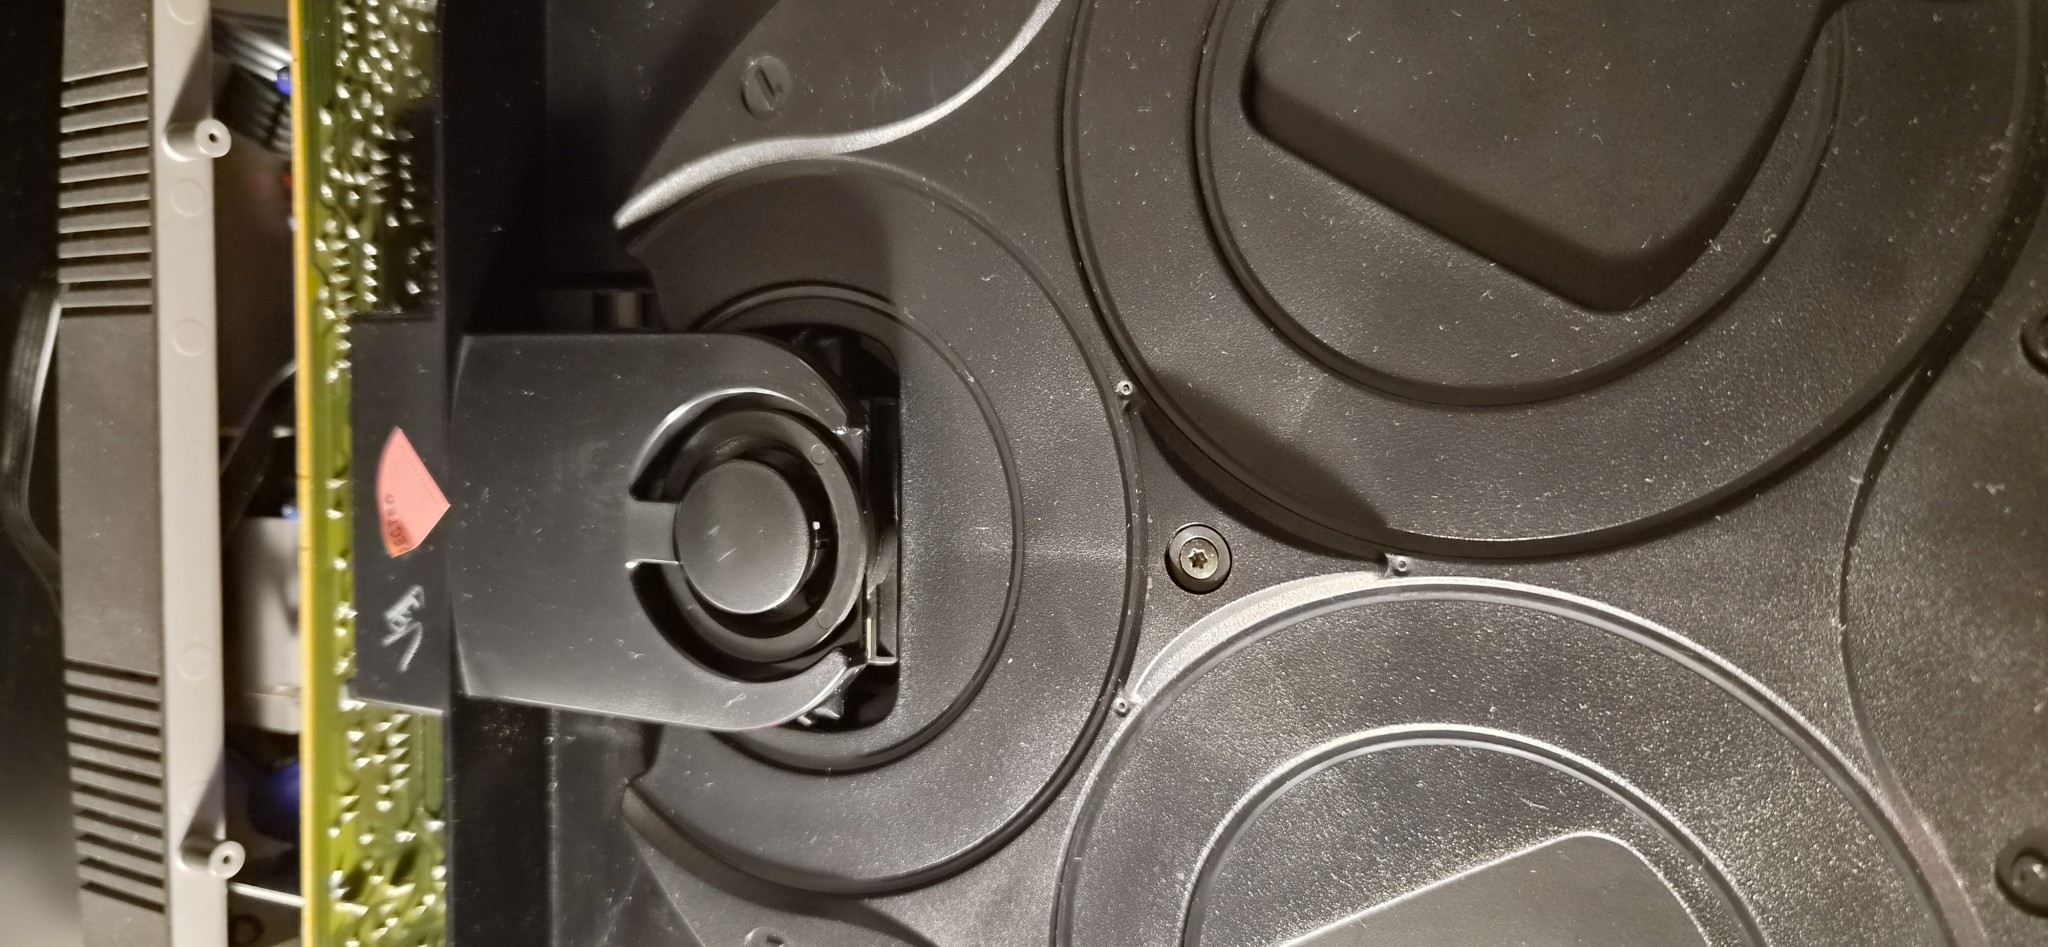
This was an inexpensive Philips DAC employing the company’s so-called Continuous Calibration system, intended to improve resistance to ageing and temperature variations. The underlying design also eliminates zero-crossing distortion.
Interestingly, the TDA1545A developed something of a reputation in its day for sounding unexpectedly good considering its low price, and consequently became popular in DIY projects.
The player contains two main circuit boards, as was common in Philips-based designs.
The decoder, an SAA7378, and the TDA1545A DAC sit beneath the mechanism, while a board at the rear contains the rectifiers, voltage regulators and the microcontroller responsible for controlling the player.
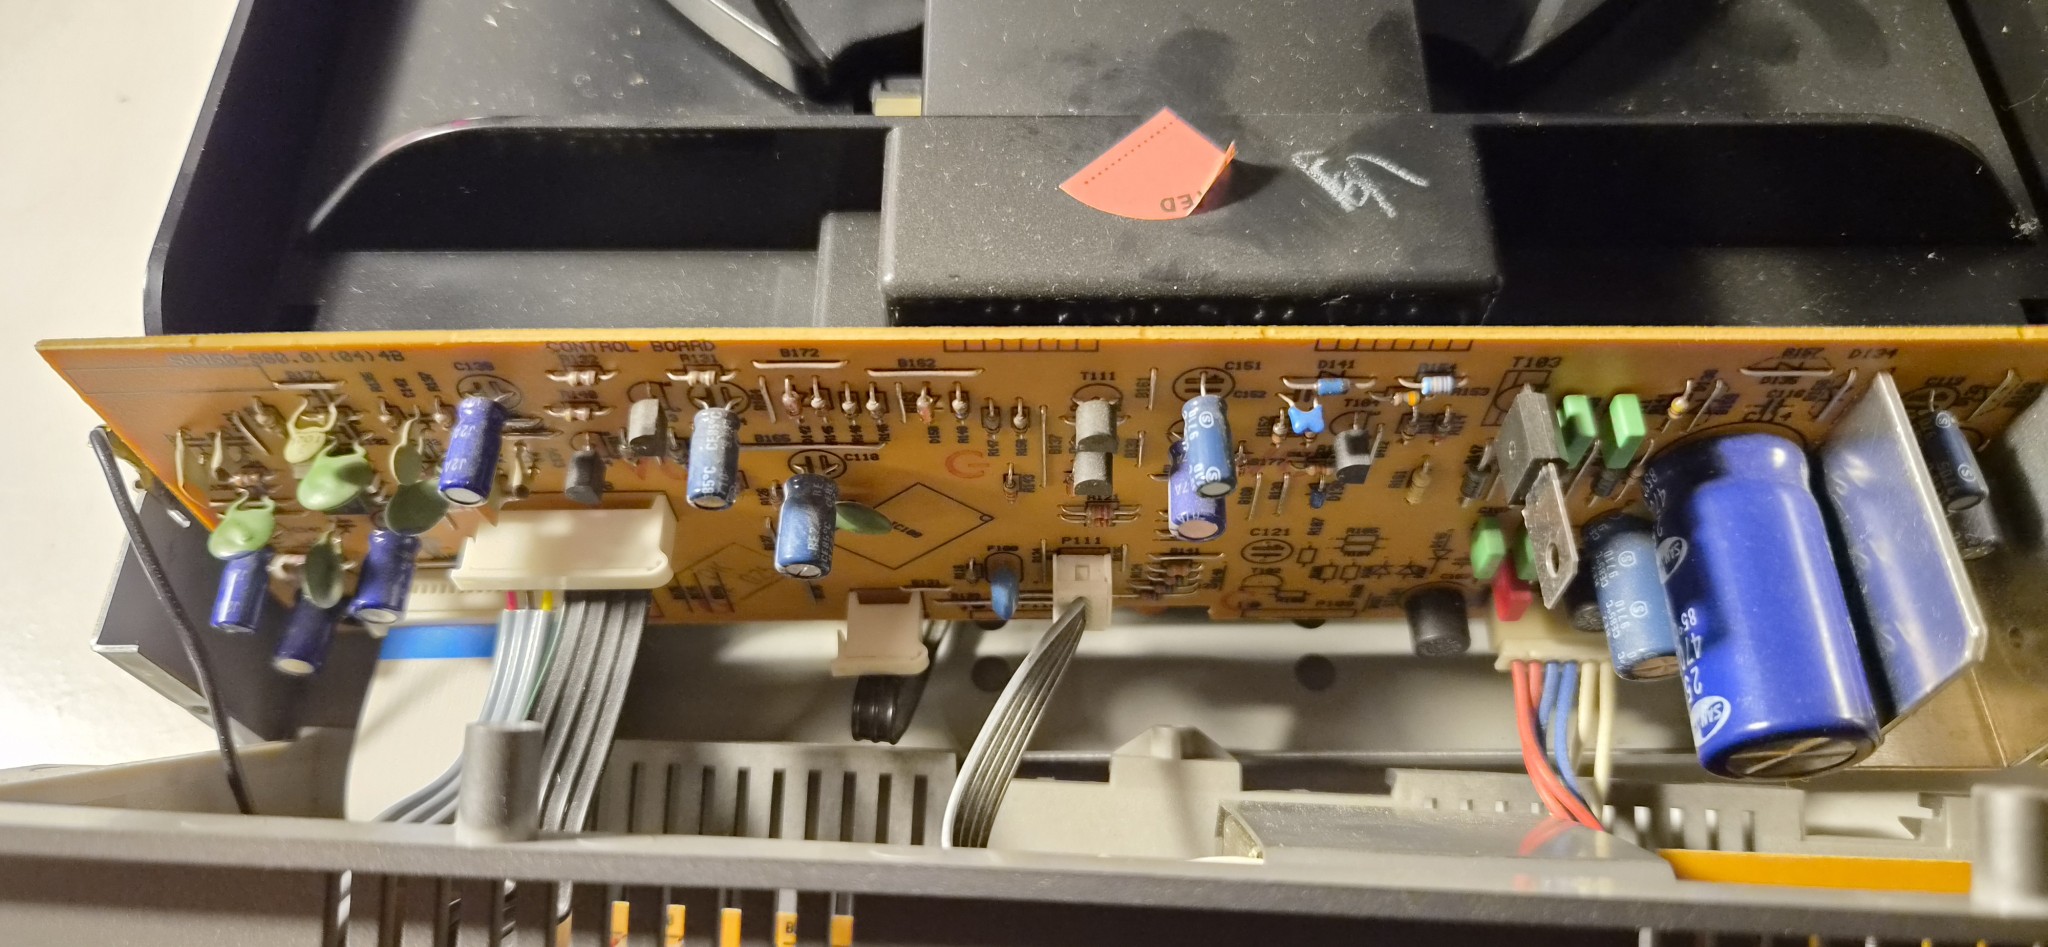
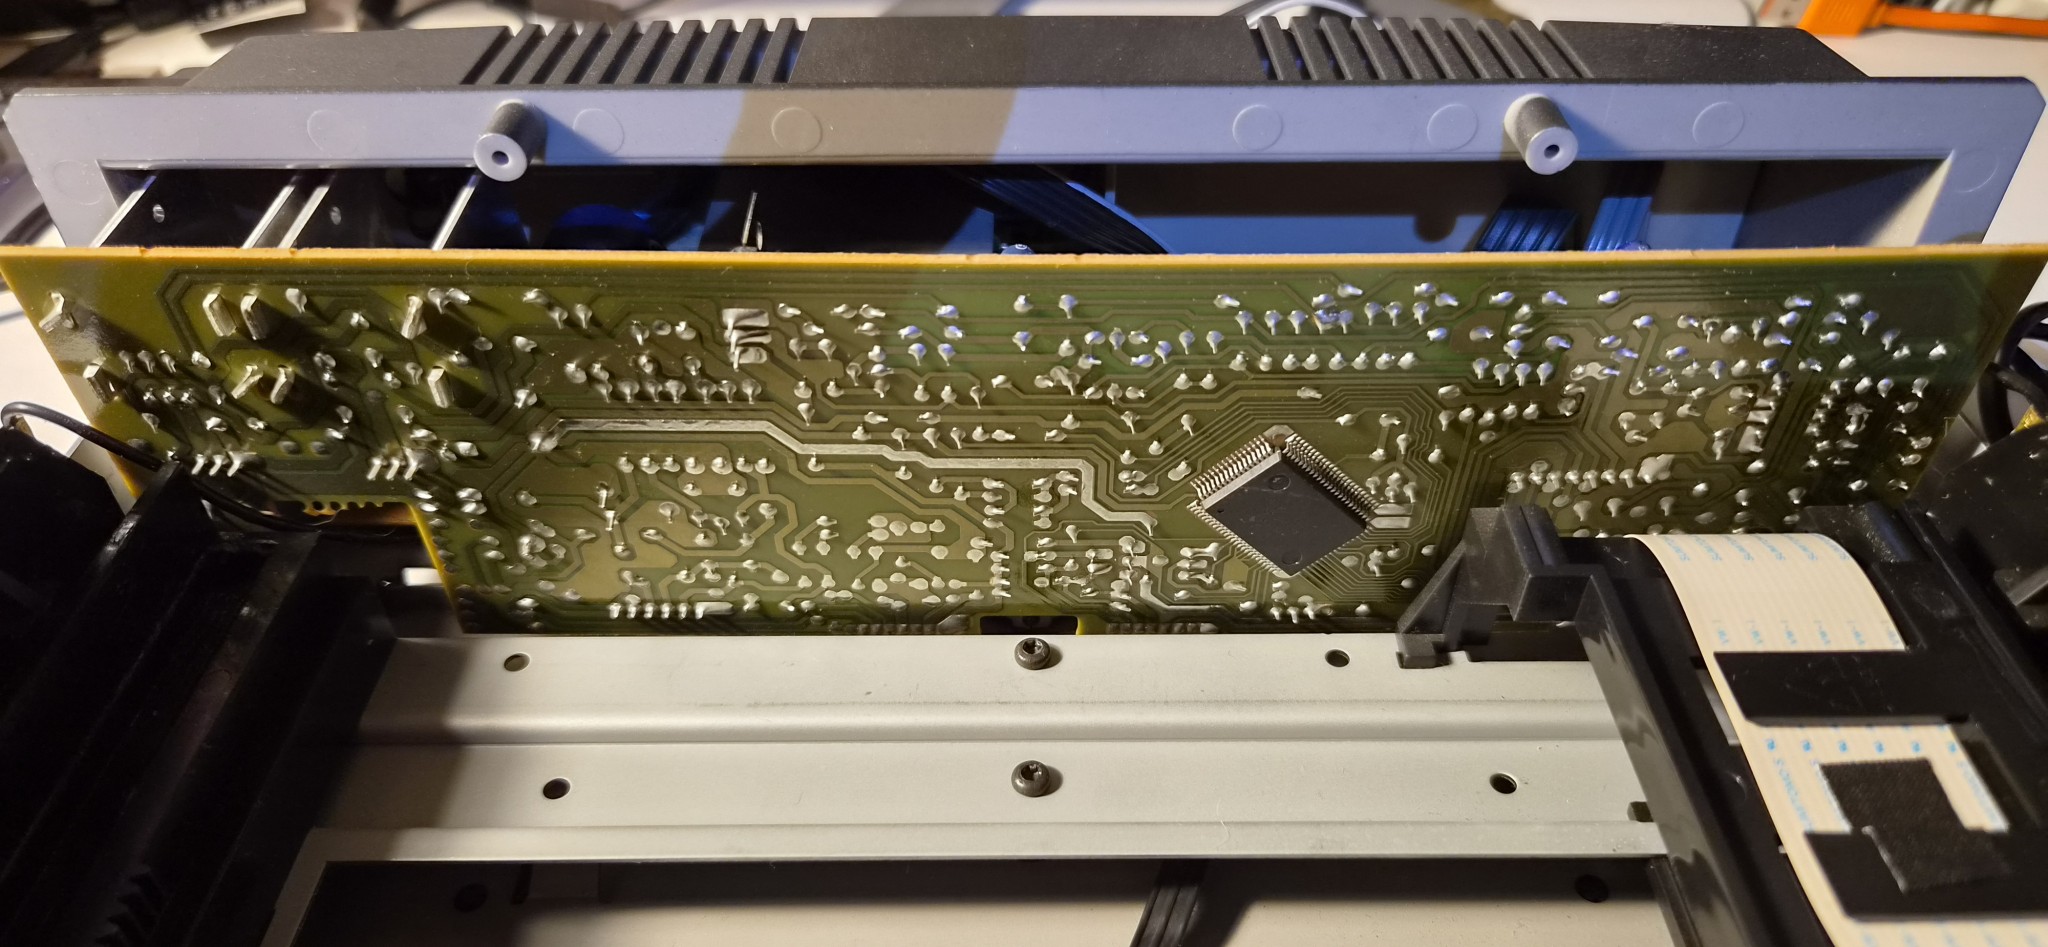
The output of the DAC chip goes directly to the audio output, with no I/V conversion stage or buffer whatsoever.
Repair
The system I bought arrived complete with its original loudspeakers and, apart from the speakers showing some signs of transportation damage, was in very good condition.
Of the four plastic tabs that secure the pre-receiver’s front panel to its cover, I discovered that three had broken.
I managed to glue two of them successfully and permanently. I had no such luck with the third and eventually gave up.
The pre-receiver itself was fairly dusty, so I cleaned it as thoroughly as I could without dismantling it. The power amplifier was somewhat cleaner, while the remaining components were moderately dusty, but nothing alarming.
The cassette deck still had its original belt, which was right at the limit of acceptable performance, so I replaced it.
It’s not particularly pleasant to work on, which is often the case with decks using horizontal cassette loading because of the mechanism required to handle loading and ejection.
The CD player merely required cleaning, including the laser lens, and that was that.
Further testing revealed that the tuner had poor reception. Even the stations it could receive wouldn’t switch into stereo and no RDS information was displayed.
I spent a little time aligning it and afterwards it worked beautifully.
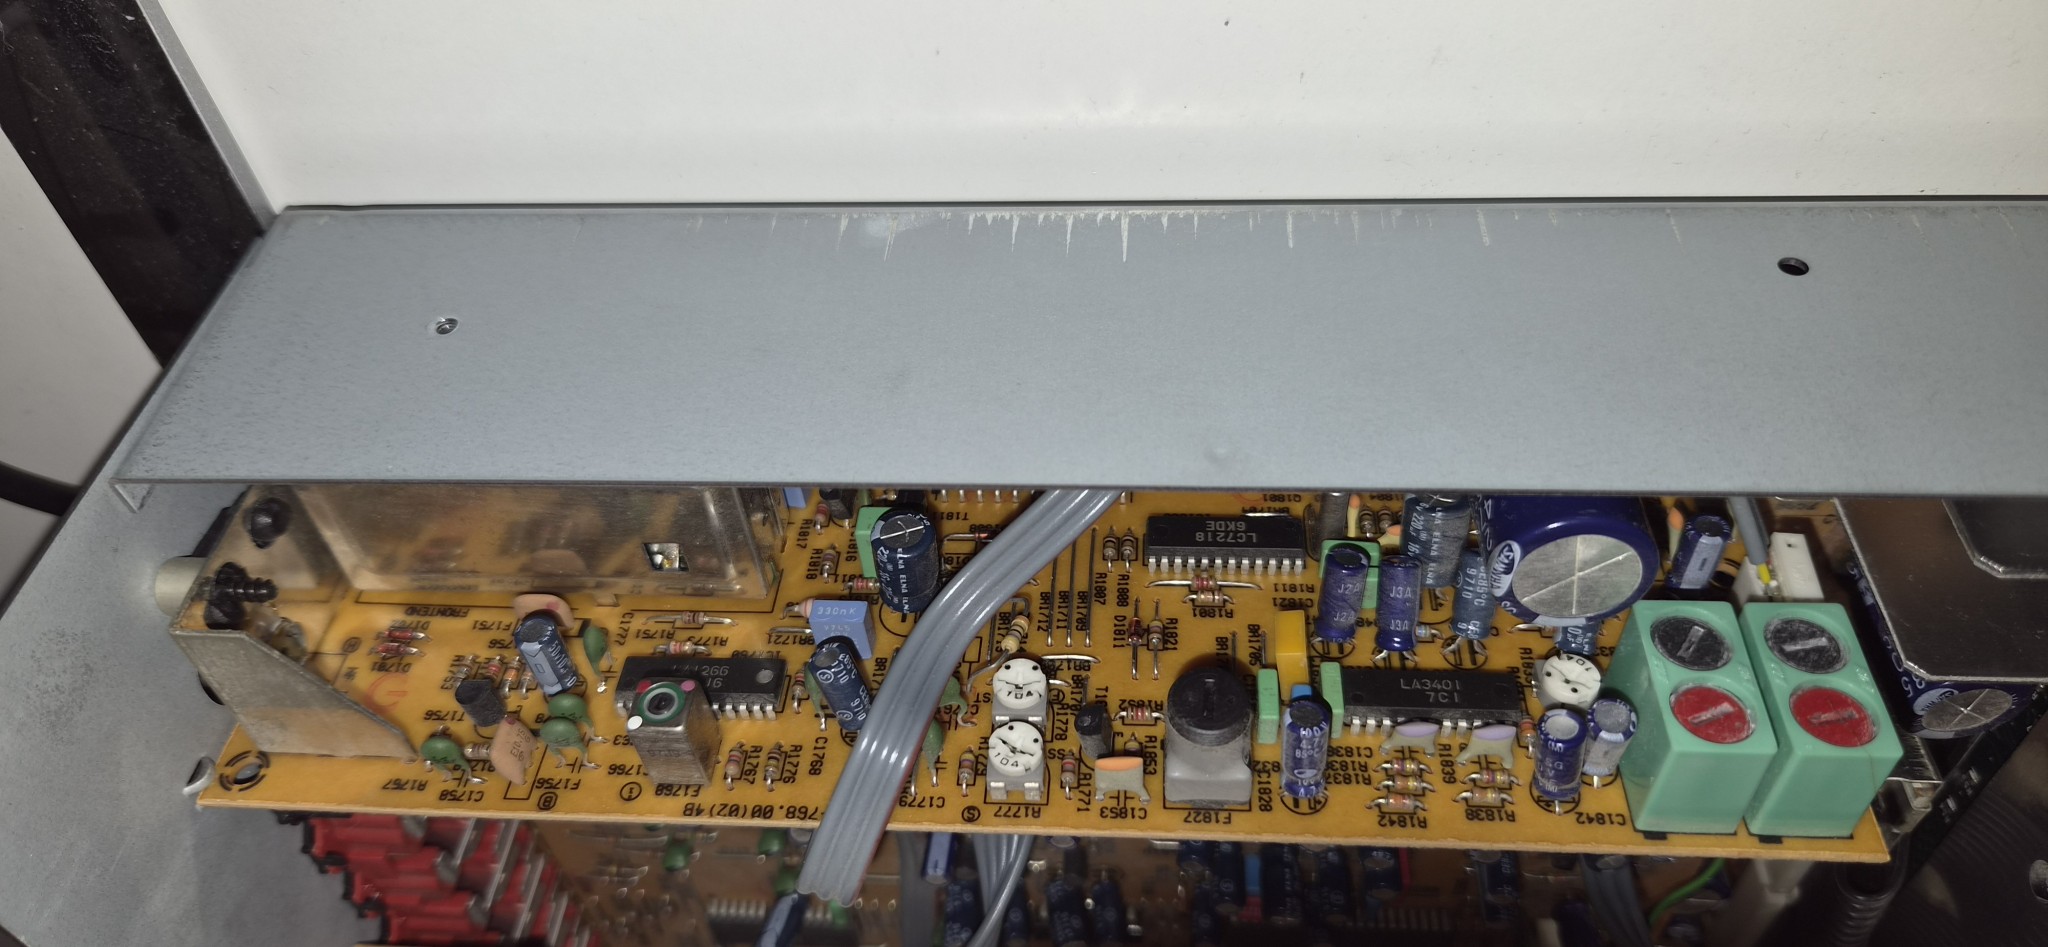
After replacing the cassette deck belt, I noticed that tape speed was slightly high, although I hadn’t measured it before replacing the belt. Azimuth was also incorrect in one direction.
I additionally aligned the deck for TDK D tape. I didn’t have any BASF cassettes handy, which are what Grundig equipment was usually aligned for, and I didn’t have time to search through countless boxes for one.
The adjustments required were quite minor, suggesting that the deck had originally been aligned well at the factory and had retained its settings surprisingly well over the years.
In the end, it sounded noticeably better than I had expected.
Then I reached the hardest part:
replacing the battery in the remote control.
This may sound ridiculous, but I didn’t know what type of batteries had originally been used, how many cells there were, or even which pin on the connector was positive and which was negative.
Someone had apparently removed the original battery, presumably intending to replace it, then failed to find a suitable replacement and simply left the remote that way.
I managed to trace the connection between one battery connector and one connector on the base, the pre-receiver, since the remote receives power plus another signal through four contacts on its underside when docked.
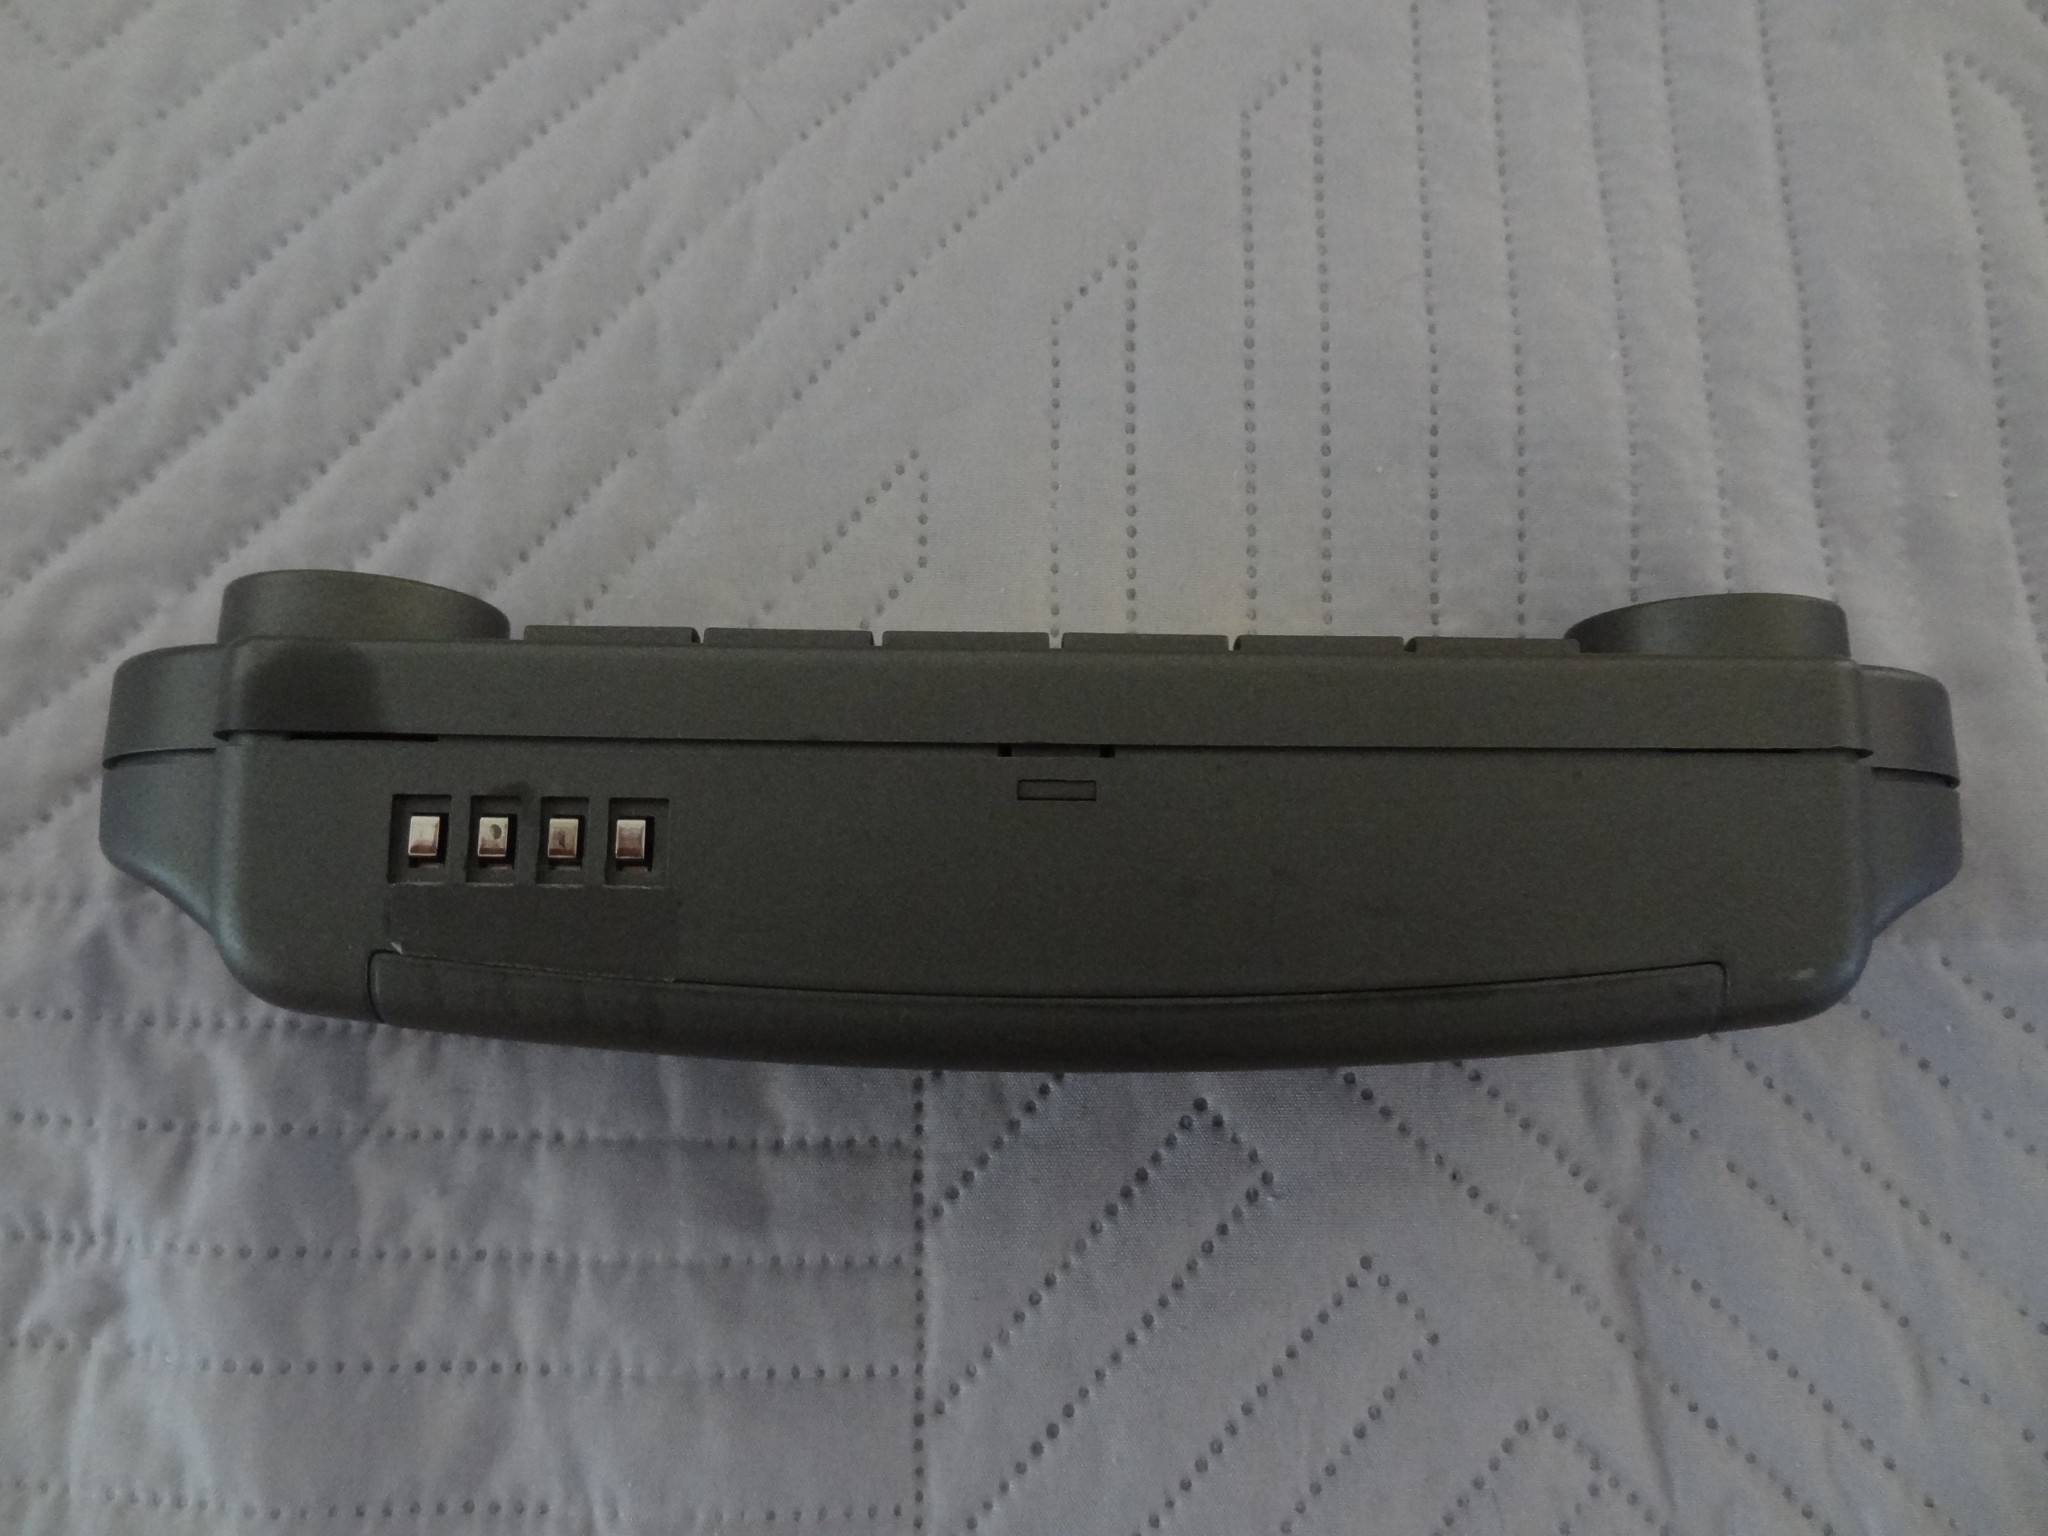
I concluded that the remote itself, including battery charging, operated from a 4 V supply, generated by the aforementioned large “top-hat” MJE2955 transistor inside the pre-receiver.
I then concluded, almost certainly but incorrectly, that the system charged two NiCd or NiMH cells. Two such cells in series can reach around 2.8 V at maximum charge, leaving approximately 1.2 V of potential difference to produce charging current.
I dismantled the remote. You have to be somewhat careful, but it’s perfectly serviceable. It certainly wasn’t designed to prevent disassembly, and everything inside is actually very neatly organized, unlike some other products.
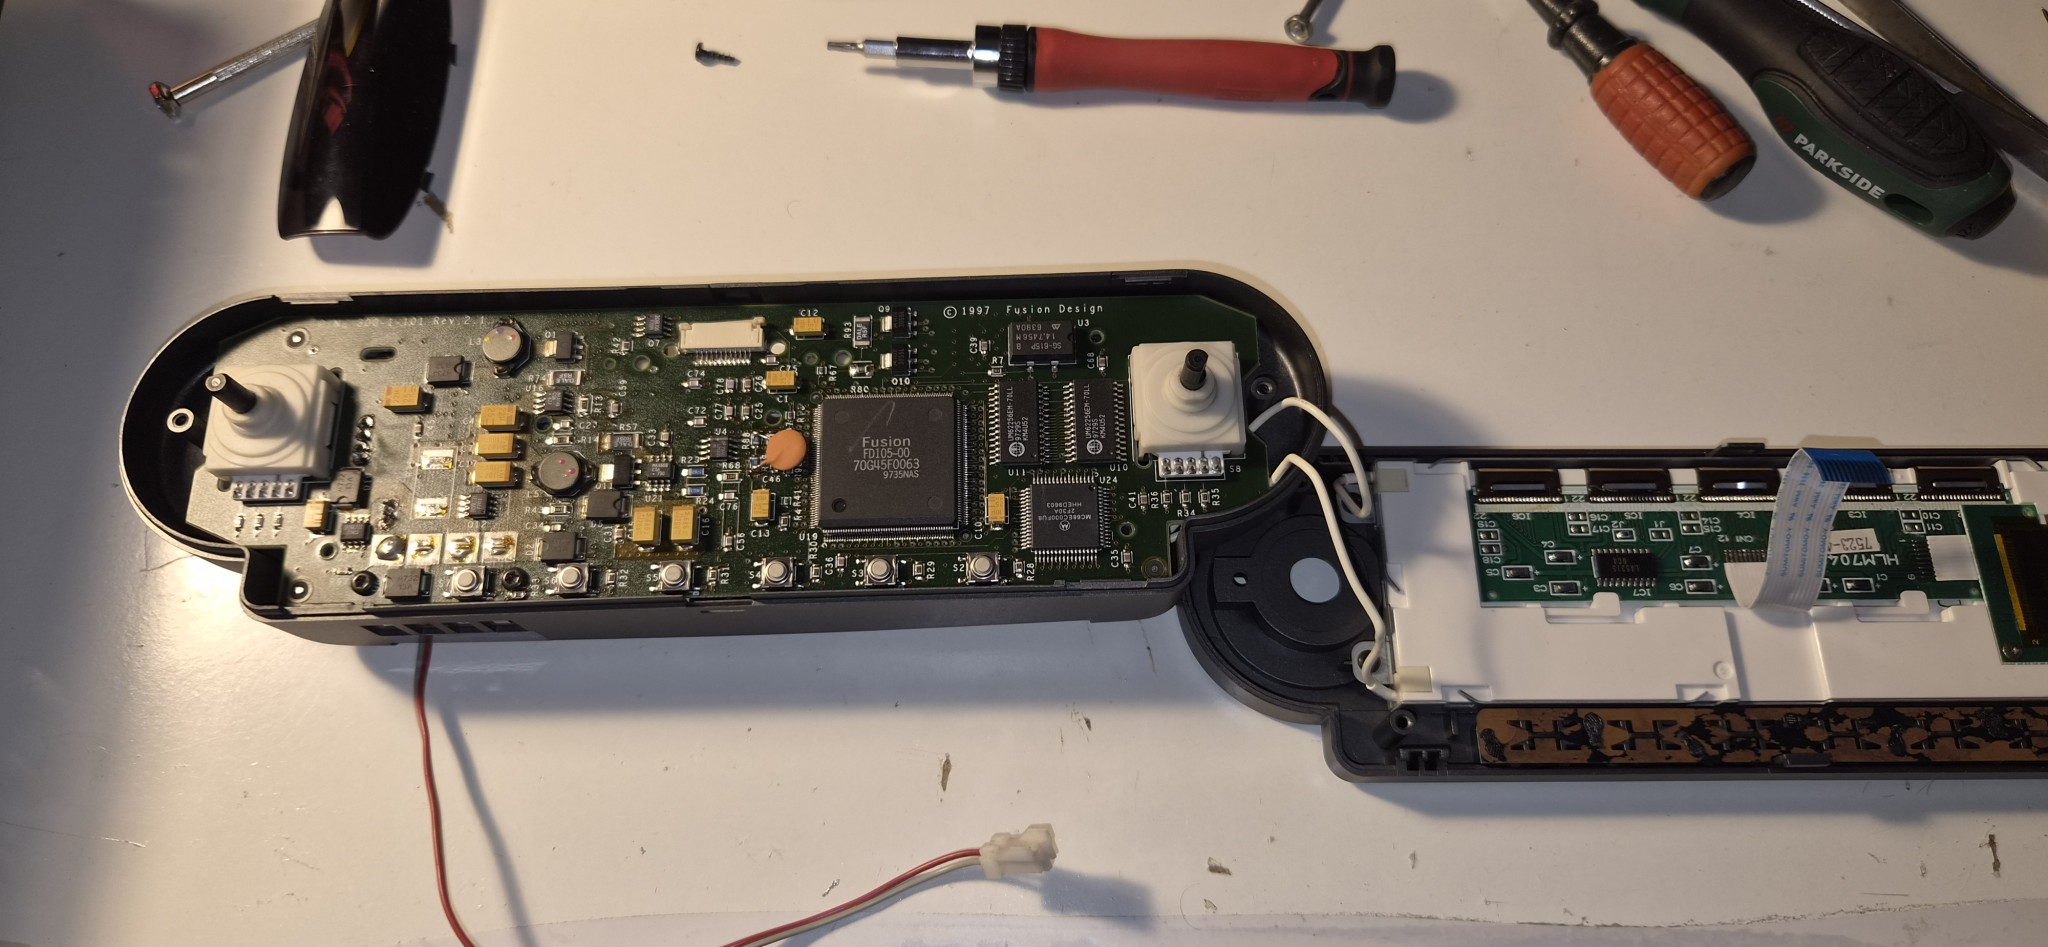
I desoldered the original connector and soldered in two wires, securing them with adhesive, so that I could connect a holder for two AA cells.
I had considerable difficulty finding and buying a suitable holder, but I wanted an elegant solution.
To make everything fit, I had to remove several plastic retainers from the cover.
I regret that now…
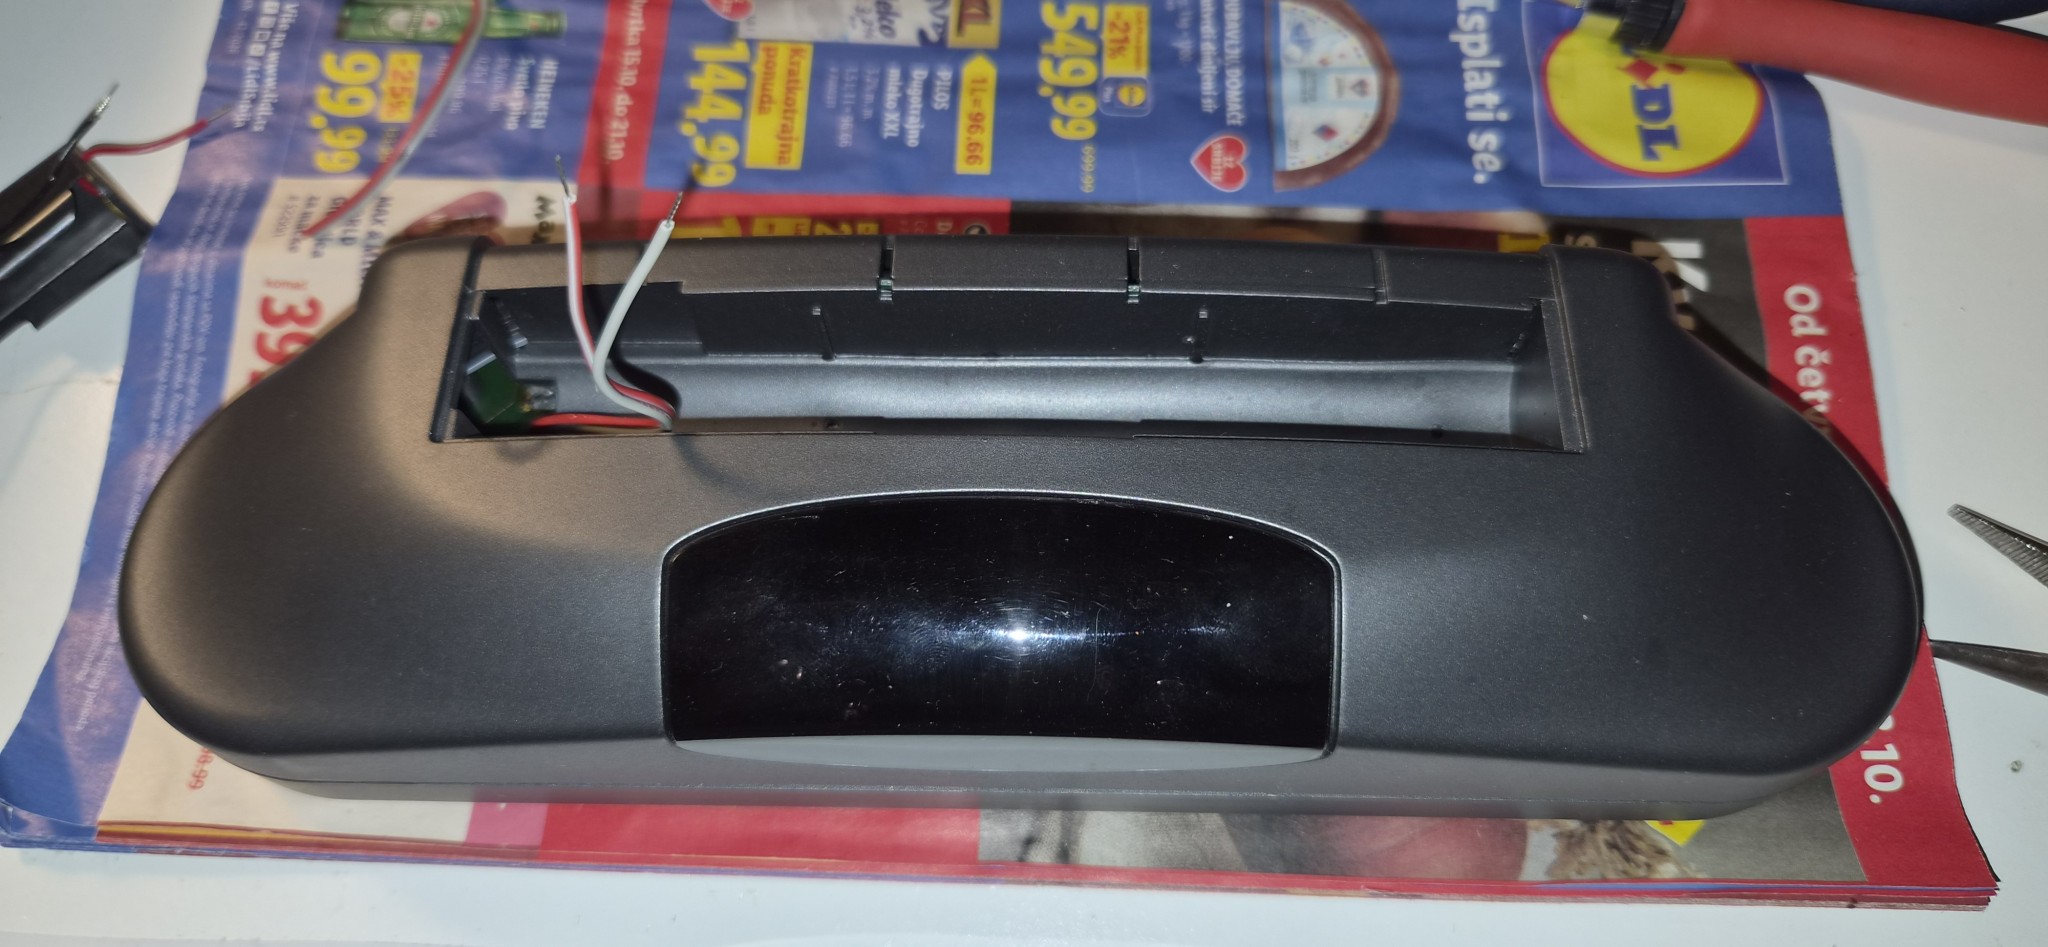
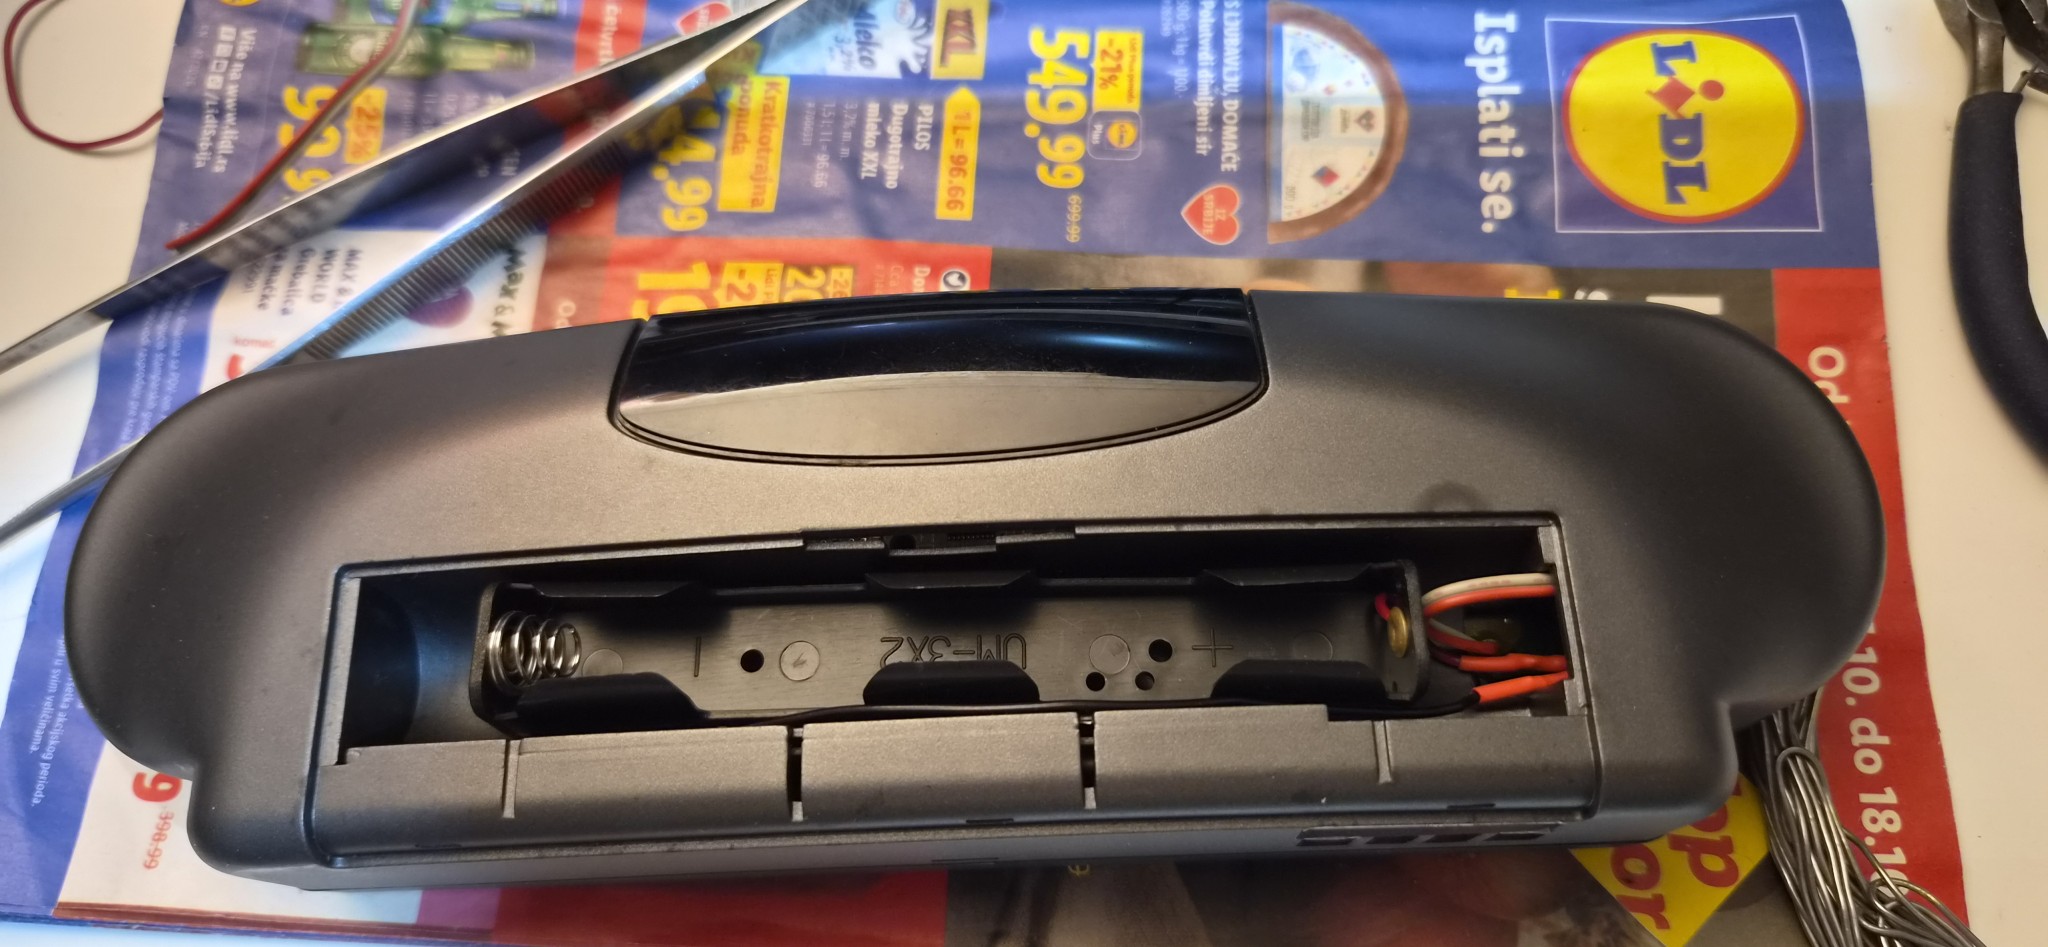
After finishing everything and carefully reassembling the remote, I inserted the batteries.
It didn’t start immediately because the remote first has to be placed into the cradle of a powered-up pre-receiverin order to initialize.
Then everything came to life.
The batteries, which I had deliberately inserted discharged, although I also tested fully charged ones, appeared to behave normally. Everything worked and the batteries were charging.
But alas…
After one night, I noticed that the remote was becoming very warm.
I checked the batteries.
They were scorching hot, deformed, their printed plastic sleeves had split, and one had even leaked slightly.
I’m lucky they didn’t explode. Horrible!
And I’m lucky the whole thing didn’t burn out.
I then constructed a measurement setup and somehow managed to insert wires so that I could measure the charging current.
It turned out to be around 770 mA, falling only slightly even when the batteries were fully charged.
In other words, the cells were being continuously overcharged and overheated.
The other possibility was to try three cells, but because of the available space they had to be AAA batteries.
During my experiments with three cells, the remote suddenly began displaying a “low battery” warning, even though it was docked and should have been receiving power from the pre-receiver while simultaneously charging the batteries.
And then everything went silent.
The remote died.
And so did the pre-receiver, which could no longer be switched on, although I could see that it was attempting communication via the infrared LEDs.
“Oh dear, Zoran. What have you done?”
I gave the receiver a quick check but couldn’t find anything obvious. I couldn’t even reach the lower power-supply board easily.
I called a friend of mine, an outstanding audio technician, but Voja was ill.
So I decided I’d have to try fixing it myself.
Whatever happened, happened.
I dismantled the pre-receiver and began tracing the fault.
I discovered that the remote’s 4 V supply had disappeared.
Tracing it led me to the large “top-hat” transistor, which now received only 2.2 V and naturally couldn’t produce 4 V at its output.
To trace the circuit further, I had to dismantle the entire pre-receiver completely.
That meant removing twenty screws or thereabouts.
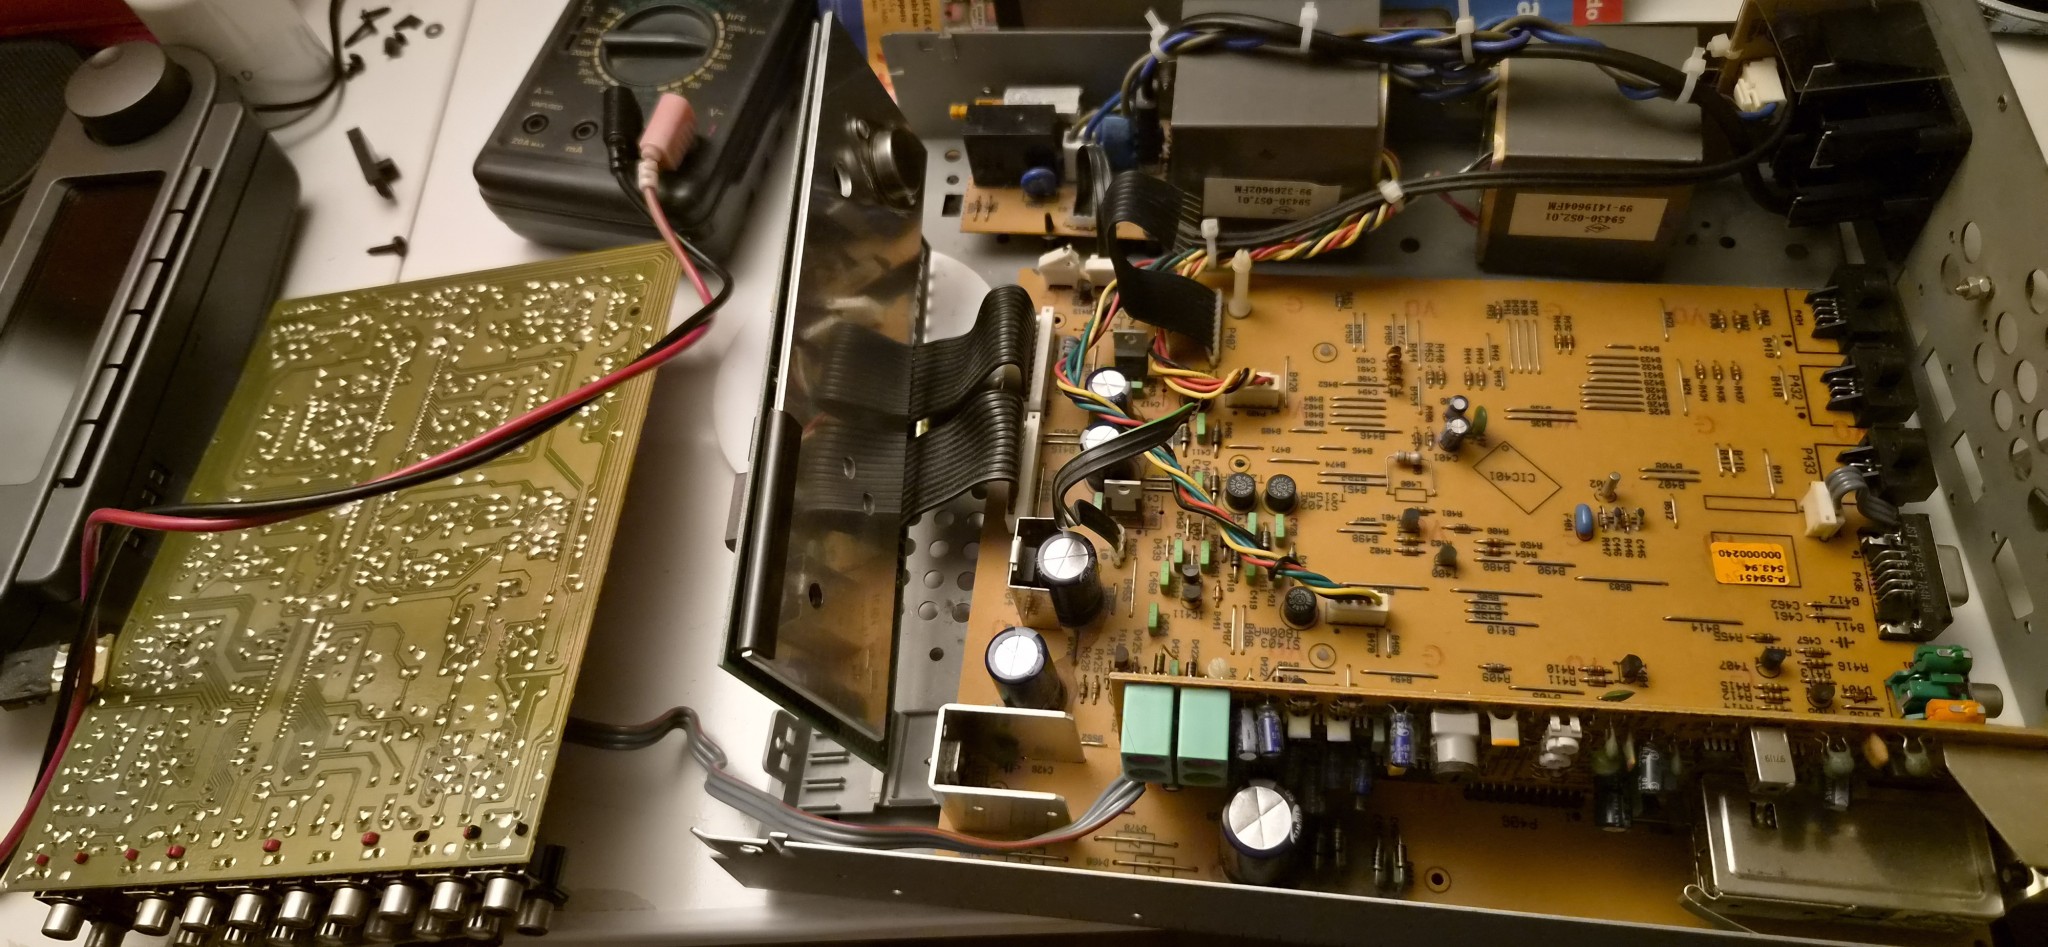
I located the rail supplying the “top-hat” transistor and noticed that its voltage rose extremely slowly with no load connected.
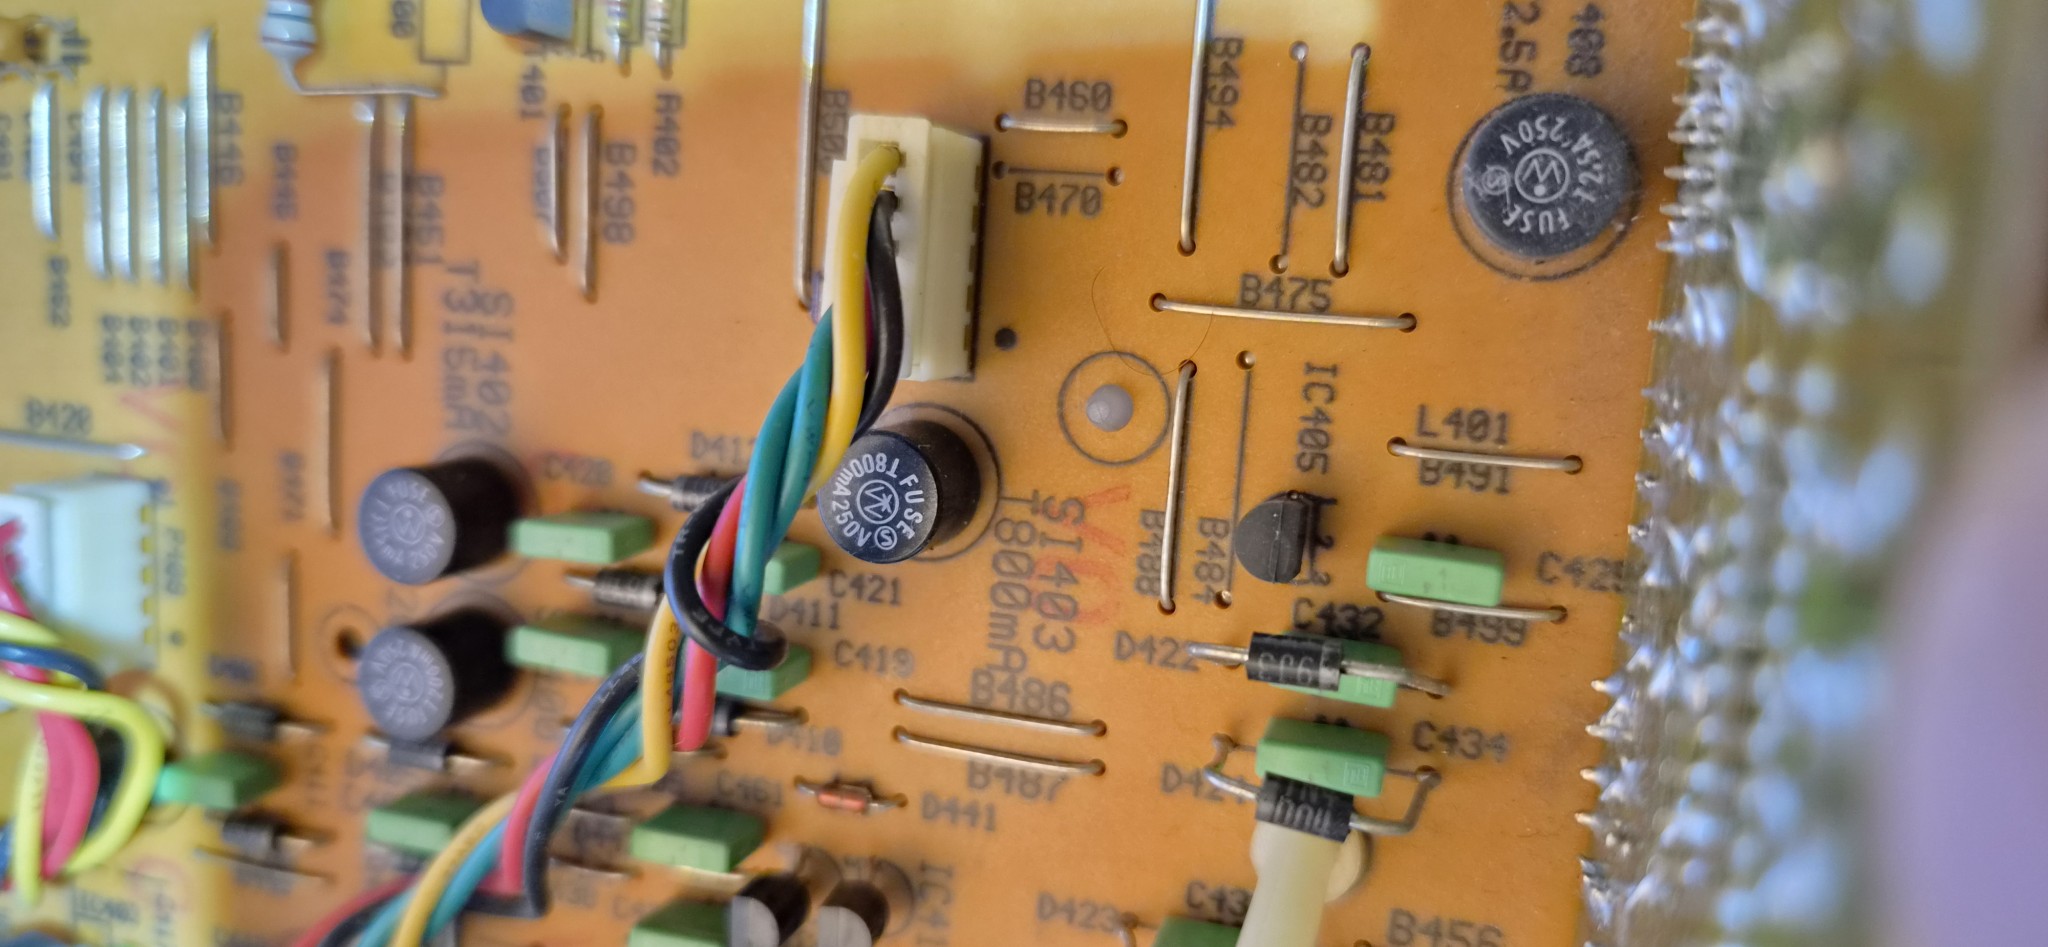
The rail was powered from one of the transformer’s secondary windings through a surprisingly hefty 2.5 A fuse, but the fuse itself was fine.
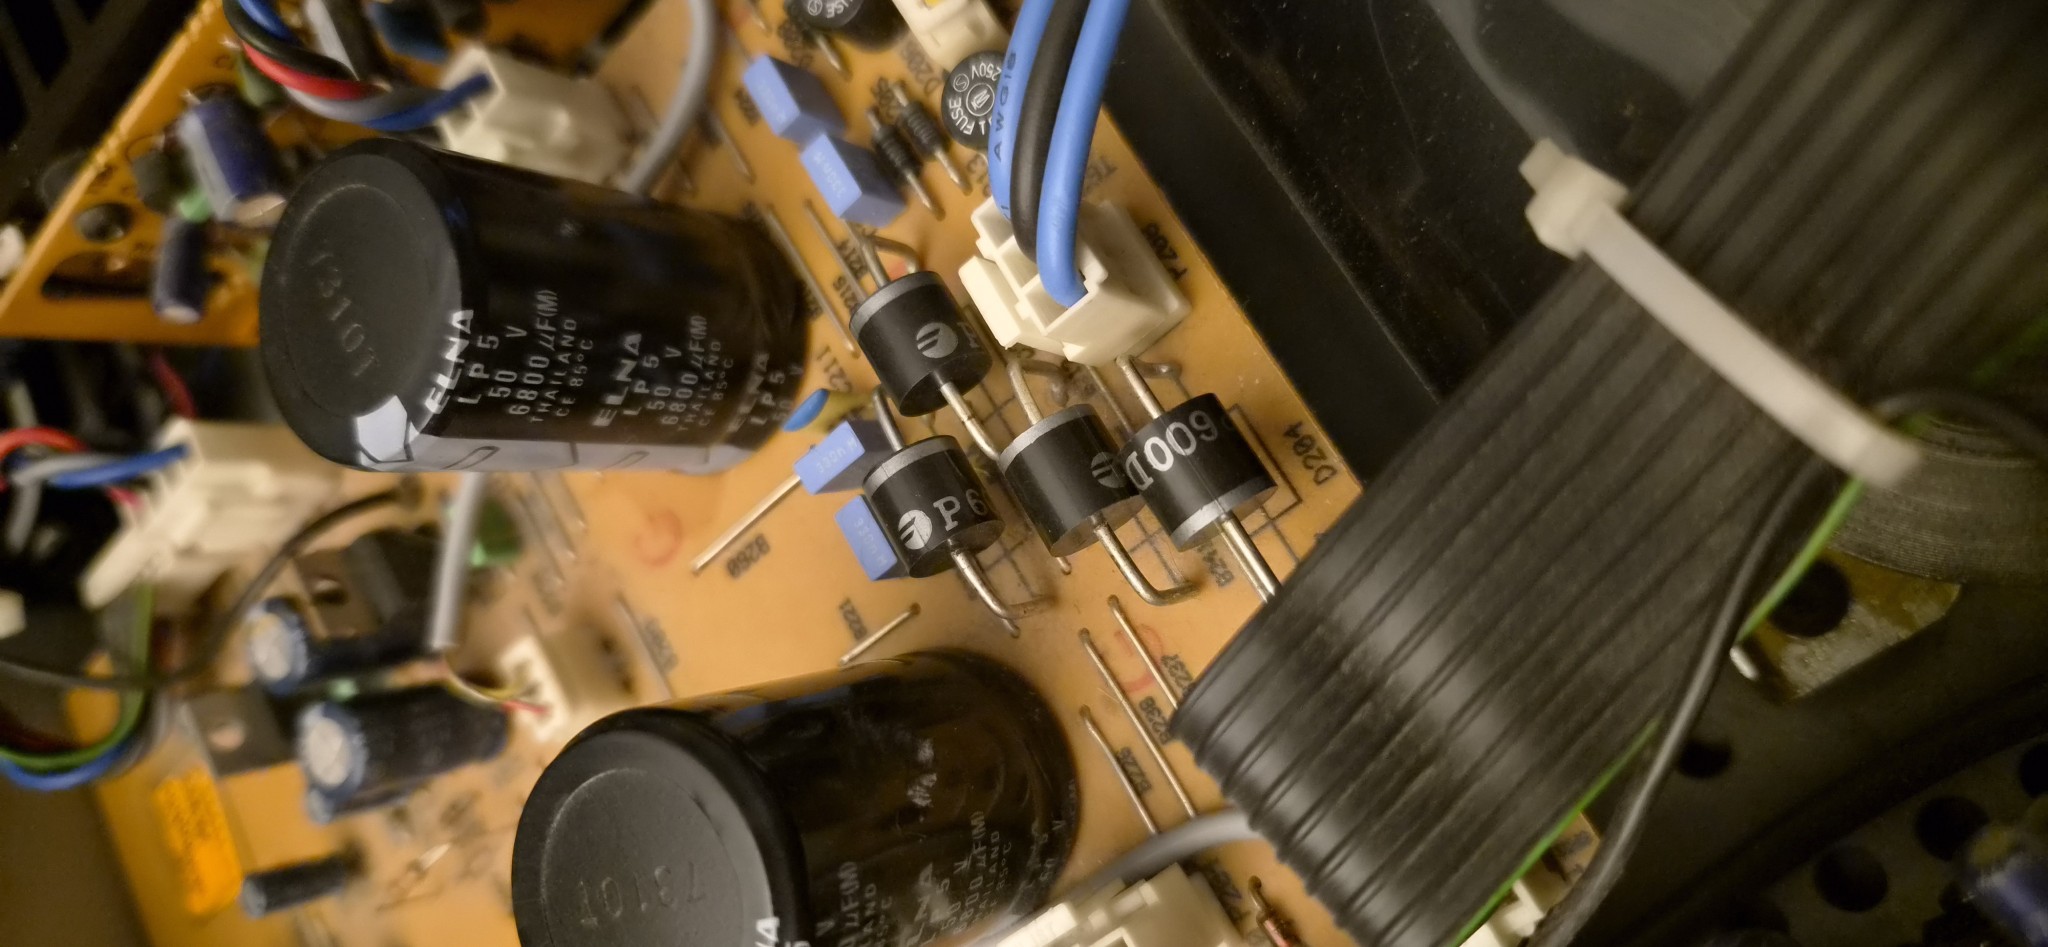
You can see it right at the bottom of the photo:
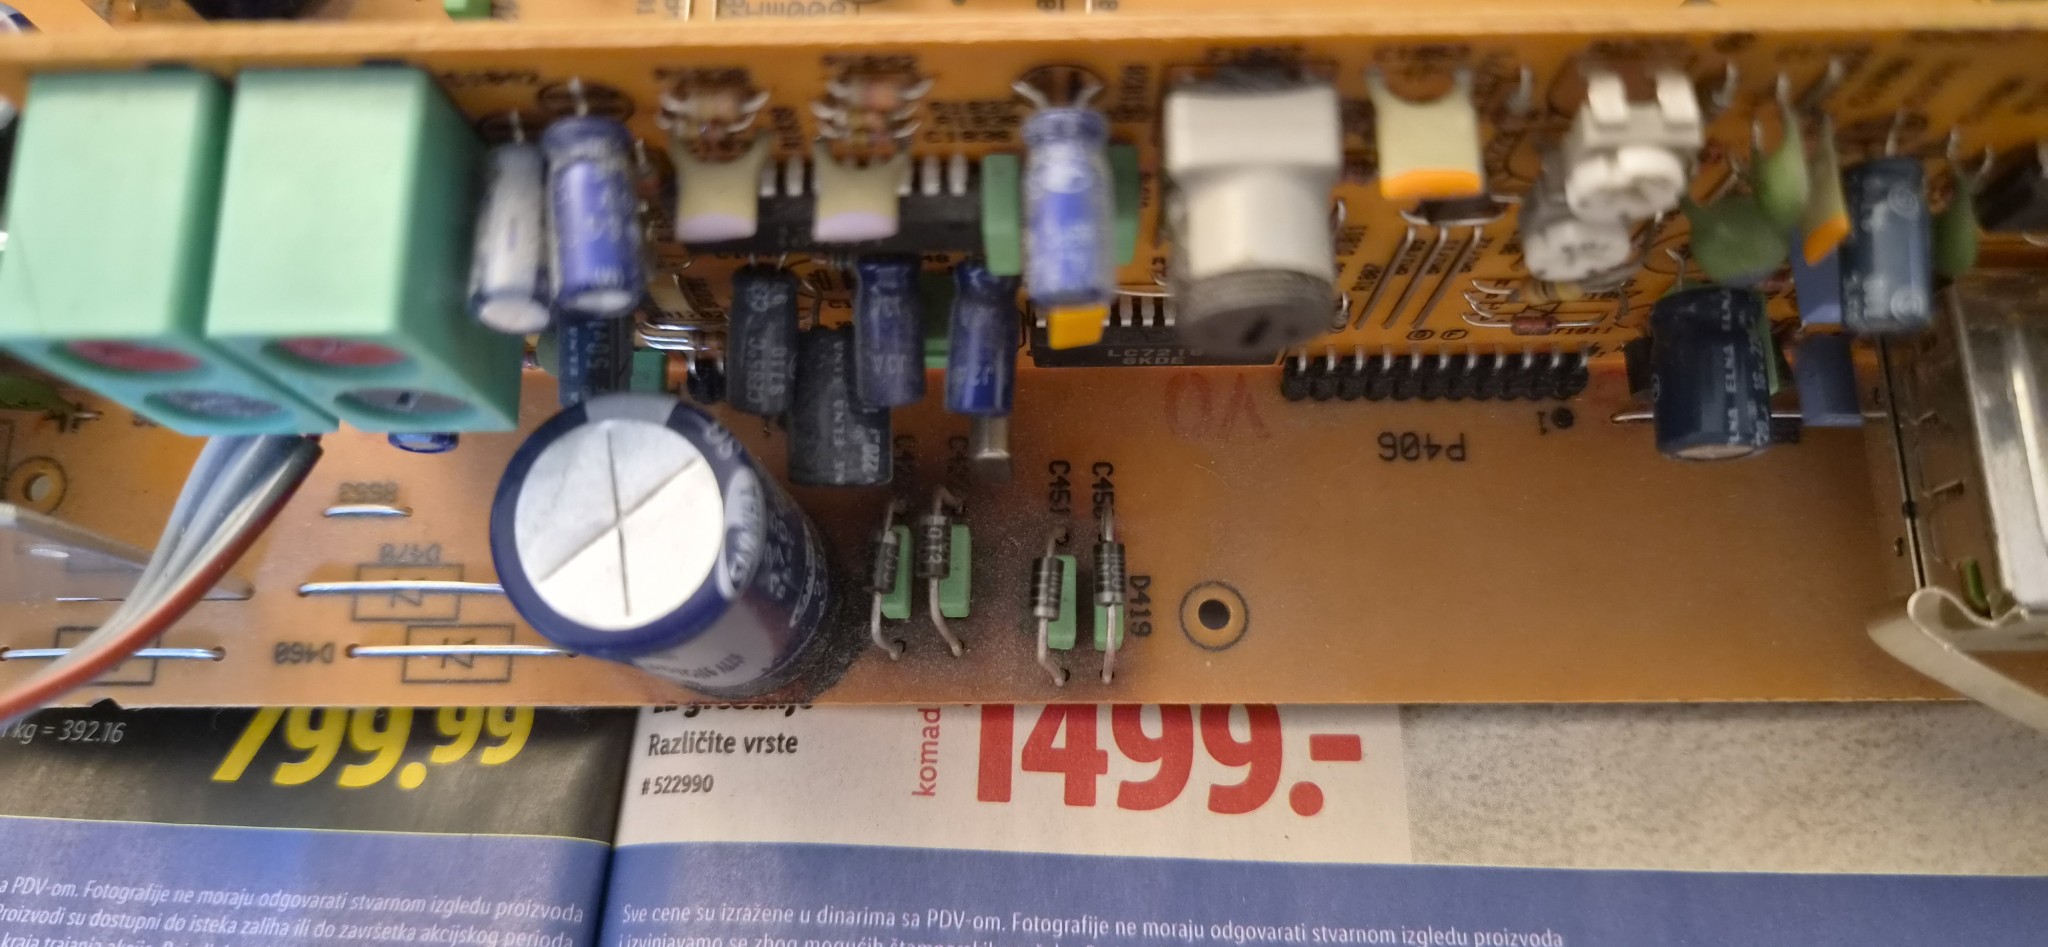
Eventually, I compared the rise of AC and DC voltage around the rectifier circuit. It’s a standard bridge rectifier comprising four diodes and a 4,700 µF capacitor.
When switched on, the AC voltage rose almost instantly to around 10 V, whereas the DC output crawled upwards for more than half a minute.
I decided to replace the diodes.
I couldn’t read their markings in circuit, but they looked like members of the 1N400x family. Once removed, they turned out to be 1N4004s, rated at only 1 A.
I replaced them with appropriately specified fast Philips diodes rated at 2 A. Since there is already a fuse upstream, it will protect the transformer in the event of failure, while the 2 A diodes should operate under less stress than the original 1N4004s.
After removing them, I discovered that two of the four 1N4004s had gone open-circuit.
The capacitor was actually still good, but I replaced it anyway.
Here’s the simple rectifier circuit before replacement: the large capacitor and four diodes on the horizontal circuit board.
Then came reassembly and testing.
The “top-hat” transistor was once again receiving 12 V at its input and delivering 4 V at its output.
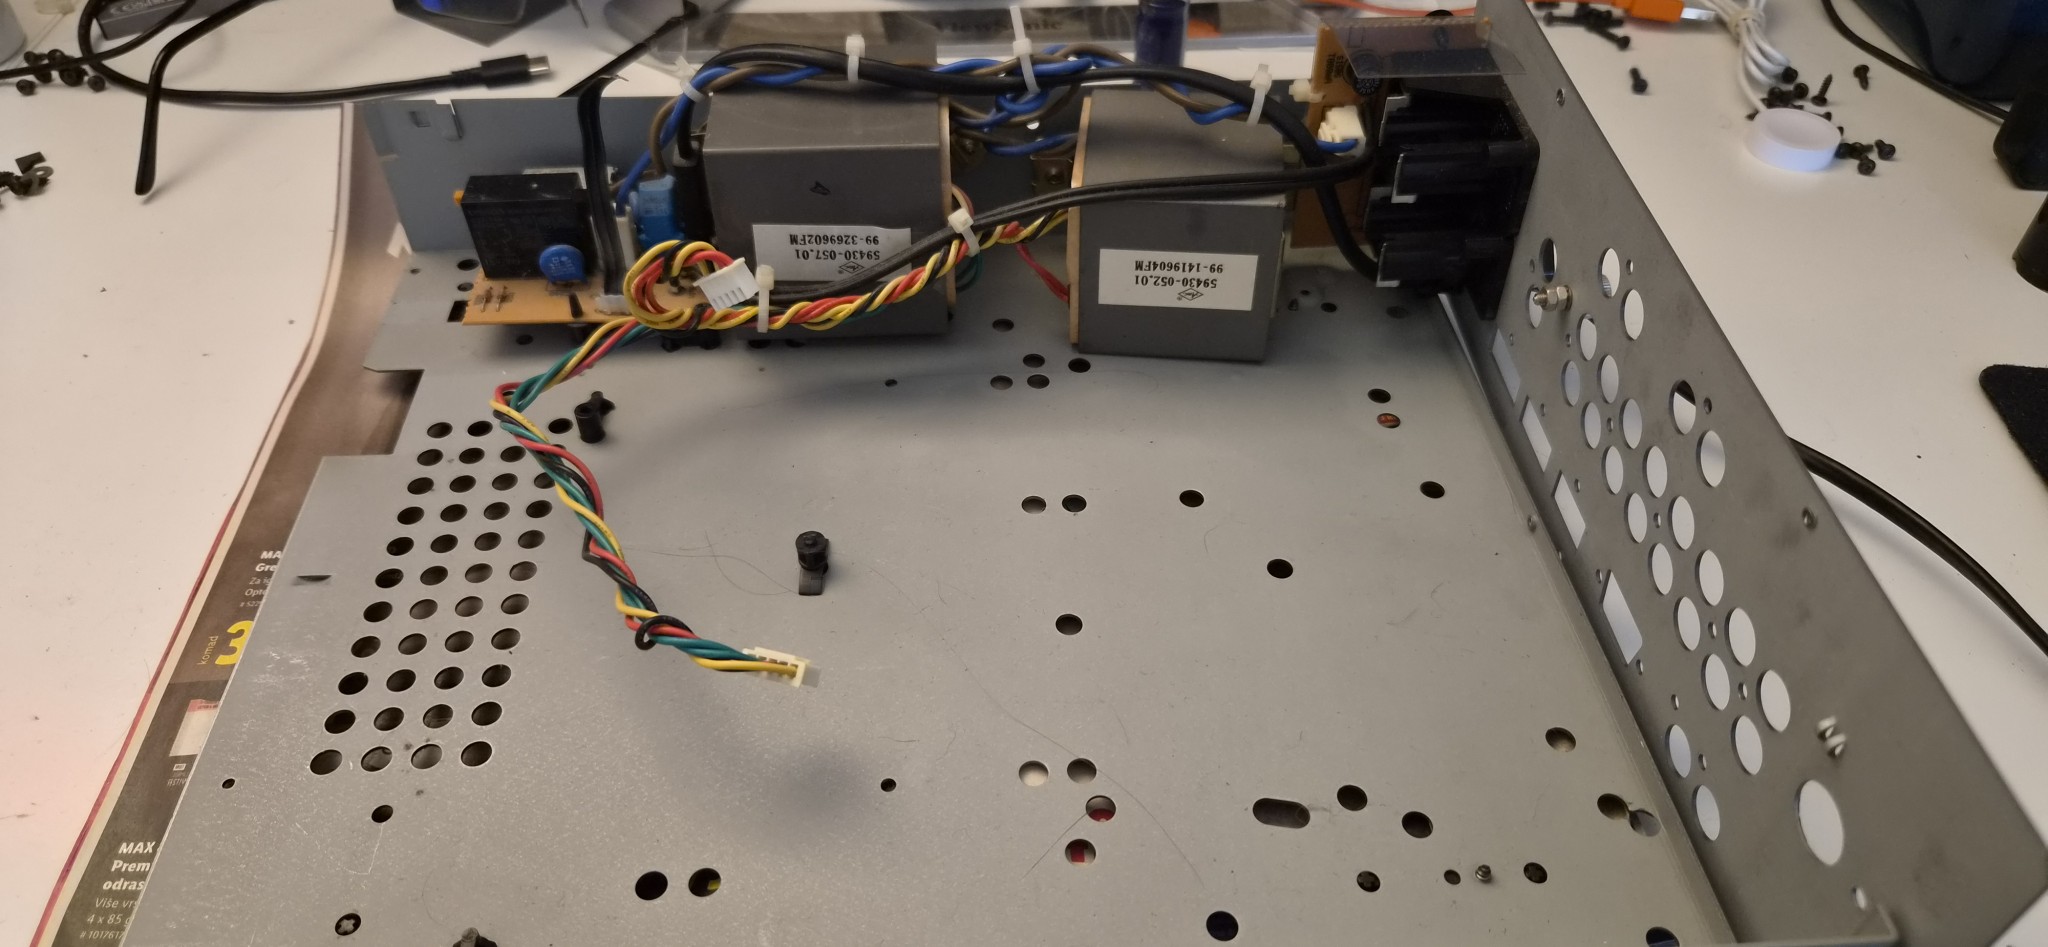
Now that the pre-receiver was working again, I dismantled it completely and washed the chassis:
Next I assembled a battery pack using three AAA cells and connected it to the supply.
The system came back to life without the batteries heating up during charging.
Battery life away from the cradle is no more than around 50 minutes, but at least everything now works correctly and is usable.
Because I had removed those plastic retainers from the battery cover, I added a small piece of foam to prevent the batteries from rattling when turning the remote over in my hands.
Unfortunately, changing the number of cells meant there was no longer room for the battery holder. I therefore had to discard it and connect the batteries directly to the wires.
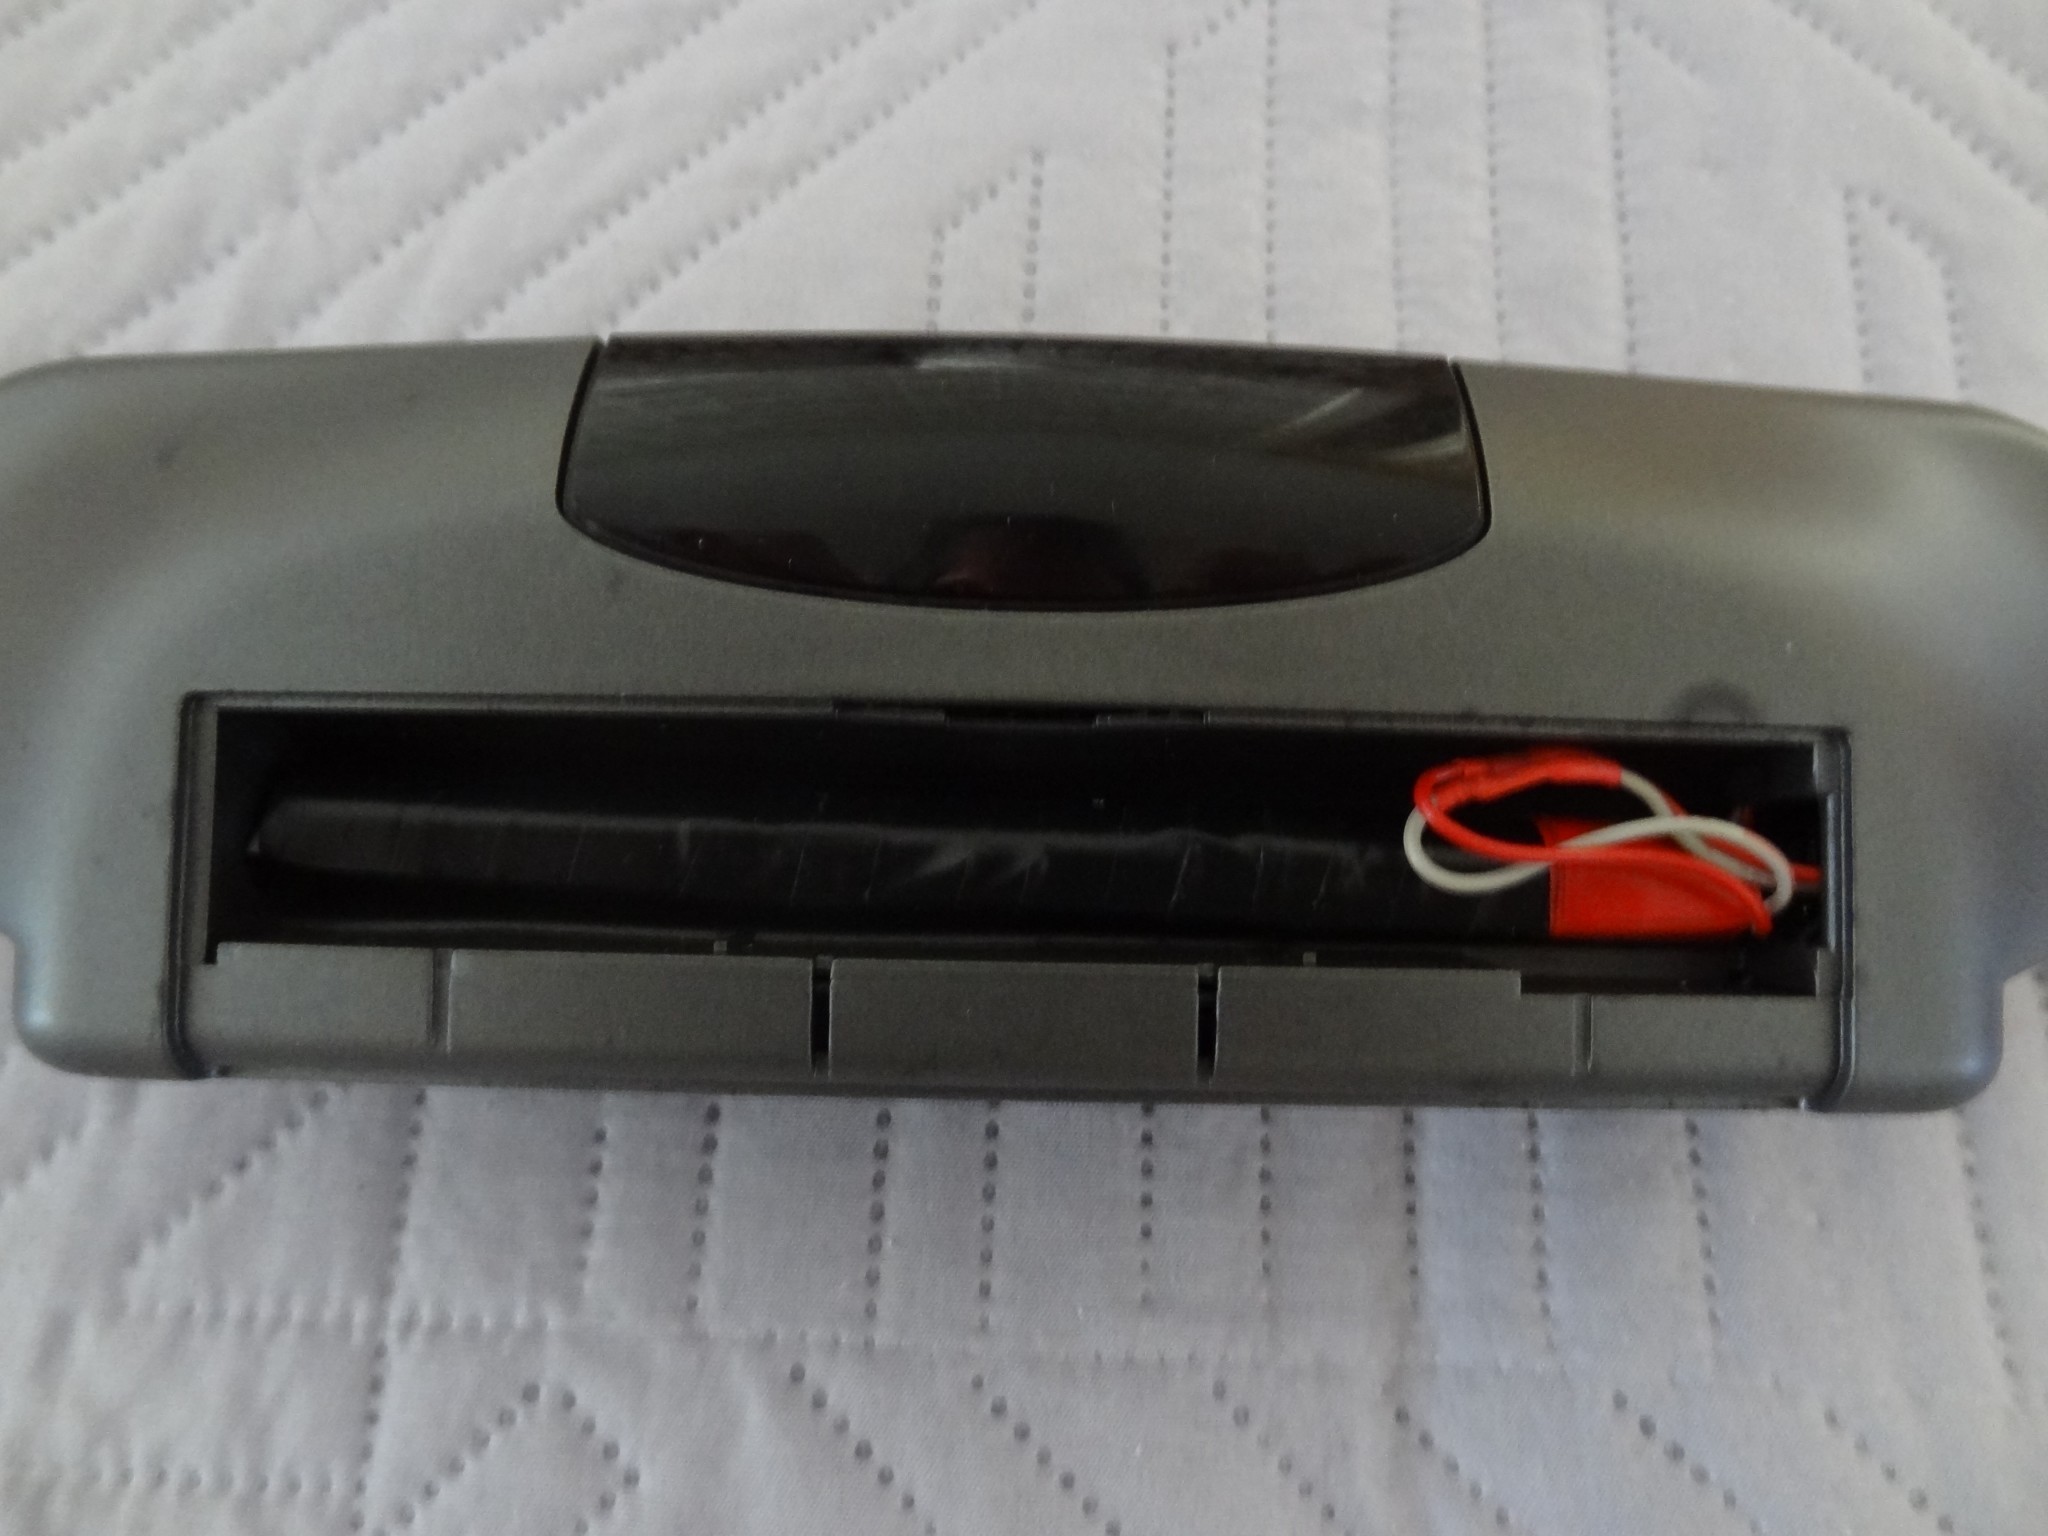
Finally, after a little over two weekends of work, it was time to hear what this Dual beauty actually sounded like.
Sound
I’ll begin with what I didn’t like: the headphone amplifier. Although it appears to be a conventional design based around a standard 4556 operational amplifier, it sounded poor. The tonal balance was shifted towards the midrange and treble, the presentation sounded compressed and bass was weak. I didn’t have time to experiment with replacing the electrolytic capacitors or op-amp. The problem may well have been caused by some ageing component, so the poor sound does not necessarily mean that the basic design itself was bad. Still, in its present state, it sounded poor.
I hoped I wouldn’t get the same result from the preamplifier’s line outputs and therefore through the power amplifier and loudspeakers.
And… I didn’t. In fact, I was surprised by just how good this system sounded.
I first tried it using conventional commercial interconnects, then switched to FTA and WAY Cables, driving my trusty Elac FS210 Anniversary loudspeakers.
For sources I used the built-in tuner, which naturally had sounded poor through the headphone output, followed by the Dual CD player from the system itself and finally a Sony HAP-Z1ES audio server.
In every case, the results were consistent.
The better cables produced a somewhat more spacious presentation and a little more detail, but nothing earth-shattering compared with the standard cables, which performed unexpectedly well. The CD player and Sony HDD server produced broadly similar results. The Sony is better in every respect, but it is genuinely surprising how well this little CD changer holds its own. Even the tuner was quite good and perfectly respectable for casual listening.
Moving on to the cassette deck, I expected competent mini-system sound. What I got was considerably better. Recordings are exceptionally clean, with good detail and dynamics. Played back on another deck I used for comparison, a TEAC V-7010, the recording sounded considerably better than recordings from some overhyped decks from the 1980s, for example. In fact, the recording sounded better on the TEAC than it did on the MN 8010 deck itself.
That tells me the MN 8010’s recording section is excellent.
But let’s return to the pre-receiver and power-amplifier combination itself. How the MN 8010 actually sounds like?
The first surprise is the bass.
It simply isn’t the kind of bass you’d expect from a mini system. It’s powerful, soft and full-bodied, giving the impression that the power amplifier could drive even some fairly insensitive loudspeakers without much difficulty. So the MN 8010’s bass is pleasant and dynamic. It perhaps isn’t exceptionally detailed and doesn’t reach right down into the lowest octave, but it is far, far better than I ever expected from this system.
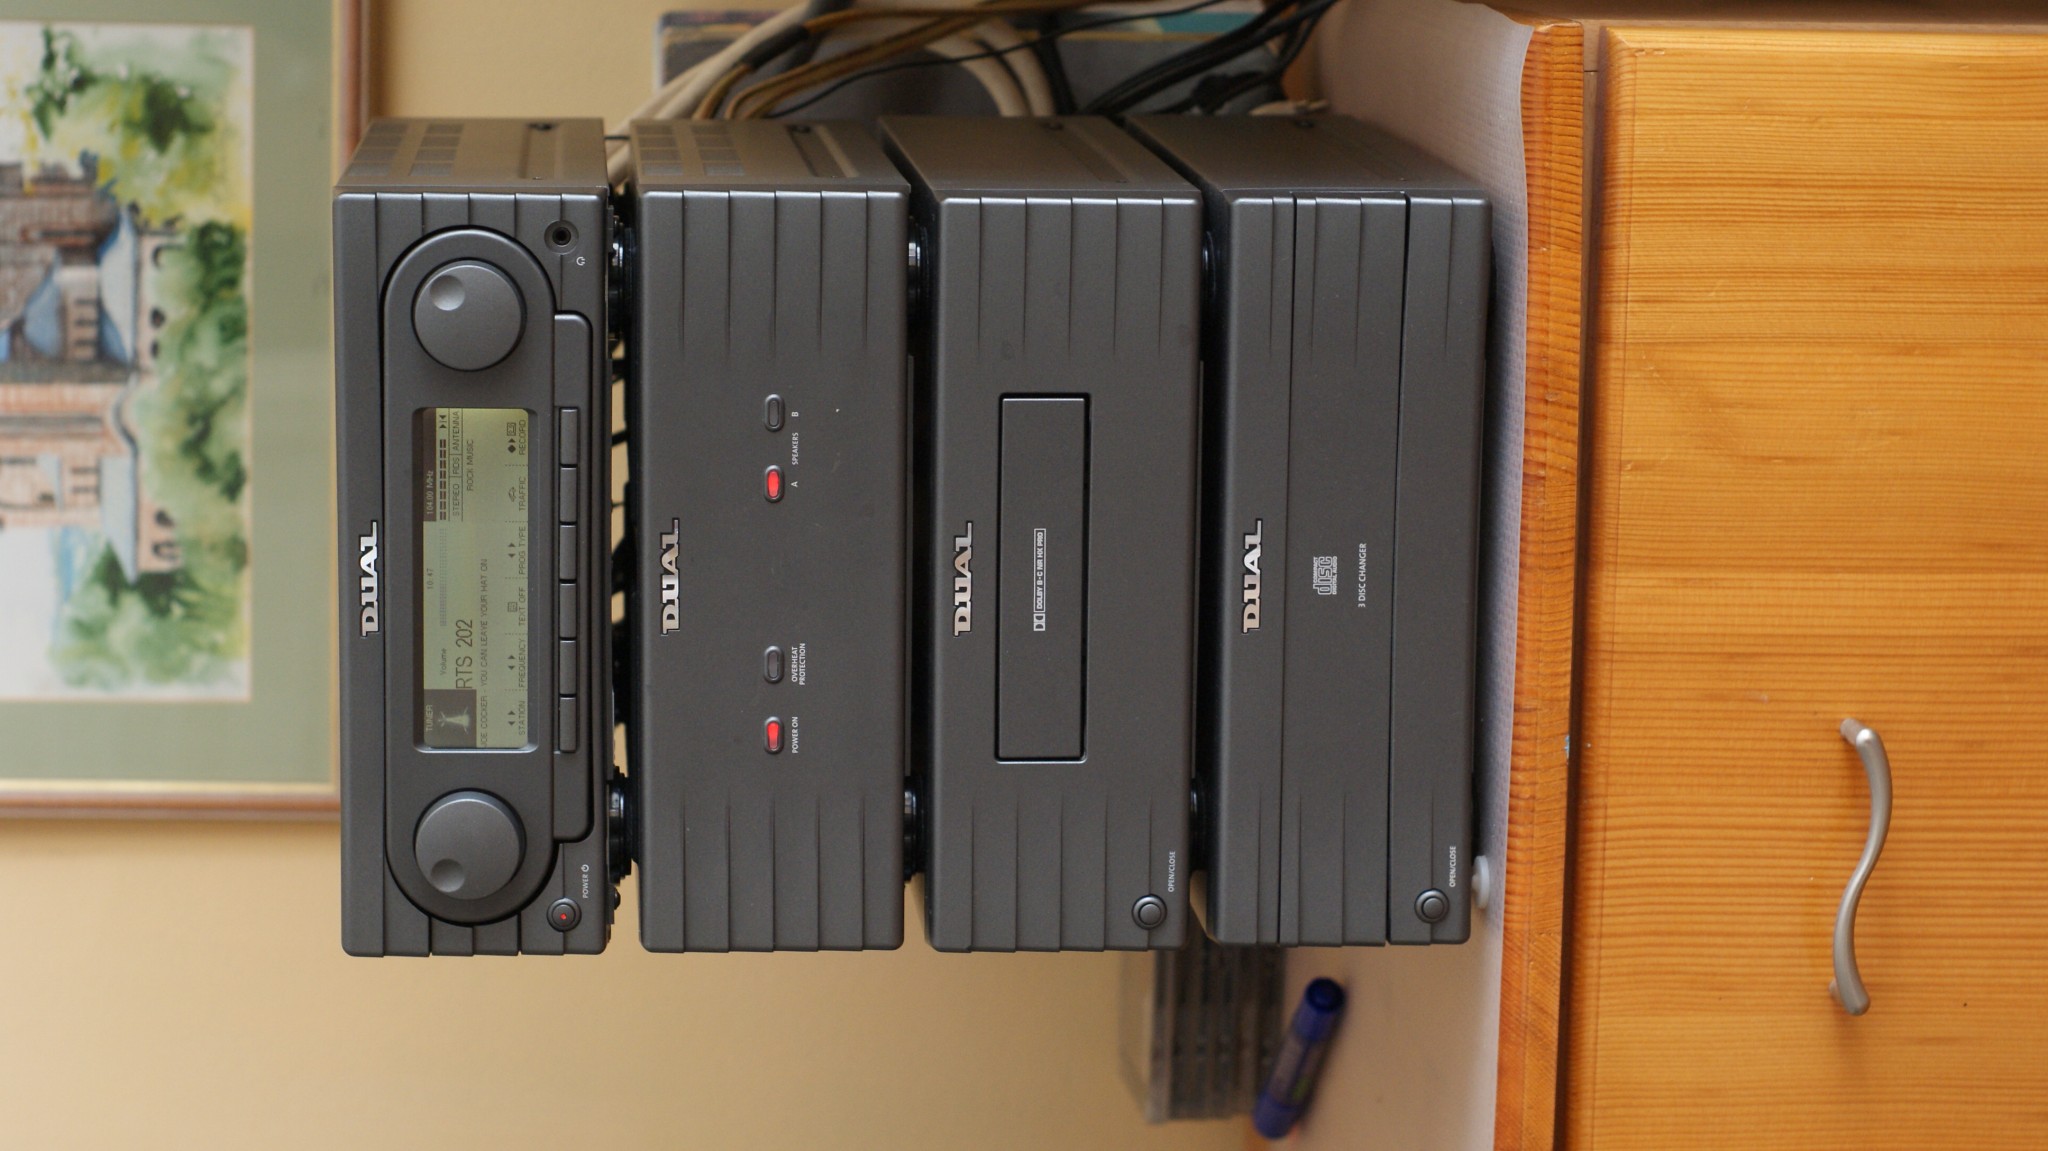
The midrange and treble are equally well balanced. There are no obvious dips, tonal holes or inconsistencies. Everything is restrained, smooth, detailed and remarkably lively, or, in other words, dynamic. The overall musical experience leaves a very clear impression that the MN 8010 is a highly musical and rhythmic machine, with a clean and lucid presentation and no obvious veiling or artificial tricks designed to suggest capabilities it doesn’t really possess.
The result is far, far better than I expected.
This isn’t high-end audio, of course, but it is very good Hi-Fi, genuinely comparable to full-size separate components. And that’s quite a compliment when you consider how difficult it is to achieve this level of sound quality in a small, commercially mass-produced audio format.
I didn’t test the phono preamplifier because I simply didn’t have enough time to play with it.
What interested me more was how the Dual MN 8010 would sound through its own loudspeakers.
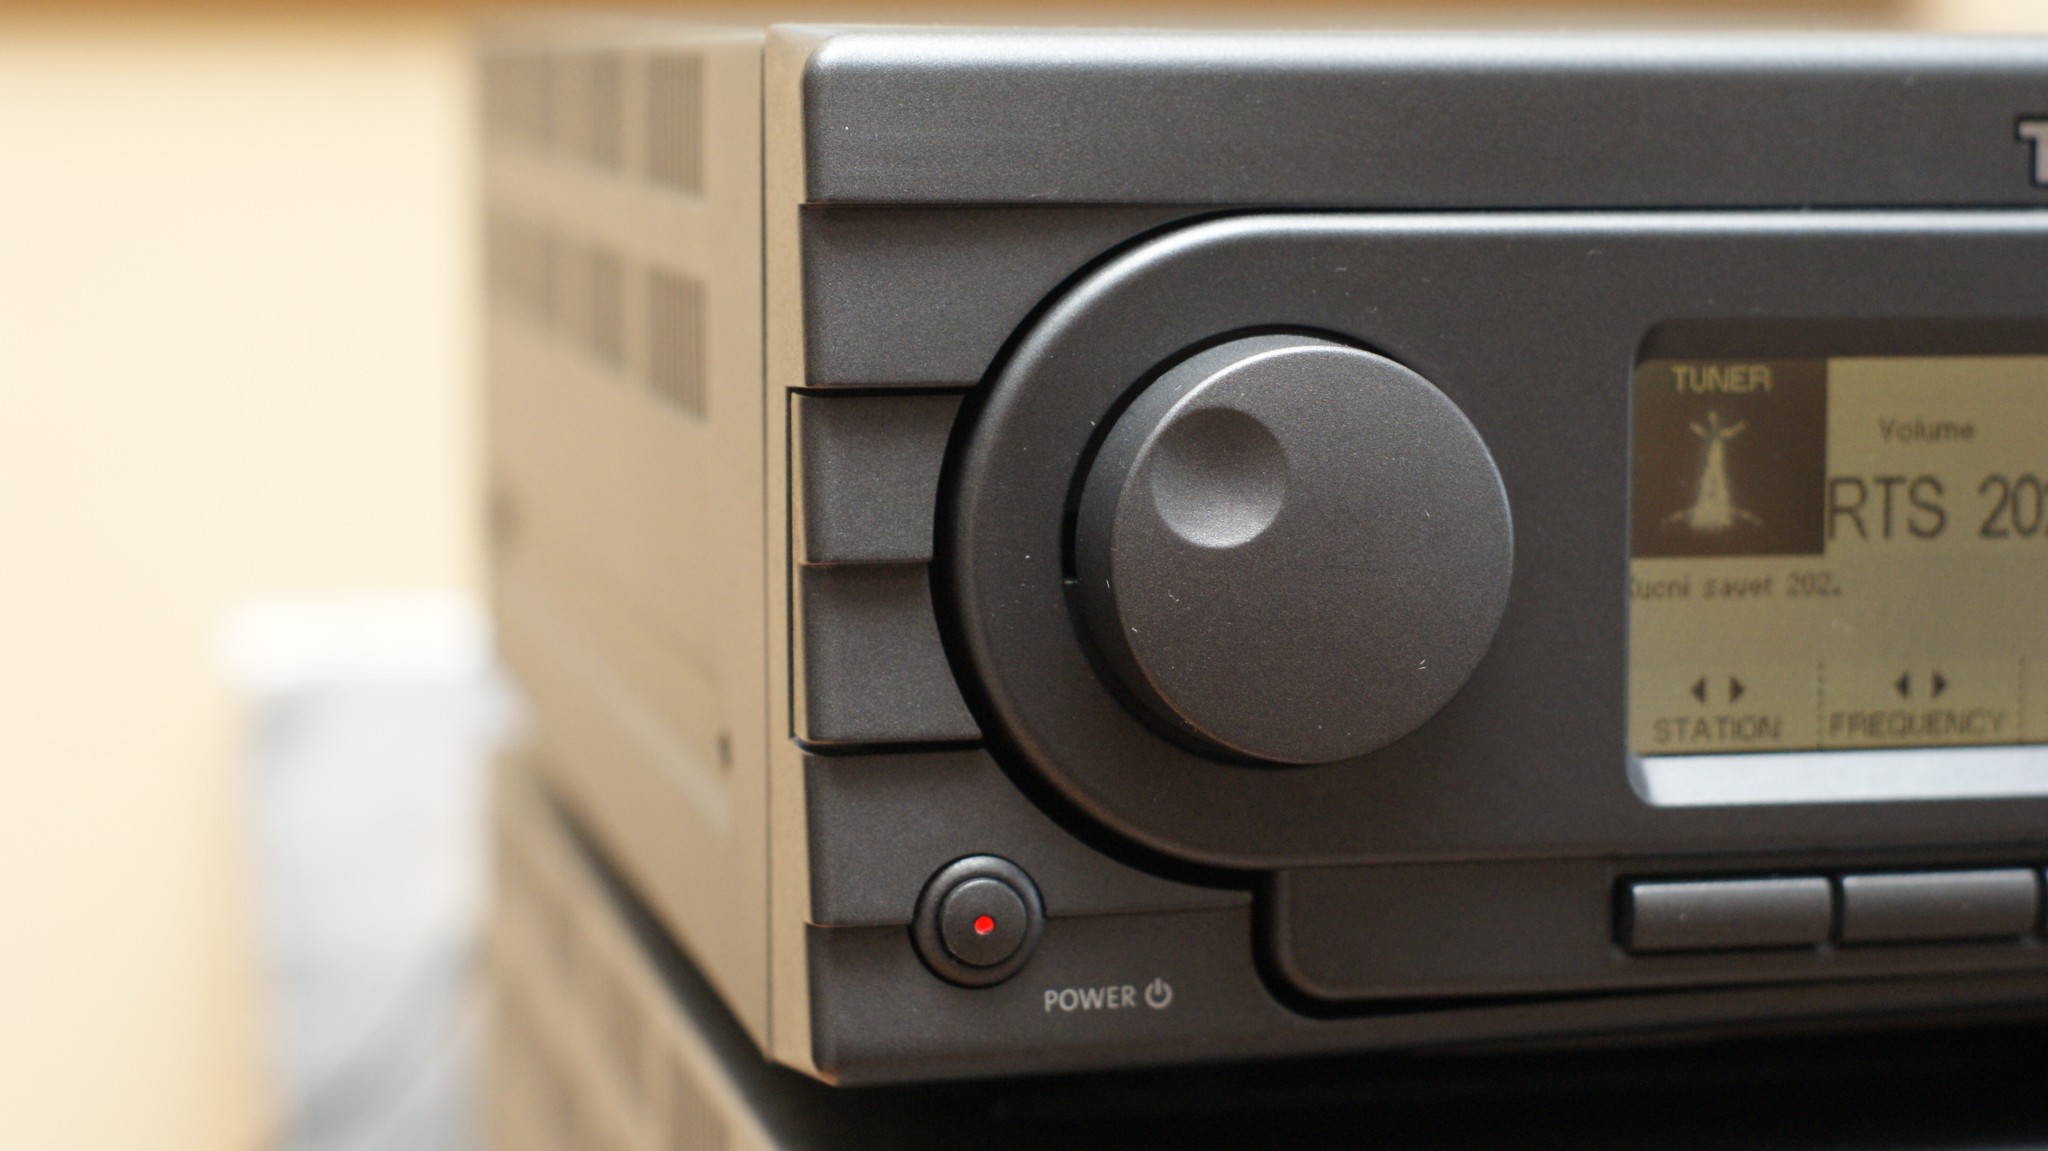
DUAL MN 8010 SP loudspeakers – Description
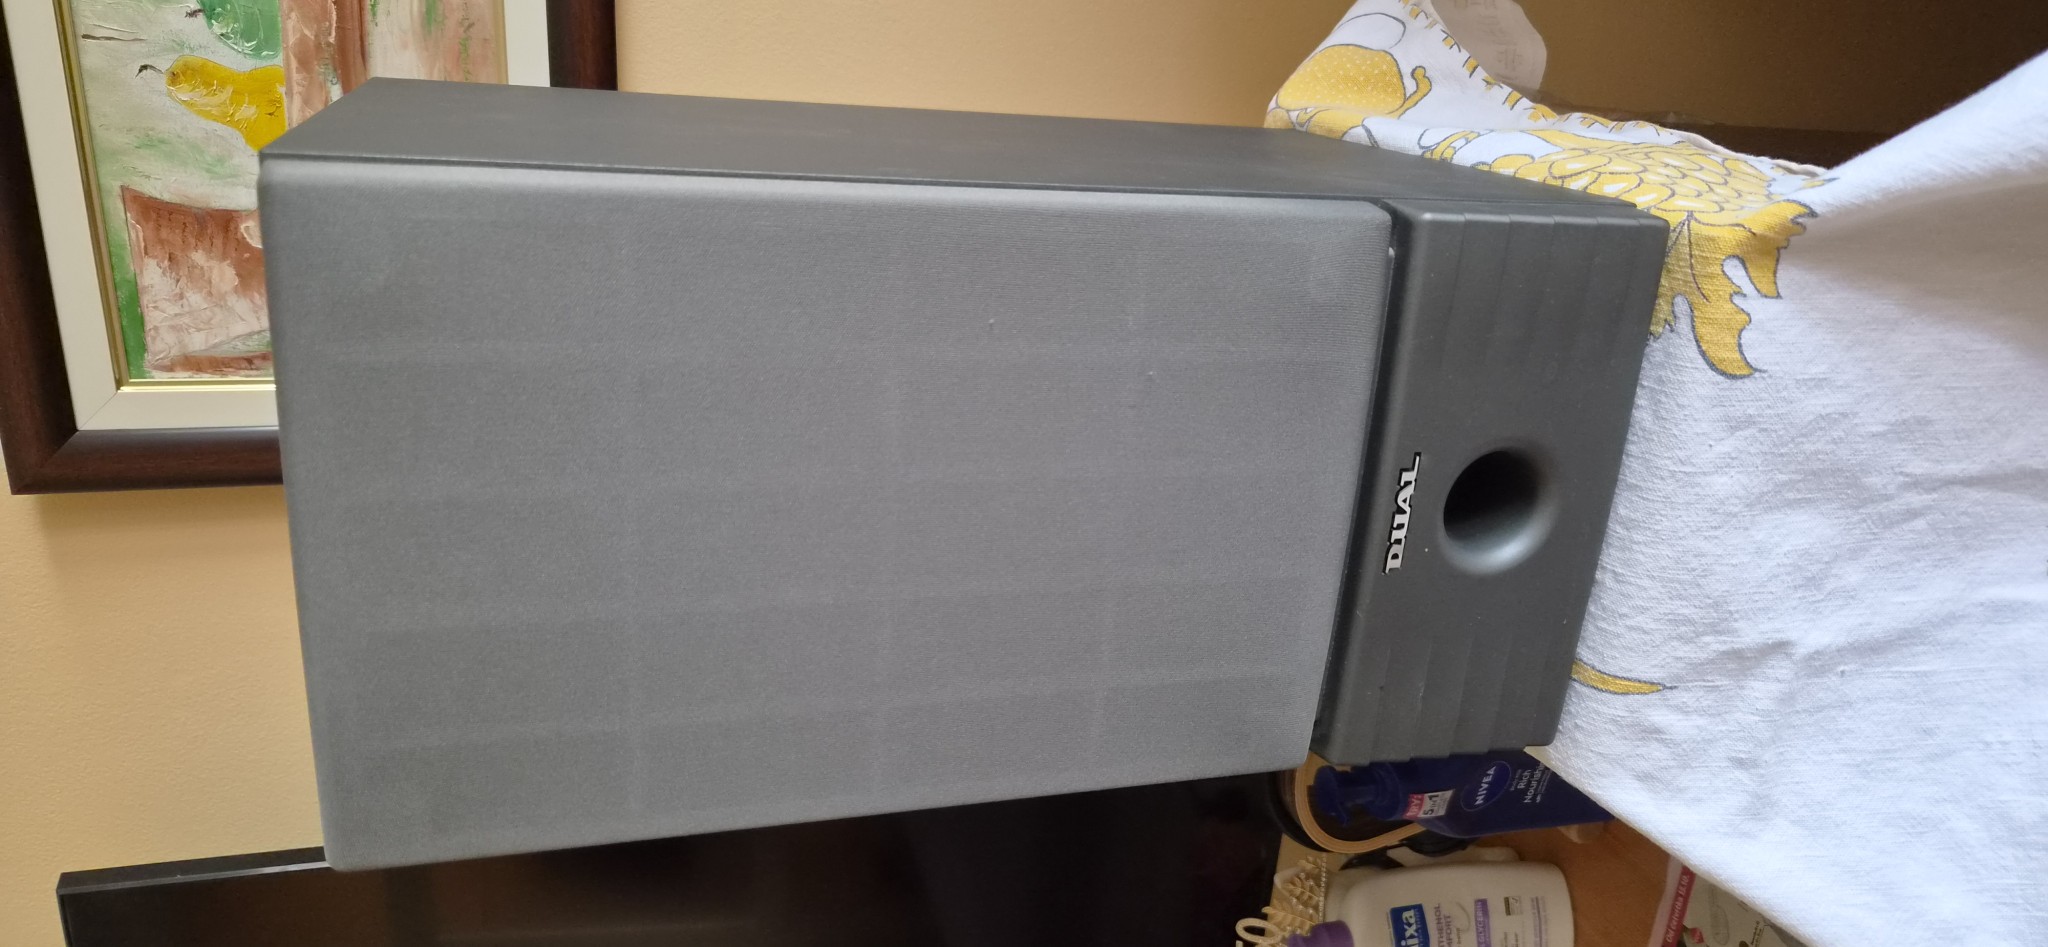
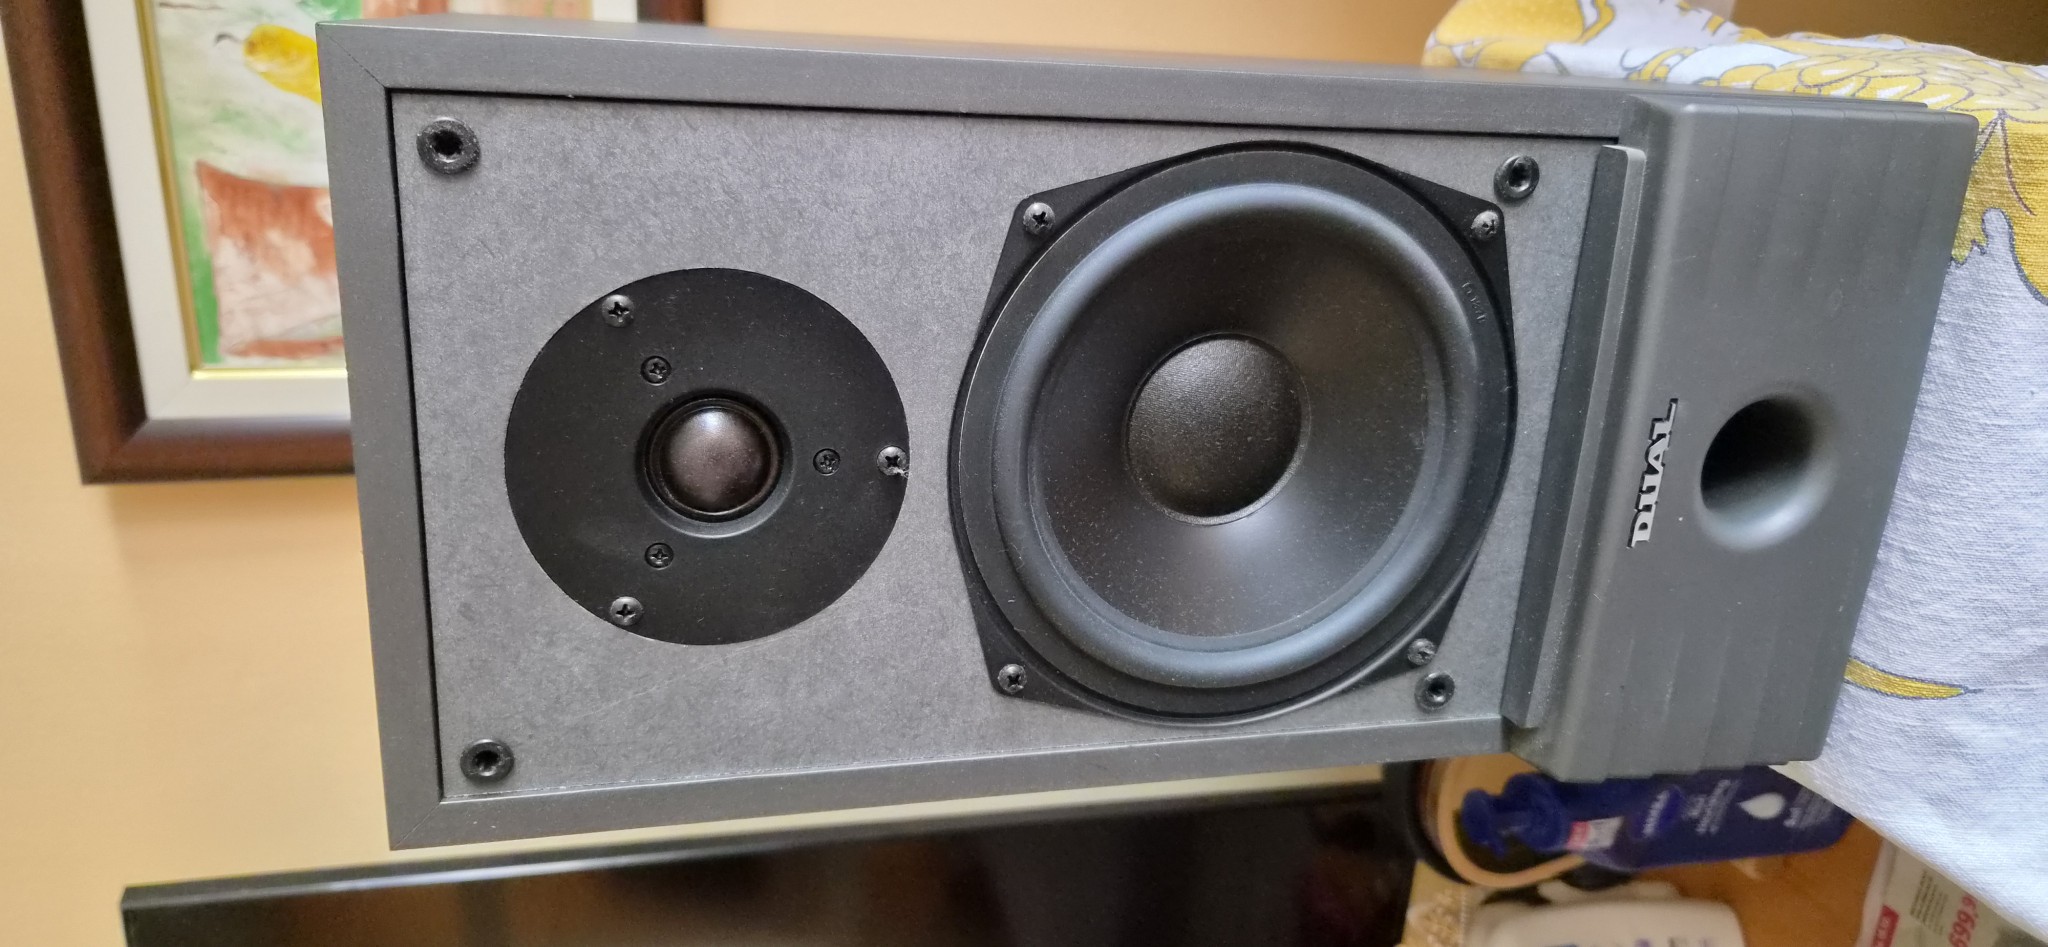
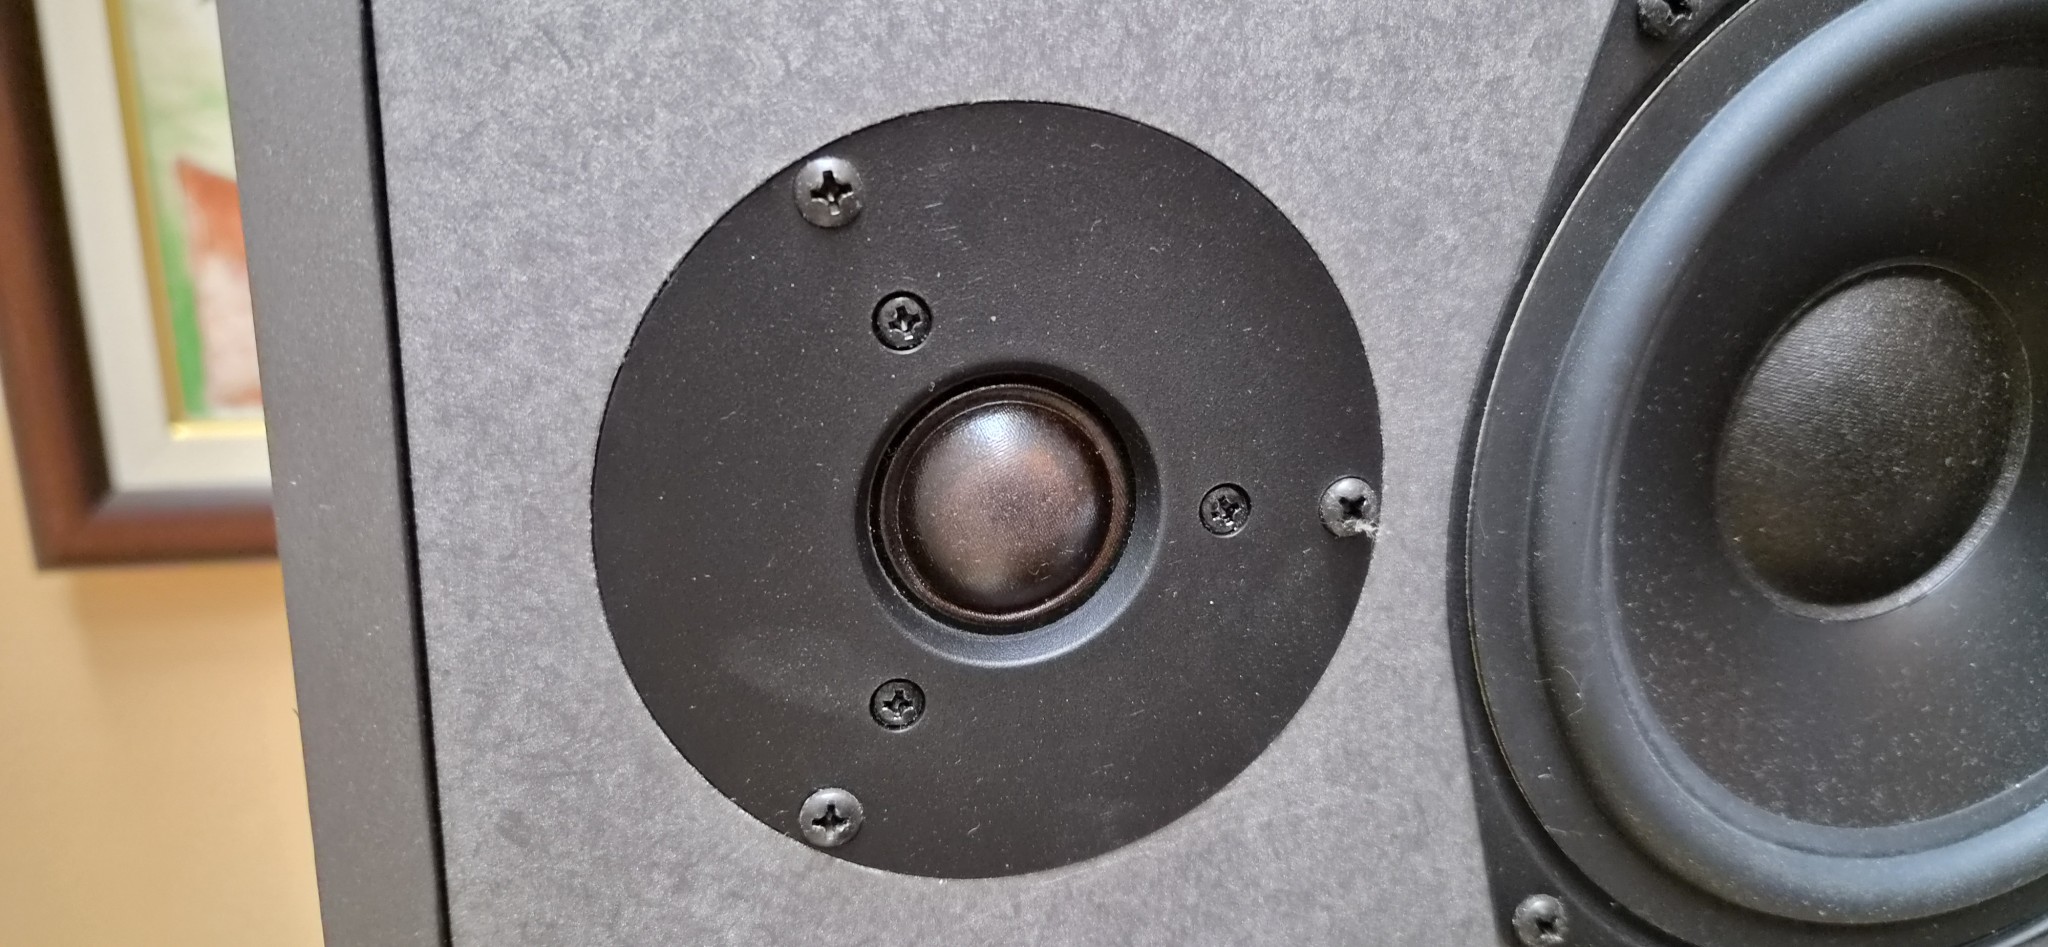
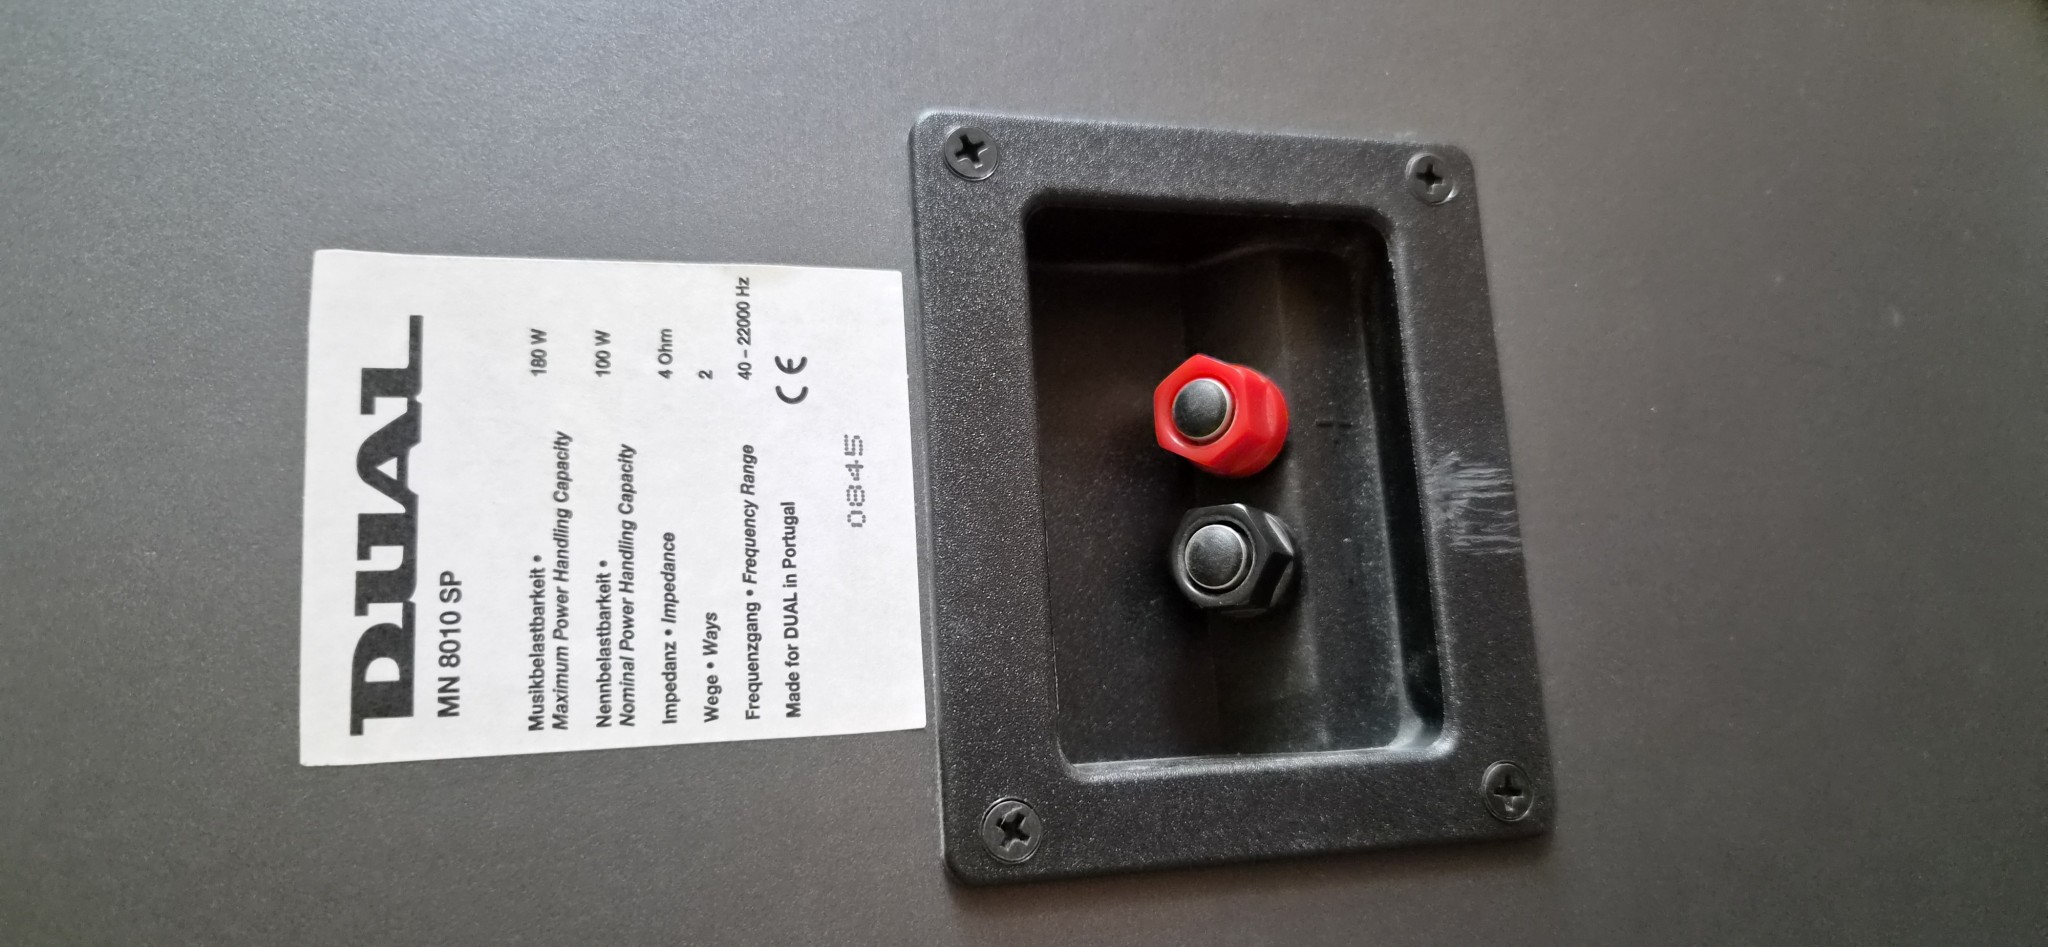
I’m fairly certain that these speakers, like much of the MN 8010 itself, were manufactured by Grundig. They share the same Portuguese origin.
I didn’t remove the actual drive units to check who manufactured them. They are two-way bass-reflex loudspeakers, rated at 100 W nominal power and 4 ohms impedance. The specified frequency range is 40 to 22,000 Hz, and they were manufactured in Portugal, presumably at Grundig’s factory. The bass/midrange driver is six inches in diameter, with a rubber surround, while the dome tweeter measures one inch, or 2.54 cm. The bass-reflex port is on the front.
Stylistically, the speakers fit the visual language of the rest of the system, although they are less extravagant and, at least to my eyes, not particularly attractive. The grilles cover most of the cabinet, while the protruding lower section containing the bass-reflex port sits flush with the grille.
The front-facing port also suggests that the speakers can be placed relatively close to the rear wall, which can sometimes be very useful.
Dual MN8010 – Using Dual own speakers
Sonically, these speakers match the rest of the system reasonably well.
However, for a clearly better result I would recommend a decent pair of floorstanding speakers, or good bookshelf/standmount models if floorstanders aren’t practical. The original Dual speakers produce plenty of strong bass, although it doesn’t extend particularly deep.
Their positive qualities include a warm tonal balance and unexpectedly gentle detail at the upper end. Although every meaningful performance parameter places them clearly below my Elac FS210 Anniversary, which is exactly what you’d expect, they still have genuine virtues.
They aren’t muddy, they don’t sound as though the music is coming from inside a cave.
MN 8010 speakers make an honest attempt at reproducing music properly, and for the most part they succeed. The overall presentation is fairly clean and detailed, especially through the midrange and treble, although soundstage width is essentially confined to the space between the loudspeakers. Right in the sweet spot they can occasionally sound somewhat boxy, while from certain positions outside the sweet spot they can sound pretty miserable.
Personally, I think the inexpensive Wharfedale D310 is a better solution. The Dual speakers may emphasise bass somewhat more strongly, but the D310 is the better-sounding loudspeaker overall.
Perhaps I’m being too hard on these speakers. They aren’t bad at all, and we should remember that they were included within that total DEM 2,300 system price. You can’t reasonably expect miracles. More importantly, Dual doesn’t appear to have cut corners here either, just as it didn’t with the rest of the system. The speakers fulfil their intended role perfectly respectably.
The point is simply that the rest of the MN 8010 is capable of considerably more. And that’s something worth exploiting.
Conclusion
Today, Dual MN 8010 systems occasionally appear in classified advertisements, but hardly anybody seems to want them. What once looked timeless and futuristic can, decades later, appear primitive, crude or ugly.
That’s why amplifiers with two or three knobs will always sell. Just like black patent-leather shoes.
But the Dual MN 8010 doesn’t deserve that fate. Quite the opposite.
Far ahead of its time, it represents the audacity and courage of designers, engineers and management willing to make a decision and follow it through to the very end, venturing somewhere nobody had gone before and where, for years afterwards, almost nobody else would go.
I would genuinely love to hear the inside story of how this system came into existence: what the original idea was, who drove the project and how everything was ultimately brought together.
Dual never attempted anything remotely similar again.
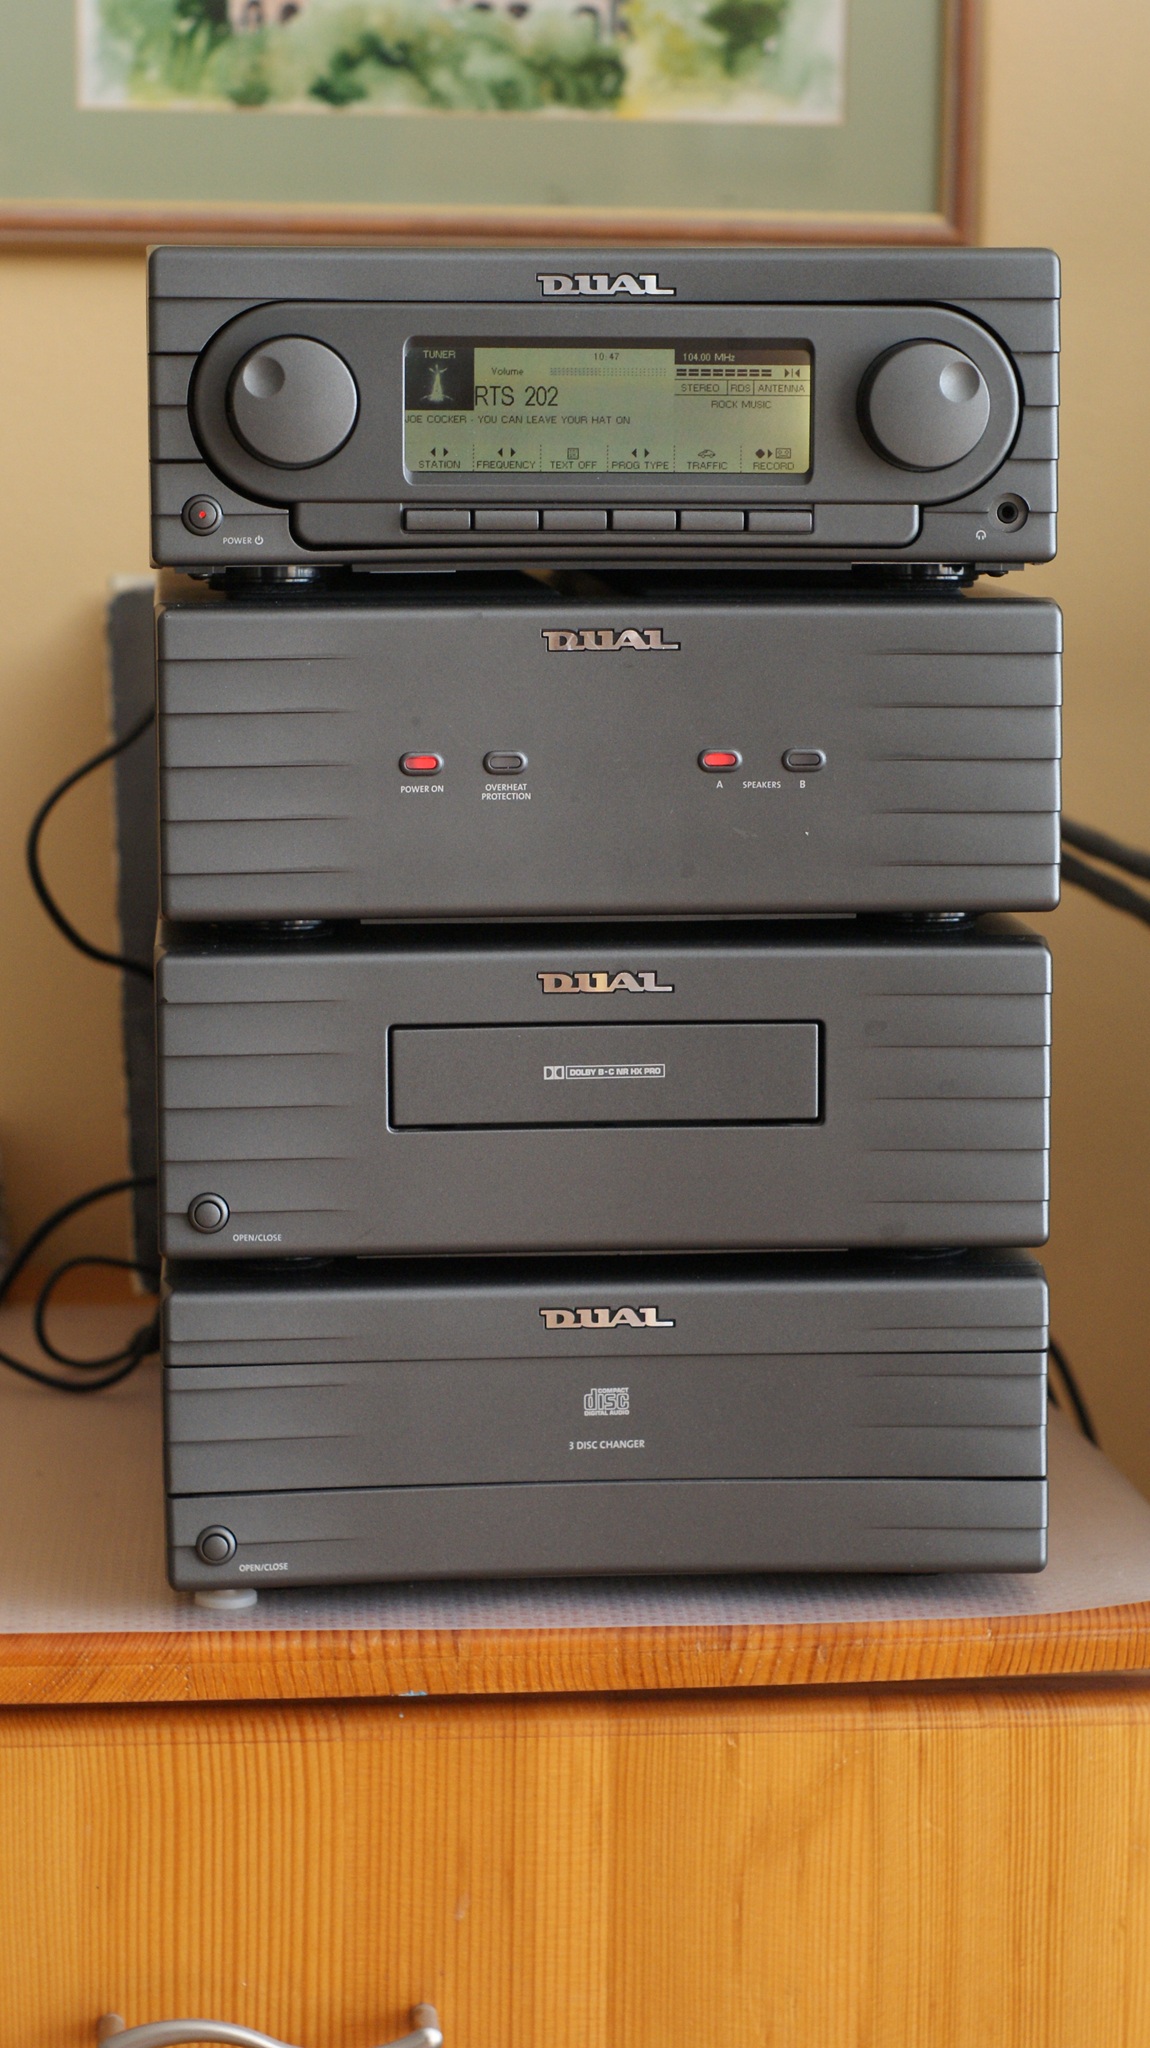
Compare the MN 8010 with the finest mini systems of its period, such as the TEAC Reference 500 or Onkyo Liverpool series, and from an engineering standpoint the Dual is certainly no worse. If anything, quite the opposite. At no point do you get the impression that all the money was spent on the futuristic control system while everything underneath was engineered to mediocrity, with cost-cutting as the primary objective.
On the contrary. The MN 8010 is an excellent mini system with an extravagant extra that you were effectively getting for next to nothing.
If you acquire an MN 8010, consider pairing it with a decent set of used loudspeakers that originally sold for perhaps EUR 700–2,000. The Dual will fit into such a system very nicely.
Add a proper streamer, or a streamer/PC and DAC combination, and you can enjoy genuinely good Hi-Fi sound.
Trust me.
You may even find yourself wondering what today’s systems really offer that is dramatically better for their insanely higher prices.
What else can I say?
Hats off to Dual.
For a long time I wondered whether I should buy an MN 8010. Now that I finally did, I can honestly say that this extraordinary machine entertained me and, in its own peculiar way, made my life a little better.
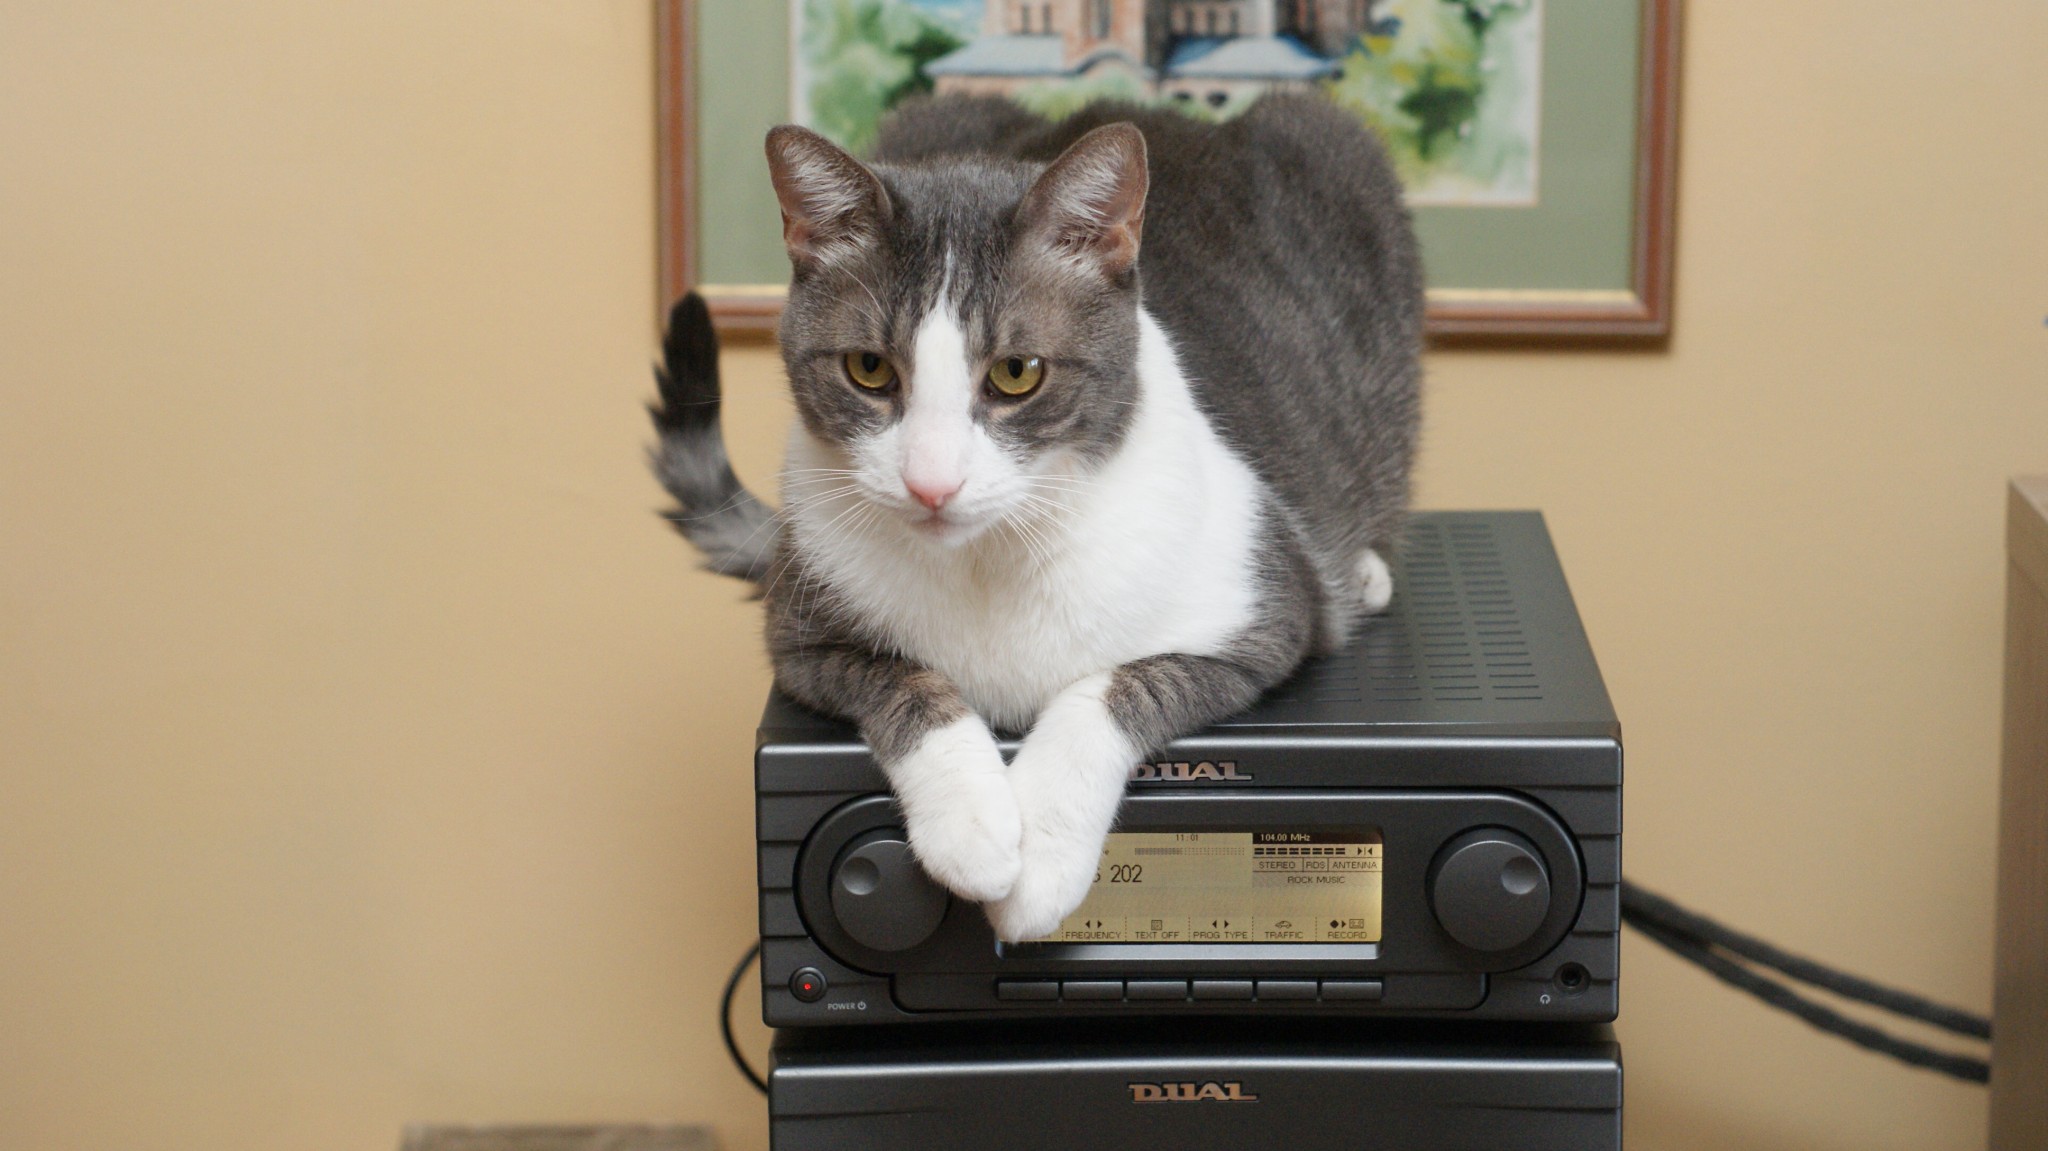
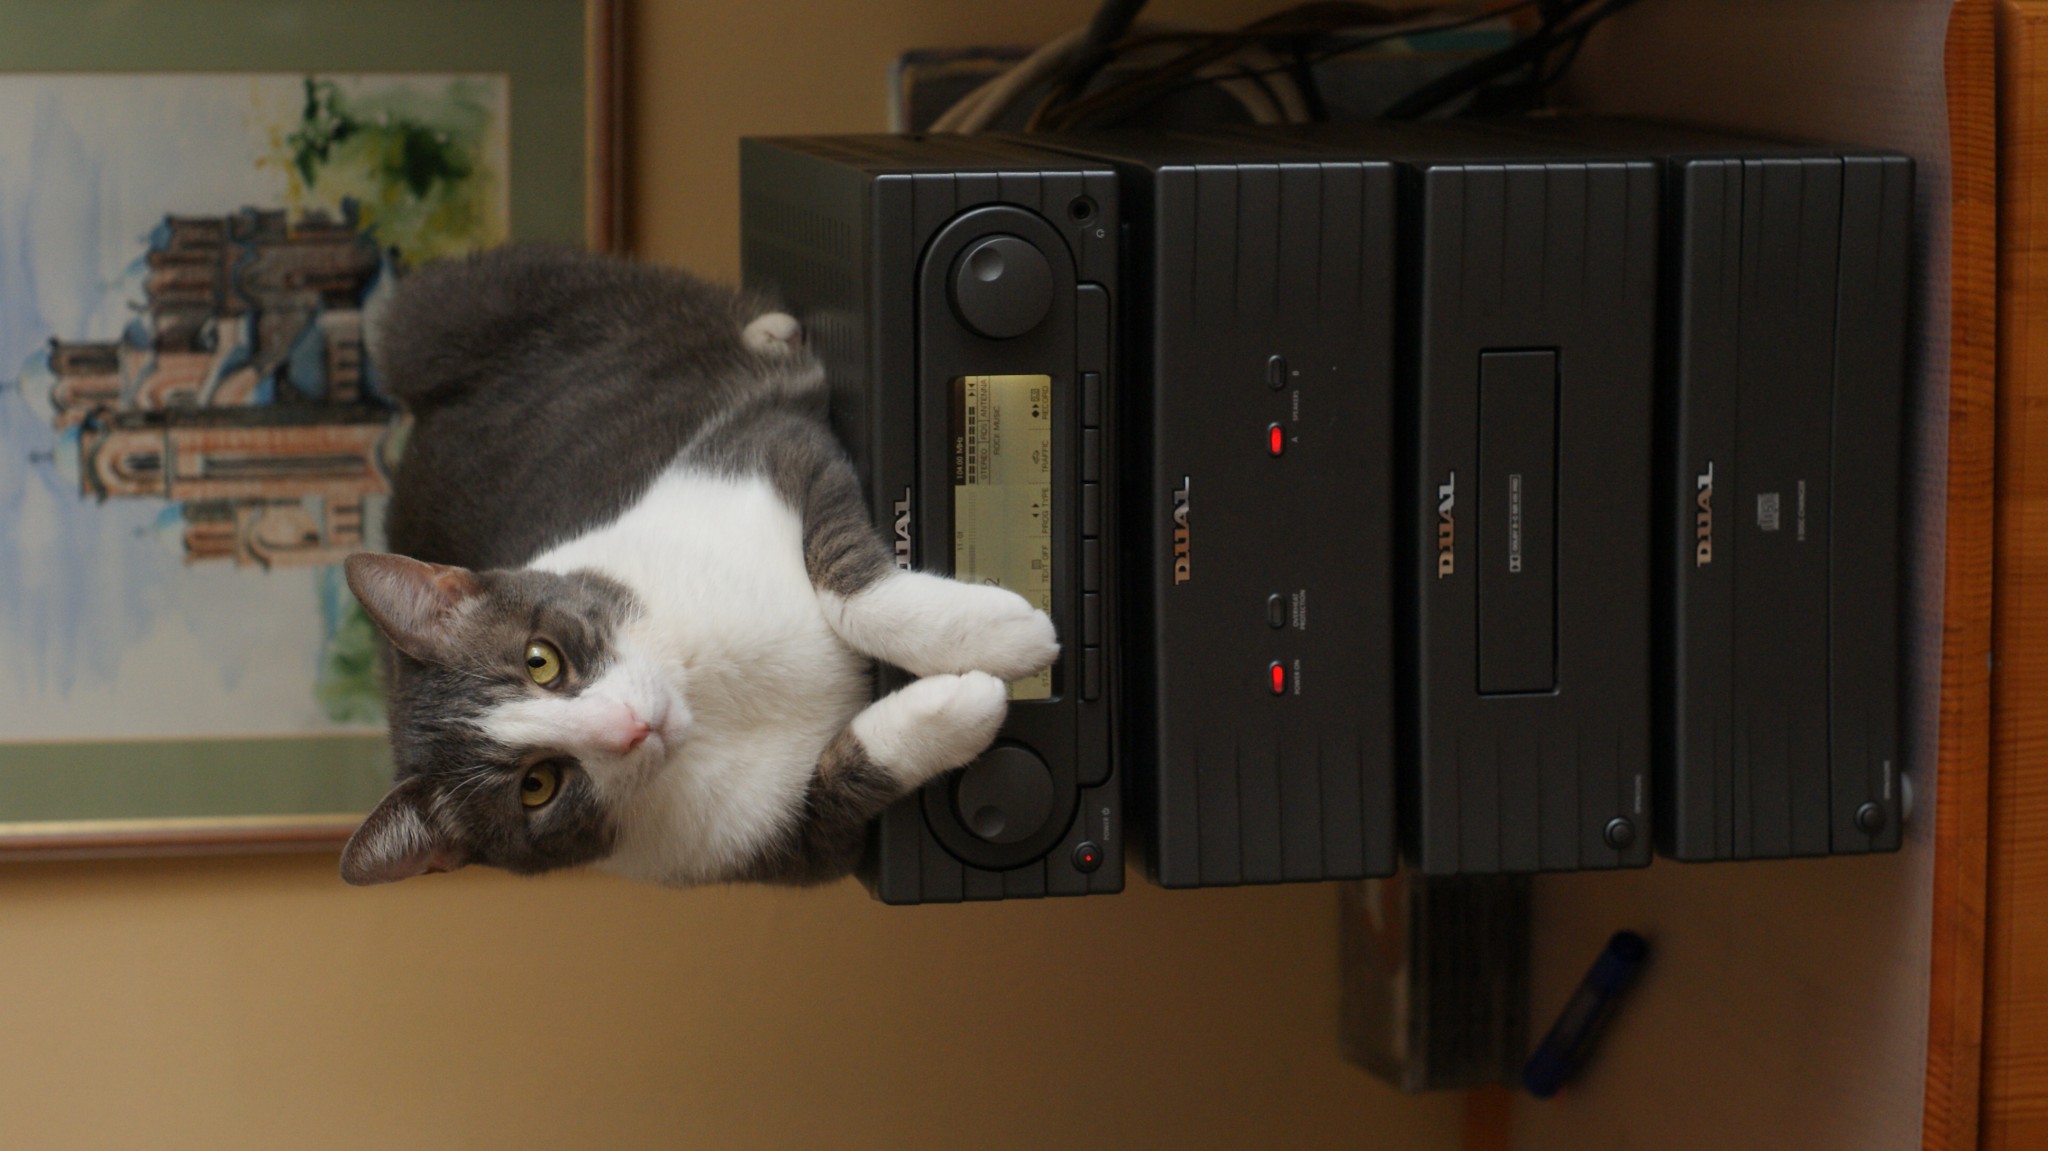
And when, after several weeks, I finally took the MN 8010 apart, I think the member of our household who suffered the most was our cat.
He absolutely loved lying on top of it and keeping himself warm…